
Engineering a Mini Electric Vehicle
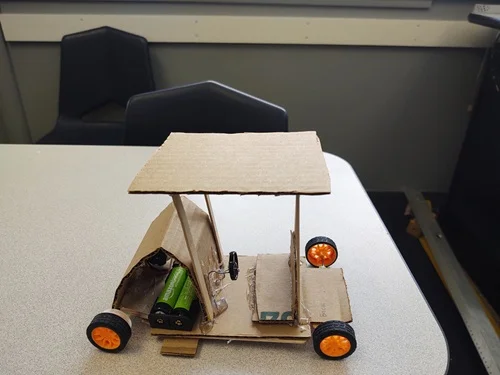 An example of a student-designed mini EV made with low-tech materials.Copyright Andy Mundell, Purdue Polytechnic High School
Student teams design, build, and test mini electric vehicles (EVs) using provided components and material options. As they assemble their EVs, students explore how components such as the motor, battery, drivetrain, axles, and wheels work together to make the vehicle move. Following the engineering design process, teams make design decisions based on established criteria and constraints, test their vehicles, evaluate their performance, and iterate to improve their designs. While the activity provides a basic structure for building the EV, it can be adapted into a more open-ended design challenge with additional time and materials. Teams can also put their designs to the test through model EV races, load-carrying challenges, or aesthetic design competitions.
EVs combine concepts from multiple engineering disciplines, including electrical and mechanical engineering, to inform the design, development, and advancement of transportation technologies. Automotive engineers work alongside engineers from these disciplines to design and integrate vehicle systems such as electric motors, batteries, drivetrains, wheels, and controls. They build and test prototypes, analyze vehicle performance, and use testing results to identify opportunities for improvement. This engineering design challenge models how engineers collaborate to design, build, test, and iterate automobile designs to meet performance goals and other design requirements.
After this activity, students should be able to:
- Identify fundamental EV components and their functions (motor, battery, wheels, drive train, and chassis).
- Use the engineering design process and creativity to design and build a working model.
- Recognize that multiple designs can solve the same engineering problem (variations and similarities in students’ final mini EV designs).
- Demonstrate perseverance and confidence through hands-on engineering success.
- STEL-1J Develop innovative products and systems that solve problems and extend capabilities based on individual or collective needs and wants.
Grades 6-8
Do you agree with this alignment? - STEL-7Q Apply the technology and engineering design process.
Grades 6-8
Do you agree with this alignment? - STEL-7T Assess design quality based upon established principles and elements of design.
Grades 6-8
Do you agree with this alignment?
- MS-ETS1-1 Define the criteria and constraints of a design problem with sufficient precision to ensure a successful solution, taking into account relevant scientific principles and potential impacts on people and the natural environment that may limit possible solutions.
Grades 6-8
This resource focuses on the following Three Dimensional Learning aspects of NGSS:
Science & Engineering Practices- Define a design problem that can be solved through the development of an object, tool, process or system and includes multiple criteria and constraints, including scientific knowledge that may limit possible solutions.Do you agree with this alignment?
Disciplinary Core Ideas- The more precisely a design task's criteria and constraints can be defined, the more likely it is that the designed solution will be successful. Specification of constraints includes consideration of scientific principles and other relevant knowledge that is likely to limit possible solutions.Do you agree with this alignment?
Crosscutting Concepts- The uses of technologies and any limitations on their use are driven by individual or societal needs, desires, and values; by the findings of scientific research; and by differences in such factors as climate, natural resources, and economic conditions.Do you agree with this alignment?
- All human activity draws on natural resources and has both short and long-term consequences, positive as well as negative, for the health of people and the natural environment.Do you agree with this alignment?
Do you agree with this alignment? - Define a design problem that can be solved through the development of an object, tool, process or system and includes multiple criteria and constraints, including scientific knowledge that may limit possible solutions.
- MS-ETS1-2 Evaluate competing design solutions using a systematic process to determine how well they meet the criteria and constraints of the problem.
Grades 6-8
This resource focuses on the following Three Dimensional Learning aspects of NGSS:
Science & Engineering Practices- Evaluate competing design solutions based on jointly developed and agreed-upon design criteria.Do you agree with this alignment?
Disciplinary Core Ideas- There are systematic processes for evaluating solutions with respect to how well they meet the criteria and constraints of a problem.Do you agree with this alignment?
Do you agree with this alignment? - Evaluate competing design solutions based on jointly developed and agreed-upon design criteria.
- MS-ETS1-4 Develop a model to generate data for iterative testing and modification of a proposed object, tool, or process such that an optimal design can be achieved.
Grades 6-8
This resource focuses on the following Three Dimensional Learning aspects of NGSS:
Science & Engineering Practices- Develop a model to generate data to test ideas about designed systems, including those representing inputs and outputs.Do you agree with this alignment?
Disciplinary Core Ideas- Models of all kinds are important for testing solutions.Do you agree with this alignment?
- The iterative process of testing the most promising solutions and modifying what is proposed on the basis of the test results leads to greater refinement and ultimately to an optimal solution.Do you agree with this alignment?
Do you agree with this alignment? - Develop a model to generate data to test ideas about designed systems, including those representing inputs and outputs.
Each group selects materials of choice:
- Car body/chassis:
- cardboard pieces, popsicle sticks, or other sturdy lightweight materials
- tape or hot glue gun (to attach components)
- optional: markers, paint, etc. (to decorate)
- Wheels & axles:
- 4 wheels 1-2” in diameter (bottle caps, hobby wheels, 3D printed wheels, etc.)
- 2 axles (2 mm diameter wooden skewers, plastic or thin metal rods, etc., to attach pulleys and wheels)
- hollow tubing to place the axles through (straws, heat‑shrink tubing, taped loops, etc.) and attach to the chassis
- rubber bands (put around the circumference of the plastic cap wheels for traction)
- Motor:
- 1 mini DC motor (3 V, 2 mm diameter shaft recommended)
- 2 AA batteries
- 1 2 AA battery pack with wire leads and an on/off switch
- 2 connectors (alligator clips and ties to wrap up extra length or lever nuts)
- Drivetrain:
- 2 plastic pulleys (about 2 mm diameter to fit motor shaft and axles) and a rubber band to place in the pulley grooves (one placed on the motor shaft and the other placed on an axle) OR only a rubber band placed directly around an axle and the motor shaft
You are going to take on the role of automotive engineers. Automotive engineers design, build, test, and improve vehicles, and electric vehicles (EVs) are especially interesting because they bring together several areas of engineering. Mechanical components such as wheels and axles have to work with electrical components such as batteries and motors. If one part of the system does not work well, it can affect the performance of the entire vehicle.
Before we start building, think about an electric vehicle you have seen. It might be a full-size EV, an electric scooter, or even a small remote-controlled vehicle. What parts do you think an EV needs to move? (Allow students to share responses. Record key ideas on the board, such as battery, motor, wheels, axles, and drivetrain.)
Those components have to work together as a system. The battery stores energy, but somehow that energy has to result in the wheels turning. How do you think a motor and battery work together to make the wheels spin? (Allow students to share their ideas without correcting responses at this point. Use their responses to gauge prior understanding.)
Today, you’ll get to investigate that question by building your own mini EV. Your battery will provide electrical energy to a motor. The motor will create rotational motion, and your challenge will be to design a vehicle that successfully transfers that motion to the wheels and gets your EV moving.
But getting a vehicle to move is only part of the challenge. Engineers have to think about how all of their design decisions affect performance. What challenges do you think engineers might face when designing a small EV model? (Encourage responses such as keeping the wheels aligned, reducing friction, getting enough traction, keeping the vehicle lightweight, positioning the motor and battery, transferring motion from the motor to the axle, and keeping components securely attached.)
Those are exactly the kinds of problems you are going to investigate. Working in teams, you will use the engineering design process to design, build, and test a mini electric vehicle. You’ll make decisions about your vehicle's design, see how well it performs, and then use evidence from your testing to make improvements.
Your first EV does not have to be your best EV. Just like automotive engineers, you’ll design, build, test, evaluate, and improve your vehicle. The question isn’t simply “Can you make it move?” It’s “How can you use what you learn from each test to make your EV perform better?”
Background
Electric Vehicles (EVs). An EV uses electrical energy stored in a battery to power one or more electric motors that provide the mechanical motion needed to move the vehicle. Although a full-size EV contains sophisticated electronics, controls, battery-management systems, and other components, the model EV demonstrates the same basic relationship among an energy source, electric motor, drivetrain, axles, and wheels. Understanding this simplified system helps students investigate how individual components must work together for a vehicle to function.
Batteries, Circuits, and Energy Transformation. The battery provides the electrical energy needed to operate the model EV. When the battery, wires, and motor form a closed electrical circuit, electric current can flow through the motor. The motor converts electrical energy into mechanical energy, producing rotational motion at the motor shaft. That rotational motion is then transferred through the drivetrain to an axle and wheels, causing the vehicle to move. Some of the energy is also transformed into heat and sound because no system transfers energy with 100% efficiency.
Electric Motors. A DC electric motor converts electrical energy into rotational mechanical motion through the interaction of electric current and magnetic fields. Inside a simple brushed DC motor, permanent magnets create a magnetic field around an electromagnet on the rotating portion of the motor. When current flows through the motor's coils, magnetic forces produce torque that rotates the motor shaft. A commutator and brushes repeatedly change the direction of current through the rotating coils so that the shaft continues to rotate. For this activity, students do not need to understand every internal motor component, but teachers should understand that the motor is the component responsible for converting the battery's electrical energy into the rotational motion used to propel the EV.
Drivetrain and Motion Transfer. The drivetrain transfers mechanical motion from the motor to the vehicle's wheels. In this model, a rubber band acts as a belt connecting the motor shaft or motor pulley to a pulley on the axle. As the motor shaft rotates, the belt transfers that rotation to the axle, which turns the wheels. Belt tension is important: a belt that is too loose may slip, while one that is too tight can increase friction and make it difficult for the motor and axle to turn. Pulley sizes can also affect the relationship between rotational speed and torque.
Wheels, Axles, Friction, and Traction. The wheels and axles influence how efficiently the EV moves. Axles should be as straight and parallel as possible so that the wheels rotate freely. Poorly aligned axles or wheels rubbing against the chassis increase friction, which opposes motion and can slow or stop the vehicle. At the same time, some friction is necessary. Traction is the friction between the wheels and the driving surface that allows the wheels to push against the surface rather than simply spin. Adding rubber bands around smooth wheels can increase traction. Students may therefore discover that successful EV design involves managing friction rather than simply eliminating it.
Mass, Balance, and Vehicle Performance. The size, shape, mass, and arrangement of components can affect model EV performance. A heavier vehicle generally requires more force to accelerate, while unnecessary mass may reduce performance. Where students place the motor, battery, and other components can also affect the vehicle's balance and traction. A lightweight design is not automatically the best design; the chassis must also be sufficiently rigid to support the components and keep the wheels and axles properly aligned. These trade-offs provide opportunities for students to make and test engineering decisions.
Speed, Torque, and Design Trade-Offs. The distinction between speed and torque is important. Speed describes how quickly something rotates or how quickly the vehicle travels, while torque describes the turning effect of a force. Depending on the drivetrain configuration, engineers may trade rotational speed for greater torque or vice versa. This becomes particularly relevant if students compare EVs designed to travel quickly with EVs designed to carry additional weight. A design optimized for one performance goal may not be optimal for another.
Before the Activity
- Gather sufficient materials for student teams, as outlined in the Materials section.
- Make copies of the Engineering a Mini EV Worksheet (PDF), one per student.
- Review the engineering connections, learning objectives, and background knowledge sections to become familiar with the model EV concepts students will explore.
During the Activity
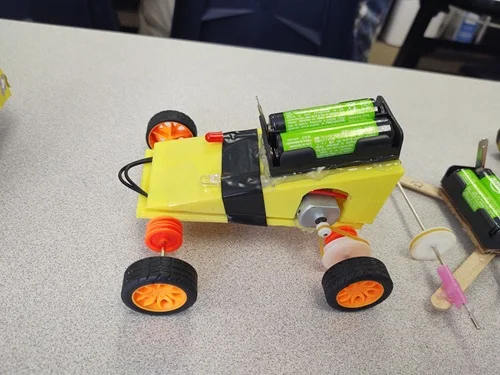 An example of a student-designed mini EV.Copyright Andy Mundell, Purdue Polytechnic High School
- Introduce the Design Challenge
- Divide students into small groups.
- Distribute one Engineering a Mini EV Worksheet (PDF) to each student.
- Present the design challenge: Student teams will design, build, test, and improve a model electric vehicle (EV) while exploring its components and how they work together.
- Establish the design criteria and constraints. (This is an open-ended design challenge for which instructors or students can select the criteria. For example, design a model EV that travels the fastest over a set distance or that can carry the most weight for a certain distance.)
- Explain that students will build and test their EVs and use their test results to improve their designs.
- (Optional) Research: Gather Information
- Review the major components of the model EV, including the chassis, wheels, axles, motor, battery pack, and drivetrain.
- Discuss how electrical energy from the battery is converted by the motor into mechanical energy that turns the wheels.
- Have students consider how factors such as vehicle mass, wheel size, axle alignment, traction, and drivetrain design could affect the EV's performance.
- Encourage students to use what they learned from previous investigations of motors, electromagnets, or electric circuits to inform their designs.
- Imagine: Brainstorm Possible Solutions
- Have each group brainstorm several possible EV designs before beginning construction.
- Encourage students to consider different chassis shapes and sizes, wheel sizes, motor and battery placement, and drivetrain configurations.
- Ask students to compare their ideas based on the challenge criteria and constraints.
- Have groups select the design they think has the greatest potential to meet the challenge.
- Plan: Develop the Design
- Have students create a labeled sketch of their proposed EV before building in the Initial Mini EV Design section of their Engineering a Mini EV Worksheet (PDF).
- Ask them to identify the location of the chassis, wheels, axles, motor, battery pack, and drivetrain.
- Have students identify the materials they will need.
- Encourage groups to explain how their design choices will help the EV meet the established criteria and constraints.
- Create: Build the Model EV
- Build the base: Cut a car body (chassis) from cardboard or another suitable material.
- Add the axles: Glue two straws or pieces of tubing across the underside of the chassis, positioning one near the front and one near the rear. Slide a wooden skewer or other axle through each straw or tube. If using pulleys, attach a pulley to the axle that will connect to the motor.
- Attach the wheels: Make a hole in the center of each wheel and attach the wheels to the ends of the axles so they can rotate. Alternatively, hot glue the axle to the inside center of each wheel, as appropriate for the materials being used. Add rubber bands around the wheels, if needed, to increase traction.
- Install the motor: Position and secure the motor on the chassis so that the motor shaft can connect to either the front or rear axle.
- Secure the battery pack: Attach the battery pack to the chassis, considering how its location may affect the EV's weight distribution and balance.
- Connect the drivetrain: Loop a rubber band around the pulley on the axle and the pulley on the motor shaft. If pulleys are not used, loop the rubber band directly around the axle and motor shaft. Check that the rubber band has sufficient tension to transfer rotation without preventing the axle from turning freely.
- Connect the power: Connect the battery pack to the motor using alligator clips and check that the electrical connections are secure.
- Optional: Decorate: Add color, cardboard, or other lightweight materials to create the EV's body. Encourage students to consider whether these additions could affect vehicle performance.
An example of a student-designed mini EV made with low-tech materials.Copyright Andy Mundell, Purdue Polytechnic High School- Test and Evaluate: Determine How Well the EV Performs
- Establish a consistent testing procedure so groups can compare results fairly.
- Place the EV at the designated starting point and connect or turn on the battery pack.
- Test the EV according to the established design criteria.
- Have students collect quantitative data appropriate to the challenge, such as time, speed, distance traveled, or mass carried.
- Conduct multiple trials, if time permits, to determine whether performance is consistent.
- Have students compare their results with the original criteria and constraints.
- Ask students to identify which parts of their design worked as intended and which components limited its performance.
- Have them record their observations in their Engineering a Mini EV Worksheet (PDF).
- Improve: Redesign and Iterate
- Have students use their testing observations and data to identify at least one aspect of their EV that could be improved.
- Encourage them to consider changes to the chassis mass or shape, wheel size, wheel and axle alignment, traction, drivetrain, motor position, battery position, or other design features.
- Have students modify their EV based on evidence from their testing rather than making changes randomly.
- Have them sketch their redesign in their Engineering a Mini EV Worksheet (PDF).
- Retest the redesigned EV using the same testing procedure.
- Have students compare the original and redesigned EVs’ performance to determine whether their modifications resulted in improvement.
- Have them record their observations in their Engineering a Mini EV Worksheet (PDF).
- Continue the design → build → test → evaluate → improve cycle as time permits.
- Conclude by reminding students that the engineering design process is iterative rather than strictly linear. Engineers often return to earlier steps as testing reveals new information and opportunities for improvement.
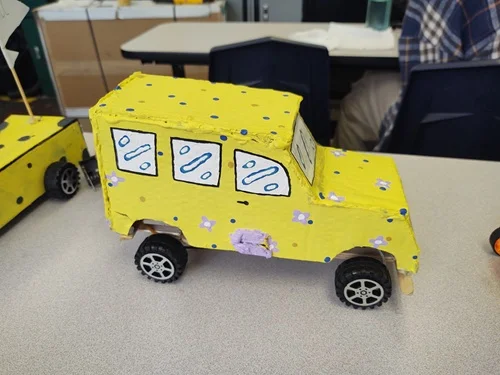 Student creativity is a key component of the mini EV design challenge.Copyright Andy Mundell, Purdue Polytechnic High School
- axle
- A bar connected to the center of a circular object, such as a wheel or gear, that allows or causes it to turn.
- battery
- A device that produces electrical energy from chemical energy.
- chassis
- A supporting frame or structure, such as for an automobile.
- circuit
- A closed (connected) system of wires and parts through which electricity can flow.
- drivetrain
- A system including all the parts linking the engine or motor of a vehicle to the wheels.
- motor
- A device that changes a form of energy (in this case, electrical energy) into mechanical energy to produce motion.
- pulley
- A simple machine that uses a wheel with a groove in it and a rope that fits into the groove.
Pre-Activity Assessment
Pre-Activity Questions: Before introducing the design challenge, facilitate a brief class discussion to assess students’ prior knowledge about electric vehicles, motors, and engineering design. Ask:
- What parts do you think an electric vehicle needs to move? Possible answers: A battery or other energy source, motor, wheels, axles, drivetrain, wires/electrical connections, chassis.
- How do you think a motor and battery work together to make the wheels spin? Possible answers: The battery supplies electrical energy/current to the motor; the motor converts electrical energy into mechanical/rotational motion; the drivetrain transfers the motor's rotation to the axle and wheels.
- What challenges do you think engineers might face when designing a small EV model? Possible answers: Reducing friction, keeping wheels and axles aligned, providing enough traction, transferring rotation from the motor to the wheels, keeping the vehicle lightweight, balancing the vehicle, securely attaching components, and meeting the design criteria and constraints.
Activity Embedded Questions (formative assessment)
Design Check: As teams plan, build, and test their mini EVs, circulate among the groups and ask questions that require students to explain and justify their engineering decisions.
- How will energy and motion travel from the battery to the wheels in your design? Look for students to identify the battery as the energy source, the motor as converting electrical energy into rotational mechanical energy, and the drivetrain/axle as transferring that rotation to the wheels.
- What design decisions did your team make to help your EV meet the challenge criteria and constraints? Look for evidence-based reasoning related to factors such as chassis size and mass, wheel size, axle alignment, traction, motor placement, battery placement, and drivetrain configuration.
- What did you learn from your test, and what will you change before testing again? Why? Look for students to use observations or test data to identify a problem, propose a specific modification, and explain how they expect the modification to improve performance.
Post-Activity Reflections (summative assessment)
EV Design Reflection: After teams complete their final test, have students use their EV, design documentation, and test data to respond to the following questions individually or as a team.
- Which design choices worked best for your EV, and why?
- How is your model EV similar to or different from a real electric vehicle?
- If you redesigned your car, what would you change to make it faster, stronger, or more reliable?
Use caution and ensure proper supervision when working with glue guns, sharp tools, or other objects while building the mini EVs. To prevent short circuits, connect the battery pack leads to the motor leads using alligator clips—do not connect the battery leads directly to each other.
Resources are abundant on the internet and teachers and students can search for advice or guidance in designing, building, and testing model EVs. A key component of the model EV is ensuring the motor and axle pulleys do not slip and using a rubber band that is not too loose or too tight to enable the car to move. The type of surface affects how the car moves: Carpet has more friction, and tile has less friction. If needed, rubber bands can be placed around the wheels to offer more grip on smooth surfaces. Here are a few videos for simple model EV car ideas for students of all ages:
This activity can be adapted in many ways based on students’ ages and grade levels. For younger students, compare how using different wheel sizes affects the vehicle's speed over a set distance. For older students, teams can compare how changing the gear ratio of different diameter-sized gears on the motor spindle and axle affects the speed and torque (power) of the drive train. Recording and averaging the results of different design criteria trials can also help reinforce how teams’ design decisions affect performance outcomes.
Contributors
Matt Jones, Ryan Cook, Seth Patterson of the ASPIRE Electric Vehicle & Roadway facility at Utah State University, and Jennifer Taylor of the Pre-College Engineering Program at the University of Colorado (CU) Boulder
Supporting Program
The Colorado Department of Transportation Office (CDOT) Office of Innovative Mobility and the National Science Foundation ASPIRE Engineering Research Center
Acknowledgements
This curriculum was developed under the CDOT E-Mobility Education and Awareness Grant award 25-HAA-ZL-00103 and the NSF award 1941524. Any opinions, findings, and conclusions, or recommendations expressed in this material are those of the authors and do not necessarily reflect the views of the Colorado Department of Transportation or the National Science Foundation.
Copyright
2026 by Regents of the University of Colorado