
Robotic Arm Challenge
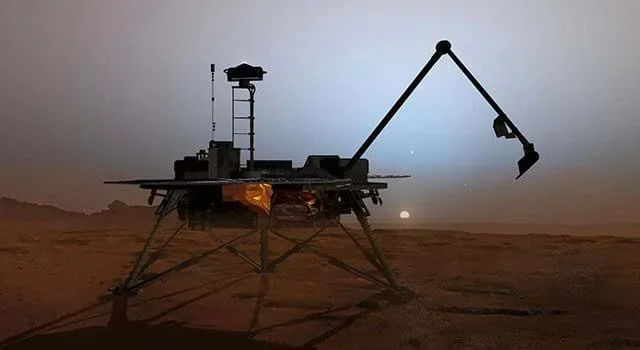 Students create a model robotic arm similar to NASA's Mars Phoenix landerCopyright NASA
Students design, build, and test a model robotic arm capable of moving objects from one location to another. Using everyday materials such as craft sticks, string, paper clips, and rubber bands, students explore how simple machines work together to perform complex tasks, like NASA engineers who design robotic arms for Mars rovers and the International Space Station.
Suggested supplies to make available to class:
- duct tape
- masking tape
- plastic or paper bowls
- paper clips
- string
- rubber bands
- binder clips
- dowels
- barbecue skewers
- chenille stems (pipe cleaners)
- brass fasteners
- index cards
- craft sticks
- other craft supplies (teacher’s choice)
For the whole class to share:
- 1 laptop or computer with projector to display YouTube videos
- 1 designated testing area (see the Before the Activity section for more information)
- 1 table
- measuring stick
- blue painters tape or masking tape
- 2 containers that can hold multiple objects of various sizes and shapes
- multiple objects of various sizes and shapes for grabbing
- (optional) stopwatch
NASA uses robotic arms to accomplish tasks that are potentially too dangerous, too difficult, or simply impossible for astronauts to do. The robotic arm on the International Space Station can capture approaching cargo ships for docking or be used to assist astronauts on spacewalks. The Mars rovers Spirit, Opportunity, and Curiosity were each designed with robotic arms that would help scientists on Earth conduct scientific experiments on Mars. Though all of these arms look different, they are similar in that each was designed to help it accomplish a given task.
Let’s take a look at this episode of “Crazy Engineering.” (Show this YouTube video to the class: https://www.youtube.com/watch?v=o1ZlVGpyHXc, 2:58 minutes.) What did you notice?
Now we are going to watch a video about an engineer who works on robotic arms for Mars. As you watch, what do you notice? (Show this YouTube video to the class: https://www.youtube.com/watch?v=TQLalCxXQLk, 1:01 minutes.)
Today we are going to use our knowledge of simple machines to make a robotic arm that can grab an object and put it into another container.
Background
Simple machines are the most basic tools that people and engineers use to make work easier. There are only six types: lever, wheel and axle, pulley, inclined plane, wedge, and screw. These six simple tools are the building blocks for every single complex machine, from a bicycle to a giant robotic arm. Simple machines work by giving us a mechanical advantage, which means they allow us to use less force to get a job done. They do this by either changing the direction of the force (such as pulling down to lift something up) or by spreading the effort out over a longer distance.
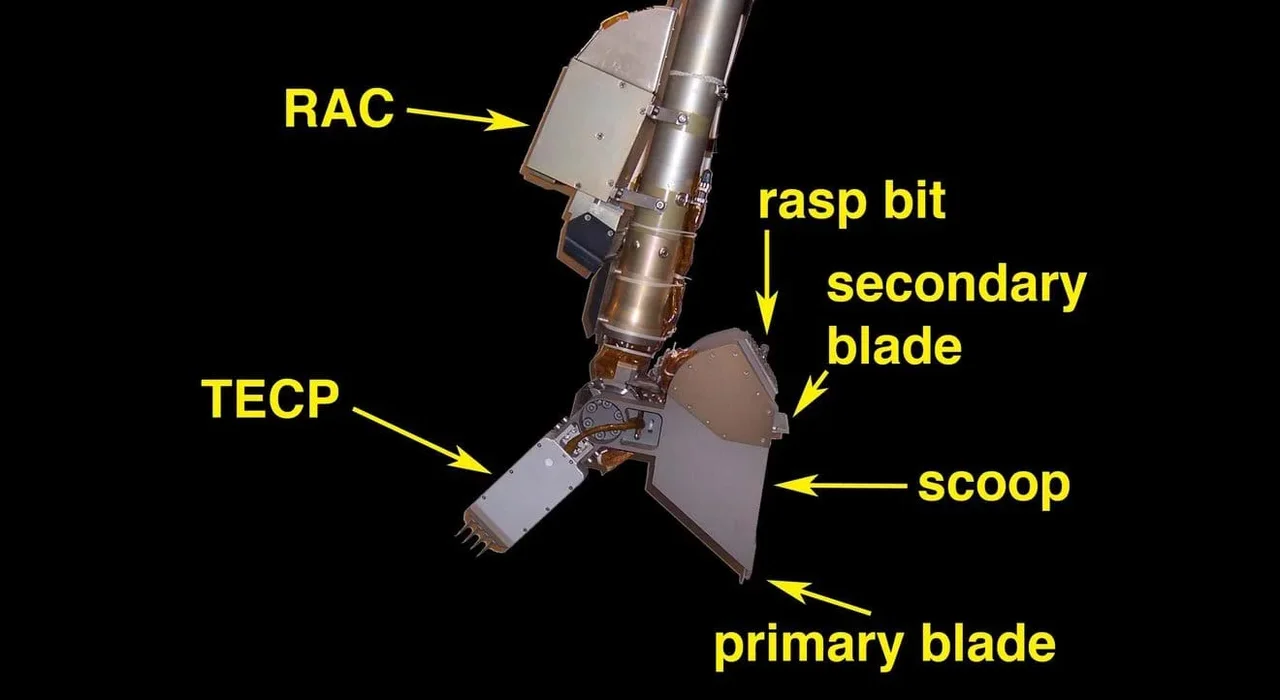 This image shows the tools on the end of the Mars Phoenix arm that are used to acquire samples, image the contents of the scoop, and perform science experiments. These tools are commonly referred to as "end effectors."Copyright NASA/JPL-Caltech/R. Bonitz
NASA relies heavily on robotic arms to accomplish critical tasks that would be too dangerous, difficult, or outright impossible for human astronauts to handle in space. These mechanical extensions are vital to our operations, serving purposes both in orbit and on distant planets. For example, the robotic arm on the International Space Station performs complex maneuvers such as successfully capturing approaching cargo ships for docking, and it is often used to safely assist astronauts during challenging spacewalks. Similarly, rovers sent to Mars, including Spirit, Opportunity, and Curiosity, were each equipped with specialized arms designed to help scientists on Earth conduct experiments such as drilling, scraping, and analyzing the Martian surface. Though these various robotic arms look different and serve unique purposes, they are all built on the same fundamental idea: engineering a device precisely tailored to accomplish a specific and necessary mission task.
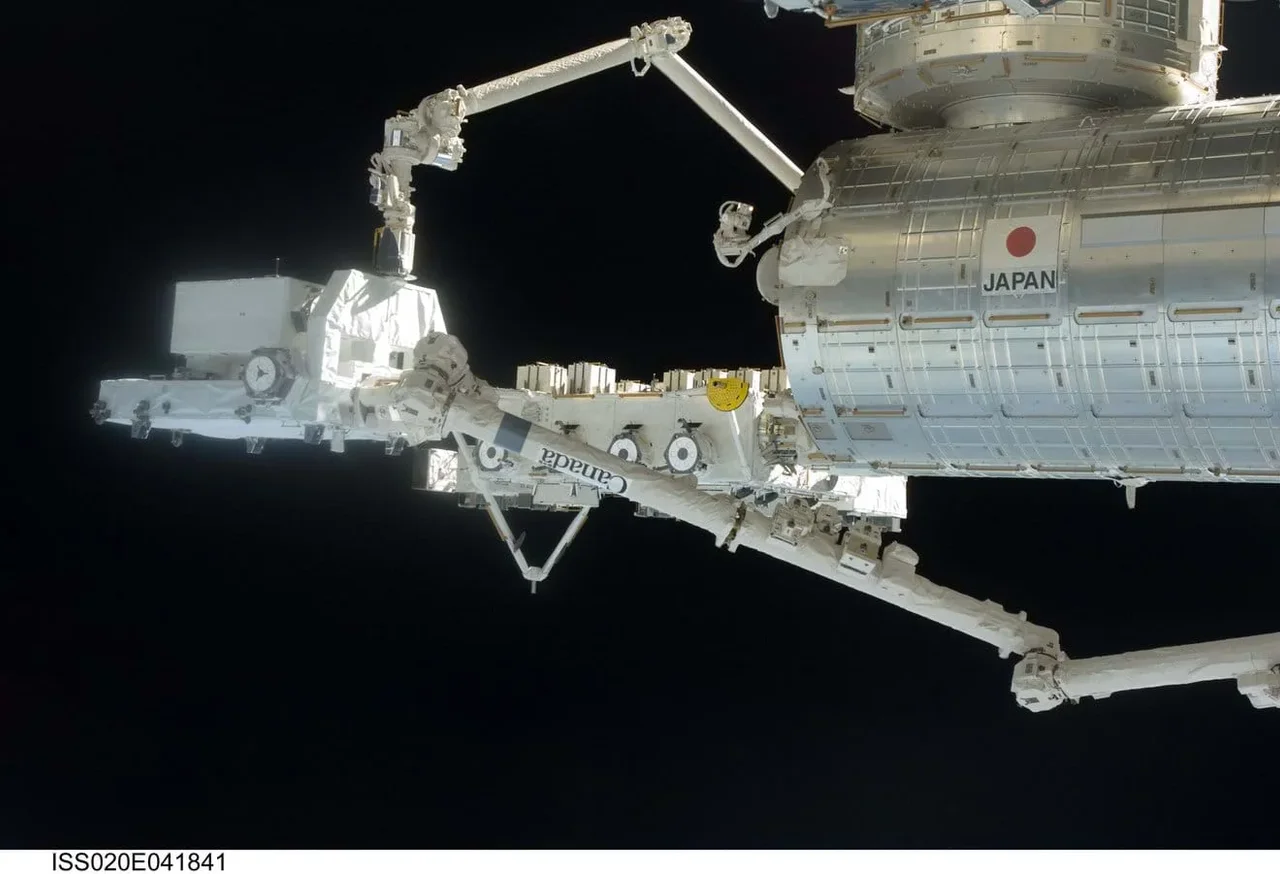 The JEM Robotic Manipulator System on the exterior of the Kibo laboratory on the International Space Station, as well as the station's Canadarm2 Remote Manipulator System, are shown in this image photographed by an Expedition 20 crew member.Copyright NASA
Overview
In this challenge, students create a model robotic arm to move items from one location to another. They will engage in the engineering design process to design, build and operate the arm.
Before the Activity
- Gather materials for building.
- Set up testing area:
- Place strips of tape across each table at 30 cm, 60 cm, and 70 cm from the edge.
- Place a container with objects of various sizes and shapes to be grabbed on the 60-cm line.
- Place an empty container on the 70 cm line.
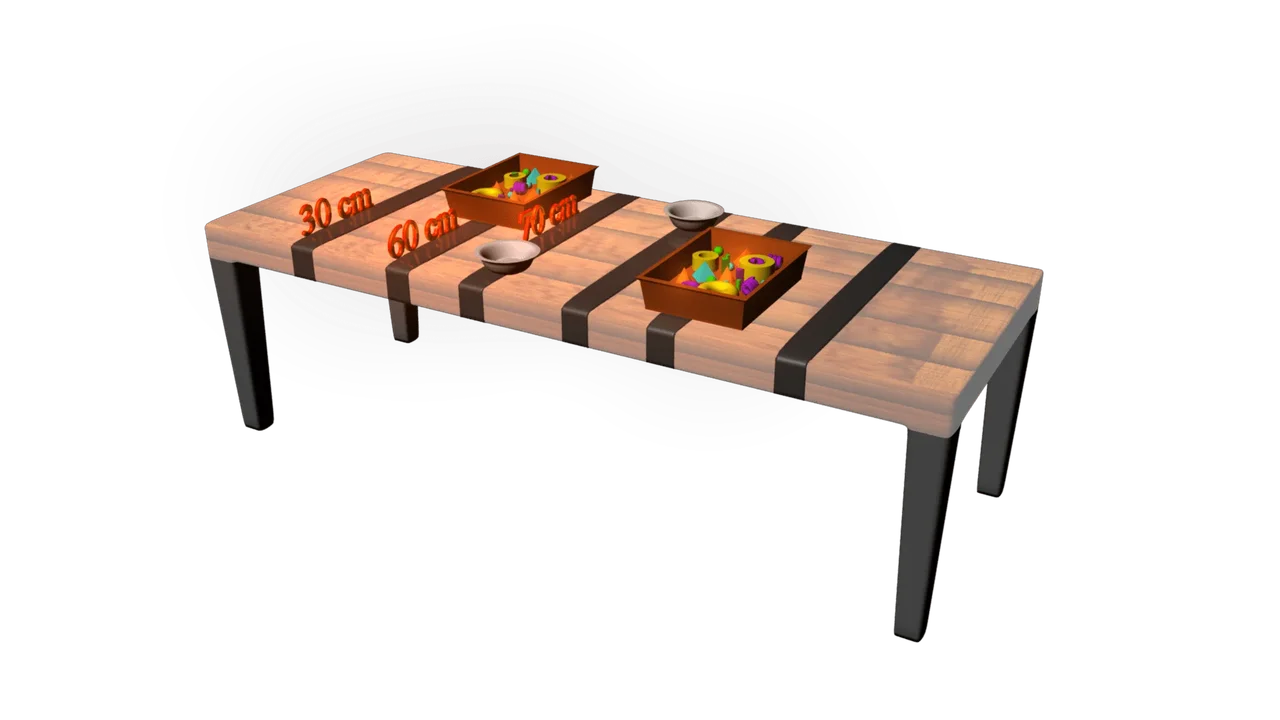 Graphic of a long table depicting two stations for the robotic arm challenge. The objective is to use a student-designed robotic arm to move as many objects as possible from the rectangular container (at the 60 cm line) to a container at the 70 cm line within a given amount of time without crossing the 30 cm line with any human body part.Copyright NASA
During the Activity
- Introduce the challenge: Student teams must use their knowledge of simple machines and how they work to make a robotic arm that can perform the challenge tasks.
- Instruct students that they will be using the available materials to build a robotic arm capable of grabbing an object (representing a payload or rock sample) and putting it in a container (representing a cargo platform or rover instrument) without reaching across the 30 cm line with their own arm.
- Ask students to make a plan by sketching designs that might work to accomplish the task.
- Once teams have a viable plan, allow them to go forward with construction and testing.
- Optional: If time is available, give students an opportunity to redesign/modify their prototype for improvement.
- Optional Extensions: Consider giving students a limited amount of time (30 or 60 seconds) within which to move as many objects as possible using their robotic arm.
Wrap Up - Thought Questions
In small groups, have students discuss, and be prepared to share with the class as a whole, the following questions:
- Which simple machines did you use to create your robotic arm?
- How easy is your robotic arm to use, and how effective is it?
- Are there improvements that can be made to your robotic arm? If so, what can be improved?
This resource was adapted with permission from NASA’s Jet Propulsion Laboratory (JPL) Robotic Arm Challenge, with minor modifications.
Supporting Program
NASA Jet Propulsion Laboratory (JPL)
Copyright
2025 by Regents of the University of Colorado; original © 2025 Jet Propulsion Laboratory