
Oh Baby! Contractions and Calculations
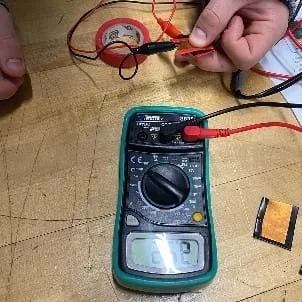 Measuring resistance of a do-it-yourself FSR from copper sheet scraps and conductive foam.Copyright 2022 Diane M. Walsh, University of Connecticut RET
Engineering is essential to our health! In this activity, students measure abdominal pressure using a force sensitive resistor and transmit the data to an Arduino microcontroller via Bluetooth. In addition, they use MIT App Inventor to create an app for an Android Smartphone or tablet that mimics how uterine contractions are displayed/charted on a fetal monitor during labor. On the Arduino side, students learn the relationship between physical pressure, voltage, resistance, and current; on the app side students practice computer science skills including sequence, iteration, and selection.
Biomedical engineers design medical devices and sensor to improve the care for both the mother and baby during childbirth. By adding Bluetooth and flexible sensors, patients can ambulate rather than being tethered to a fetal monitor. Traditional fetal monitors also typically use belted sensors that require readjustments when the mother changes positions. Biomedical engineers seek to make devices smaller and more flexible while also improving patient care.
After this activity, students should be able to:
- Describe the relationship between force and resistance in a force sensitive resistor (FSR).
- Explain how electrical energy flows through a voltage divider circuit.
- Solve simple voltage-divider problems.
- Create exponential and logarithmic equations to model information provided by a component datasheet.
- Apply a force-resistance and/or force/voltage model to predict a force based on a given input.
- Discuss how uterine contractions are measured using a pressure sensor.
- Write an algorithm using sequence, selection, and iteration.
- CCSS.Math.Content.HSF-LE.A.2 Construct linear and exponential functions, including arithmetic and geometric sequences, given a graph, a description of a relationship, or two input-output pairs (include reading these from a table).
Grades 9-12
Do you agree with this alignment? - CCSS.Math.Content.HSF-LE.A.4 For exponential models, express as a logarithm the solution to abct = d where a, c, and d are numbers and the base b is 2, 10, or e; evaluate the logarithm using technology.
Grades 9-12
Do you agree with this alignment? - CCSS.Math.Content.HSF-LE.B.5 Interpret the parameters in a linear or exponential function in terms of a context.
Grades 9-12
Do you agree with this alignment? - CCSS.Math.Practice.MP2 Reason abstractly and quantitatively.
Grades K-12
Do you agree with this alignment? - CCSS.Math.Practice.MP4 Model with mathematics.
Grades K-12
Do you agree with this alignment?
- Research and development is a specific problem-solving approach that is used intensively in business and industry to prepare devices and systems for the marketplace.
Grades 9-12
Do you agree with this alignment? - Use computers and calculators to access, retrieve, organize, process, maintain, interpret, and evaluate data and information in order to communicate.
Grades 9-12
Do you agree with this alignment?
- HS-ETS1-4 Use a computer simulation to model the impact of proposed solutions to a complex real-world problem with numerous criteria and constraints on interactions within and between systems relevant to the problem.
Grades 9-12
This resource focuses on the following Three Dimensional Learning aspects of NGSS:
Science & Engineering Practices- Use mathematical models and/or computer simulations to predict the effects of a design solution on systems and/or the interactions between systems.Do you agree with this alignment?
Disciplinary Core Ideas- Both physical models and computers can be used in various ways to aid in the engineering design process. Computers are useful for a variety of purposes, such as running simulations to test different ways of solving a problem or to see which one is most efficient or economical; and in making a persuasive presentation to a client about how a given design will meet his or her needs.Do you agree with this alignment?
Crosscutting Concepts- Models (e.g., physical, mathematical, computer models) can be used to simulate systems and interactions—including energy, matter, and information flows—within and between systems at different scales.Do you agree with this alignment?
Do you agree with this alignment? - Use mathematical models and/or computer simulations to predict the effects of a design solution on systems and/or the interactions between systems.
Each group needs:
- laptop computer or Chromebook with Arduino Serial Monitor extension.
- Arduino Uno R3 microcontroller with accompanying USB cable (available online)
- HC-05 Bluetooth module (available online)
- nine-volt battery
- nine-volt battery snap (available online) with barrel connector
- solderless breadboard (available online)
- 4 male-to-female jumper wires (available online)
- FSR, square (available online) or round (available online)
- 10KW resistor (available online)
- Android smartphone or tablet with Bluetooth
- multimeter (available online)
- piece of conductive foam (optional)
- 2 pieces of scrap copper flashing or two pennies (optional)
- Pre-Assessment (docx)
- Pre-Assessment (pdf)
- Pre-Assessment Answer Key (docx)
- Pre-Assessment Answer Key (pdf)
- Activity Overview PowerPoint Presentation (pptx)
- Activity Overview PowerPoint Presentation (pdf)
- Activity Part 1 PowerPoint Presentation (pptx)
- Activity Part 1 PowerPoint Presentation (pdf)
- Activity Part 1 Worksheet (docx)
- Activity Part 1 Worksheet (pdf)
- Activity Part 1 Worksheet Answer Key (docx)
- Activity Part 2 PowerPoint Presentation (pptx)
- Activity Part 2 PowerPoint Presentation (pdf)
- FSR 400 Series Datasheet (pdf)
- Activity Part 2 Worksheet (docx)
- Activity Part 2 Worksheet (pdf)
- Activity Part 2 Worksheet Answer Key (docx)
- Activity Part 2 Worksheet Answer Key (pdf)
- Activity Part 3 PowerPoint Presentation (pptx)
- Activity Part 3 PowerPoint Presentation (pdf)
- Activity Part 3 Worksheet (docx)
- Activity Part 3 Worksheet (pdf)
- Activity Part 4 PowerPoint Presentation (pptx)
- Activity Part 4 PowerPoint Presentation (pdf)
- Activity Part 4 Worksheet (docx)
- Activity Part 4 Worksheet (pdf)
- Post-Assessment (docx)
- Post-Assessment (pdf)
- Post-Assessment Answer Key (docx)
- Post-Assessment Answer Key (pdf)
Students should be familiar with:
- Arduino microcontrollers and simple serial communication.
- Solderless breadboarding simple circuits and Ohm's Law.
- MIT App Inventor app development.
- Exponential and logarithmic regression curve fitting.
- Variables and mathematical operations, control structures (if/else statements, for loops, and while loops), and functions.
You've all seen a movie or television show where there is a mother in labor. In many they show two large straps wrapped around the mother's abdomen. One belt monitors the baby's heart rate while the other monitors uterine contractions. A typical fetal monitor measures maternal heart rate, fetal heart rate, and uterine contractions (duration and frequency). Some devices also measure maternal temperature, blood oxygenation, and/or blood pressure. Obstetricians are particularly interested in the relationship between the fetal heart rate and the uterine contractions which indicate how well the fetus is tolerating labor.
An abnormal fetal heart rate pattern may signal fetal distress. The monitor helps detect the possibility of an underlying problem allowing a physician to intervene. For example, if the umbilical cord is compressed and blocking oxygenation to the fetus, a doctor may recommend the mother change positions. In other cases, a physician may determine that an immediate Cesarean birth is necessary.
For a low-risk pregnancy, a doctor might prescribe intermittent monitoring whereas for a high-risk pregnancy, the doctor may require constant monitoring. Fetal monitoring technology has not changed much over the past couple decades when compared to advances in other medical devices. Bluetooth popularity and ease of use has led to some wireless monitoring solutions; however, in most cases, only the data transfer has improved while the sensors remain bulky and attached to the patient via straps/belts. In the past few years, new research is leading to smaller, flexible, and beltless adhesive sensors.
Flexible sensors are made of thin layers of material. The outer layer is called Thermoplastic Polyurethane (TPU) film. You may be familiar with its use as a 3D printer filament but it is commonly known for its use as a cell phone screen protector material. TPU is the ideal material because of its elasticity.
In this activity you will be biomedical engineers designing a wireless monitoring system to measure uterine contractions (which you will simulate). You will use a force sensitive resistor as your pressure sensor, and Arduino microcontroller as the monitor, and an Android smartphone or tablet to display/graph the data.
Just like an engineer on a product-design team, you will have to organize your time between design iterations and testing to ensure functionality and form. Are you ready to "push" your skills to the limit?!
Background
This activity is geared toward students familiar with basic breadboarding of solderless circuits. Students should know how to interpret a schematic and how to identify a resistor using the color bands. Students should already know how to code using Arduino and how to write algorithms that include sequencing, selection, and iteration. They should have a basic knowledge of simple serial communication and be familiar with Bluetooth. Students should also know how to create simple apps using MIT App Inventor using variables and logic and be able to design a user interface that includes a canvas, buttons, and text labels. This activity will provide instruction on adding a graphing component.
Spacing/Time: This activity is designed for four 60-minute class periods. However, depending on the level of the learners, this time will vary.
Before the Activity
- Make copies of all handouts, one for each student.
- Test all of the equipment to verify that all Arduinos and FSRs function properly.
- Load all the Arduino IDE software on one computer; check with your IT department to ensure that you are compliant with all of the student data privacy requirements of your state/district.
- Make sure you have Bluetooth enabled Arduino smartphones or tablets, check with your IT staff.
- Gather all materials so they are organized per your usual classroom routine.
- Be ready to start with the Pre-Assessment (PDF).
With the Students
Introduction
- Administer the Pre-Assessment (PDF).
- Go through the Activity Overview Presentation (PPTX) with the students.
- Slide 1: Title slide
- Slide 2: Read through the phenomenon of childbirth.
- Slide 3: Describe the force of contractions.
- Slide 4: Introduce fetal monitoring.
- Slide 5: Describe signs of fetal distress.
- Slide 6: Describe the constraints of current fetal monitors.
- Slide 7: Outline the four parts of the activity.
- (optional) Slide 8: Describe the activity extensions.
Activity Part 1: Introduction to Force-Sensitive Resistors
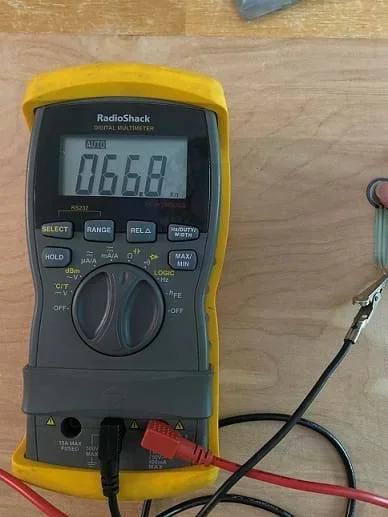 Reading the resistance of a force-sensitive resistor.Copyright 2022 Diane M. Walsh, University of Connecticut RET
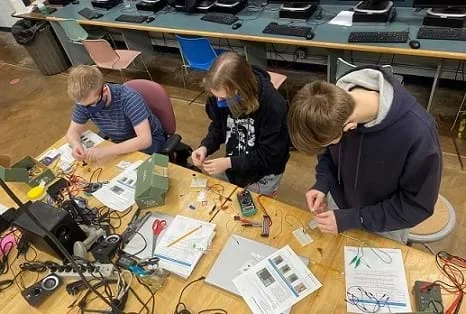 Learners reading the resistance of a force-sensitive resistor.Copyright 2022 Diane M. Walsh, University of Connecticut RET
- Divide the class into groups of three or four students.
- Go through the Activity Part 1 PowerPoint Presentation (PPTX) with the students.
- Slide 1: Title slide
- Slide 2: Introduce students to force-sensitive resistors.
- Slide 3: List uses of FSRs. Brainstorm other possible products for a force-sensitive resistor.
- Slide 4: Describe how to measure resistance with a multimeter.
- Identify the materials used in the activity: force-sensitive resistor (FSR), jumper wires, solderless breadboard, and multimeter with alligator clips.
- Explain to students that they will be discovering the relationship between physical pressure and resistance.
- Distribute a copy of the Activity Part 1 Worksheet (PDF) to each student.
- Ask students if they have any questions.
- Have students follow the instructions on the Activity Part 1 Worksheet (PDF).
- During the activity, walk around and make sure students are being careful with the tabs on the force-sensitive resistors. Answers questions and help with any technical difficulties.
- All students must successfully complete Part 1 prior to moving on to Part 2.
NOTE: This may be a great opportunity to allow students to complete an extension activity of building a DIY force-sensitive resistor.
Activity Part 2: Voltage Dividers
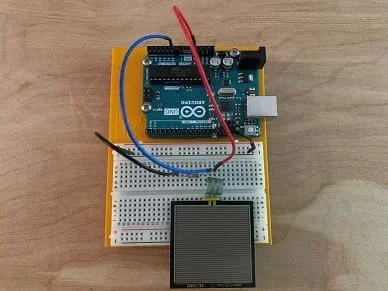 FSR connected via a voltage divider circuit.Copyright 2022 Diane M. Walsh, University of Connecticut RET
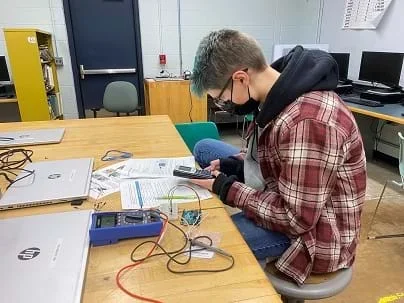 Calculating voltages across resistors in a voltage divider circuit.Copyright 2022 Diane M. Walsh, University of Connecticut RET
- Divide the class into groups of three or four students.
- Go through the Activity Part 2 PowerPoint Presentation (PPTX) with the students.
- Slide 1: Title slide.
- Slides 2 and 3: Introduce students to the concept of a voltage divider circuit.
- Slides 4 and 5: Review breadboarding basics
- Slide 6: Review how to identify resistor values via the bands.
- Slides 7 and 8: Finally explain the difference between digital and analog signals.
- Identify the additional components used in Part 2 of the activity: jumper wire, 10 kW resistor, Arduino microcontroller, accompanying USB cable, and a laptop.
- Explain to students that they will be building a voltage divider circuit and use its functionality to measure the analog voltage across a pull-up resistor. In addition, students will use the manufacturer's FSR 400 Series Datasheet (PDF) to create a model to approximate force as a function of voltage using regression. (Note: If some of the regression models are too complex for your students, modify to include fewer. A minimum selection would be linear and exponential.)
- Distribute a copy of the Activity Part 2 Worksheet (PDF) to each student.
- Ask students if they have any questions.
- Have students follow the instructions on the Activity Part 2 Worksheet (PDF).
- During the activity, walk around and answer questions and help with any technical difficulties.
- All students must successfully complete Part 2 prior to moving on to Part 3.
Activity Part 3: Arduino-to-Android Serial Communication
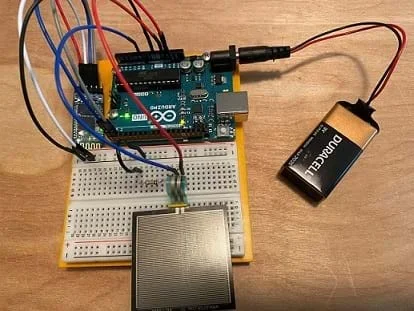 Bluetooth module and battery power.Copyright 2022 Diane M. Walsh, University of Connecticut RET
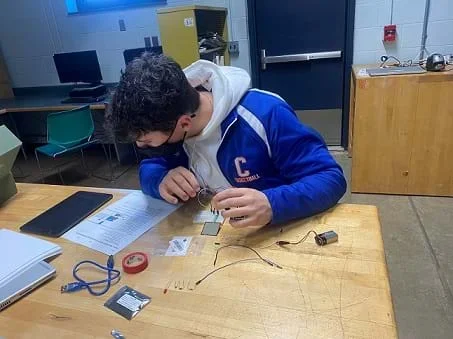 Learner adding an HC-05 Bluetooth module to a circuit.Copyright 2022 Diane M. Walsh, University of Connecticut RET
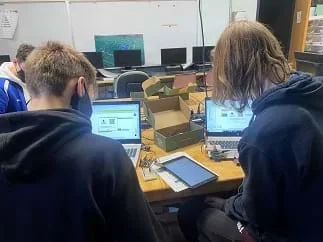 Uploading an App Inventor app on an Android tablet.Copyright 2022 Diane M. Walsh, University of Connecticut RET
- Divide the class into groups of three or four students.
- Go through the Activity Part 3 PowerPoint Presentation (PPTX) with the students.
- Slide 2: Introduce students to analog-to-digital (discrete) conversion.
- Slide 3: Introduce students to the delimiter character.
- Slide 4: Show students the ASCII table.
- Slide 5: Show students buffers and bytes in serial messages.
- Slide 6: Introduce students to delimiters, buffers and timing needed for their code.
- Slide 7: Describe serial data packets.
- Slide 8: Discuss values in the ASCII tables.
- Slide 9: Describe the data flow from a transmitter to a receiver.
- Identify the additional components used in Part 3 of the activity: 9-volt battery, snap connector with barrel connector, additional jumper wire, Bluetooth module for Arduino, male-to-female jumper wires, and an Android device (smartphone or tablet).
- Explain to students that they will be first building a circuit to add wireless serial communication via radio frequency (Bluetooth) and then programming both the Arduino (Arduino sketch) to send data and the Android device (MIT App Inventor 2) to receive and display the data.
- Distribute a copy of the Activity Part 3 Worksheet (PDF) to each student. (Note: Although each group will build a circuit together, if possible, each student should have their own Arduino sketch and their own MIT App Inventor code to test.)
- Ask students if they have any questions.
- Have students follow the instructions on the Activity Part 3 Worksheet (PDF).
- During the activity, walk around and answer questions and help with any technical difficulties.
- All students must successfully complete Part 3 prior to moving on to Part 4.
Activity Part 4: Designing a Better Monitor
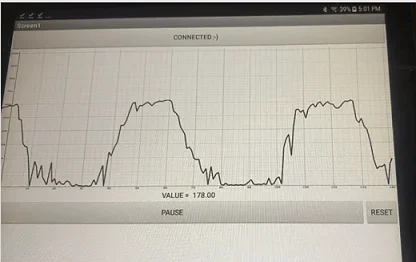 Graph of uterine contractions (pressure vs time).Copyright 2022 Diane M. Walsh, University of Connecticut RET
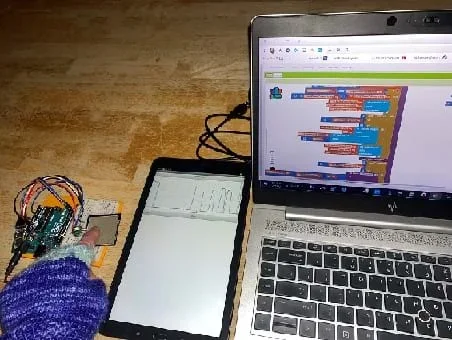 Testing the app (pressure vs time).Copyright Diane M. Walsh, University of Connecticut RET
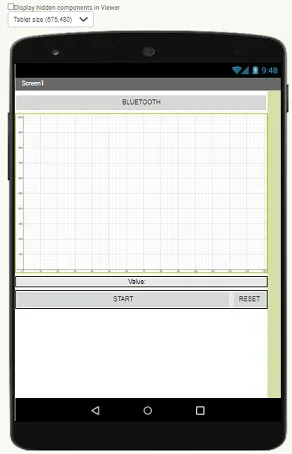 User-interface for Uterine Contractions app.Copyright Diane M. Walsh, University of Connecticut RET
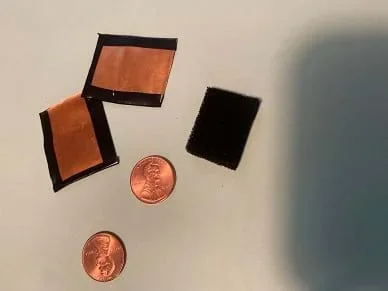 DIY force-sensitive resistor materials.Copyright 2022 Diane M. Walsh, University of Connecticut RET
- Divide the class into groups of three or four students. (Note: Although each student will be programming their own app, it is beneficial for members to collaborate on the process, try various solutions, and help each other debug any errors that pop up.)
- Show the Activity Part 4 PowerPoint Presentation (PPTX).
- Remind students that they will need to open up their previous MIT App Inventor program to continue their work.
- Explain to students that they will be programming an algorithm to show a scrolling graph of the pressure data vs time. Have students explain and differentiate what is meant by sequencing, selection, and iteration. Excite students about the opportunity to extend the project further as design engineers to find a way to attach the sensor to the mother's abdomen while still having the sensor connected to the circuitry. If time permits in your curriculum, let students explore and test their solutions.
- Distribute a copy of the Activity Part 4 Worksheet (PDF) to each student.
- Ask students if they have any questions.
- Have students follow the instructions on the Activity Part 4 Worksheet (PDF).
- During the activity, walk around and answer questions and help with any hardware technical difficulties. Encourage students to assist each other with programming errors.
- Note: All students must successfully complete Part 4 before being allowed to move on to an activity extension.
- bluetooth
- A short-range wireless technology standard that is used for exchanging data between devices such as computers or smartphones.
- current
- The flow of electrons through a circuit.
- force sensitive resistor (fsr)
- A type of variable resistor that changes resistor with the amount it is pressed and/or squeezed.
- iteration
- Repeating a set of steps, or looping, a specific number of time or until a condition is met.
- resistor
- A component or material that presents the passage of a steady electric current.
- selection
- A section of code that runs only if a condition is met. This code is recognizable as IF, THE, ELSE statements.
- sequencing
- An ordered set of steps where the order matters to produce the desired result.
- uterine contraction
- Tightening of the uterine muscles during labor to help push the baby into the birth canal.
- voltage
- The potential difference in charge between two points in an electrical field.
Pre-Activity Assessment
Pre-Assessment: Have students complete the Pre-Assessment (PDF)
Activity Embedded (Formative) Assessment
Activity worksheets. The circuits will either function or they will not. Likewise, the app will function or it will not.
Post-Activity (Summative) Assessment
Post-Assessment: Have students complete the Post-Assessment (PDF).
Breadboard circuits and Arduinos can be short-circuited. To avoid this, have students double-check their hardware before connecting Arduinos to computers or the multimeter. If an Arduino is being short-circuited, do not touch it; simply unplug the USB cable from the computer and leave the Arduino alone for a few minutes (it may be hot). If a circuit is being short-circuited (blue smoke), disconnect the batter and allow it to cool.
Since short-circuits can accidentally occur, remind students to double-check each other's connections before applying any power. Also, students should be encouraged to collaborate and help each other with problems before asking the teacher for assistance.
This activity has extensions that can be explored:
- One optional, yet simple, extension, is to build a force-sensitive resistor yourself from conductive foam and two scraps of copper flashing (or two pennies).
- Another optional extension (partial design) is to make an innovate enclosure for the force sensor to be applied to the patient's abdomen. Be creative in your choice of materials. Then you will test your designs by tightening your stomach muscles.
- A final optional extension (for advanced students) is to program a simulated fetal heart rate that drops below the normal fetal heart rate range during a contraction and then program an alarm to alert medical personnel to take action.
https://www.youtube.com/watch?v=cxP0Mdoz_Bo (How does Bluetooth Work?)
https://community.appinventor.mit.edu/t/bluetooth-hc-06-arduino-send-receive-send-text-file-multitouch-image/9518/10
https://itp.nyu.edu/physcomp/lessons/interpreting-serial-data/
https://lastminuteengineers.com/fsr-arduino-tutorial/amp/
https://learn.sparkfun.com/tutorials/analog-to-digital-conversion/all
https://news.northwestern.edu/stories/2021/05/untethering-pregnant-mothers/
Contributors
Diane Walsh; Ian Heck; Dr. Yi Zhang; He Sun; Ashley LaPane
Supporting Program
The Joule Fellows Program, School of Engineering, University of Connecticut RET
Acknowledgements
This curriculum was developed under National Science Foundation Joule Fellows Program at the University of Connecticut, School of Engineering, RET Award no. 1711706. However, these contents do not necessarily represent the policies of the NSF, and you should not assume endorsement by the federal government.
Copyright
2022 by Regents of the University of Colorado; original © 2022 University of Connecticut