
Drawing Magnetic Fields
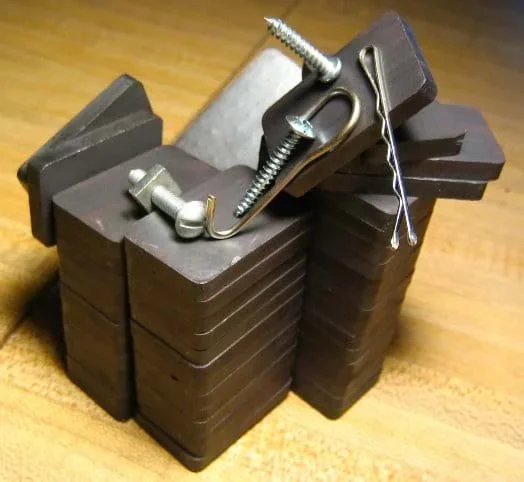 Ceramic magnets.Copyright Wikimedia Commons http://commons.wikimedia.org/wiki/File:Ceramic_magnets.jpg
Using a compass and a permanent magnet, students trace the magnetic field lines produced by magnets. By positioning the compass in enough spots around the magnet, the overall magnet field becomes evident from the collection of arrows representing the direction of the compass needle. In activities 3 and 4 of this unit, students apply this information to design a way to solve the grand challenge of separating metal for a recycling company.
This activity covers magnetic fields and also serves as an introduction to vector fields, which are a common theme through most electrical engineering disciplines. As discussed in the lesson closure, understanding the Earth's magnetic field is important in designing ways of protecting astronauts in space. Students play the role of engineers when they apply their understanding of magnets to design devices to solve the problem presented in the grand challenge later in the unit.
After this activity, students should be able to:
- Explain the significance of the directions of magnetic field lines.
- Draw the shape of magnetic field lines around a permanent magnet.
- Technological problems must be researched before they can be solved.
Grades 9-12
Do you agree with this alignment?
- 3237.4.7 Sketch the magnetic field lines around a bar magnet.
Grades 9-12
Do you agree with this alignment? - CLE 3231.5.6 Understand magnetic poles, magnetic fields, and investigate electromagnetic induction.
Grades 9-12
Do you agree with this alignment?
Each group needs:
- 1 ceramagnet (a ceramic magnet made of iron, nicke, or beryllium oxides in clay; available from Sargent-Welch and other companies for ~$5 each)
- 1 compass (small 16 mm compasses are available in packs of 10-12 from various online retailers such as Edmund Scientific at https://www.scientificsonline.com/product/mini-compasses-16mm-pkg12-item--3053606)
An understanding of what types of materials are affected by magnetic fields and that compasses point to Earth's magnetic poles.
(Hold up a compass.) We know that this compass points to the magnetic north pole of the earth—which also happens to be the geographic north, roughly. It does that because it is also a magnet and opposite poles of magnets attract. That means this compass will also point along the magnetic field that any nearby magnet creates, not just the earth's. We are going to track a whole lot of points around your magnet to see what its magnetic field looks like.
Set-up
- Make copies of the Permanent Magnetic Field Worksheet (PDF), one per student.
- Have ready the required materials for each group.
With the Students
- Divide the class into groups of two students each. Hand out the worksheets.
- On the worksheet, have students mark 30 points uniformly around the magnet, making sure the points are adequately spread out across the paper and are about 1 in to 3 cm apart.
- Students place the magnet on the paper so that the poles are facing left and right on the paper. Note that ceramagnets have wide, flat poles so the magnets will be balanced upright on their edges.
- Students place the compass centered over one point and allow the needle to settle.
- Whichever way the north or red end of the needle points, they are to mark an arrow on that point.
- Students repeat 5 and 6 until all points have been marked with an arrow for the magnetic field direction.
- Have several representative examples drawn on the board by students of their magnetic fields. Question the whole class as to their agreement or disagreement with the field lines. Identify any disagreements or problems. Make sure to drive home to students that the field lines always loop away from north and back to south.
- compass
- A small magnet suspended so that it can freely point to earth's magnetic north pole.
- lodestone
- A naturally magnetized piece of the mineral magnetite.
Worksheets: Review students' completed worksheets to assess their depth of comprehension. Assessments are conducted in accompanying lessons 3 and 4 when students use this information as engineers would to design solutions to the grand challenge for the unit.
The ceramagnets must be balanced upright and on their edges. If enough are available, it is helpful to use two magnets together as they balance easier and should fit into the rectangle drawn on the sheet. If the magnets are lying flat on the paper, the field will be moving into and out of the paper, which the compass cannot track when laid flat on the paper.
Because the ceramagnets are not marked with definite poles, students must leave the magnet in place on the paper throughout the tracing. If the magnet's orientation is flipped, the compass needle will point the opposite way, creating an incoherent overall field drawing.
It is possible, especially through the multiple uses of the compasses, for their polarity to be reversed. This should not present a problem provided the magnet is not moved and students are consistent in which direction of the needle they used to mark the arrow.
Contributors
Justin Montenegro
Supporting Program
VU Bioengineering RET Program, School of Engineering, Vanderbilt University
Acknowledgements
The contents of this digital library curriculum were developed under National Science Foundation RET grant nos. 0338092 and 0742871. However, these contents do not necessarily represent the policies of the NSF, and you should not assume endorsement by the federal government.
Copyright
2013 by Regents of the University of Colorado; original © 2011 Vanderbilt University