Quick Look
Grade Level: 5 (4-6)
Time Required: 1 hour
Expendable Cost/Group: US $11.00 This activity also uses some non-expendable (reusable) supplies such as hot glue gun and needles; see the Materials List for details.
Group Size: 1
Activity Dependency: None
Subject Areas: Physics, Science and Technology
NGSS Performance Expectations:

| 4-PS3-2 |
Summary
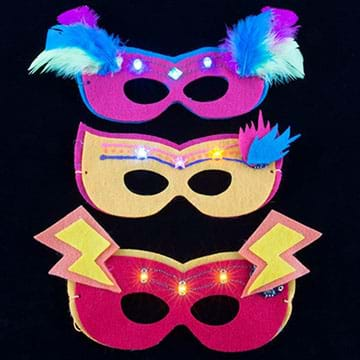
Students learn about engineering applications in artistic venues by designing and creating eye masks that each contain three LEDs. They explore parallel circuits with their LEDs, and sew with conductive thread to create light-up displays on their masks, gaining hands-on experience in using engineering technologies as well as custom product design and assembly.
Engineering Connection
In order to design and create new technologies, electrical engineers—and many other types of engineers—must understand parallel circuits. In this activity, like engineers, students create parallel circuits and discuss the difference between parallel and series circuits. They are also exposed to the wide range of areas impacted by engineering design by applying engineering technology to costume design.
Learning Objectives
After this activity, students should be able to:
- Define, recognize and assemble components in a parallel circuit.
- Explain the path of electrical charge through a circuit.
- Describe an example of how engineers apply their understanding of circuitry to the design of artistic products.
Educational Standards
Each TeachEngineering lesson or activity is correlated to one or more K-12 science,
technology, engineering or math (STEM) educational standards.
All 100,000+ K-12 STEM standards covered in TeachEngineering are collected, maintained and packaged by the Achievement Standards Network (ASN),
a project of D2L (www.achievementstandards.org).
In the ASN, standards are hierarchically structured: first by source; e.g., by state; within source by type; e.g., science or mathematics;
within type by subtype, then by grade, etc.
Each TeachEngineering lesson or activity is correlated to one or more K-12 science, technology, engineering or math (STEM) educational standards.
All 100,000+ K-12 STEM standards covered in TeachEngineering are collected, maintained and packaged by the Achievement Standards Network (ASN), a project of D2L (www.achievementstandards.org).
In the ASN, standards are hierarchically structured: first by source; e.g., by state; within source by type; e.g., science or mathematics; within type by subtype, then by grade, etc.
NGSS: Next Generation Science Standards - Science
| NGSS Performance Expectation | ||
|---|---|---|
|
4-PS3-2. Make observations to provide evidence that energy can be transferred from place to place by sound, light, heat, and electric currents. (Grade 4) Do you agree with this alignment? |
||
| Click to view other curriculum aligned to this Performance Expectation | ||
| This activity focuses on the following Three Dimensional Learning aspects of NGSS: | ||
| Science & Engineering Practices | Disciplinary Core Ideas | Crosscutting Concepts |
| Make observations to produce data to serve as the basis for evidence for an explanation of a phenomenon or test a design solution. Alignment agreement: | Energy can be moved from place to place by moving objects or through sound, light, or electric currents. Alignment agreement: Energy is present whenever there are moving objects, sound, light, or heat. When objects collide, energy can be transferred from one object to another, thereby changing their motion. In such collisions, some energy is typically also transferred to the surrounding air; as a result, the air gets heated and sound is produced.Alignment agreement: Light also transfers energy from place to place.Alignment agreement: Energy can also be transferred from place to place by electric currents, which can then be used locally to produce motion, sound, heat, or light. The currents may have been produced to begin with by transforming the energy of motion into electrical energy.Alignment agreement: | Energy can be transferred in various ways and between objects. Alignment agreement: |
International Technology and Engineering Educators Association - Technology
-
Follow directions to complete a technological task.
(Grades
3 -
5)
More Details
Do you agree with this alignment?
-
Explain how technology and engineering are closely linked to creativity, which can result in both intended and unintended innovations.
(Grades
6 -
8)
More Details
Do you agree with this alignment?
State Standards
Colorado - Science
-
Show that electricity in circuits requires a complete loop through which current can pass
(Grade
4)
More Details
Do you agree with this alignment?
Materials List
Each student needs:
- LilyPad coin cell battery holder, switched, 20 mm; such as from SparkFun at https://www.sparkfun.com/products/13883
- 3 LilyPad white LEDs; such as from this pack of five from SparkFun at https://www.sparkfun.com/products/13902
- 20-mm coin cell battery; such as CR2032 from SparkFun at https://www.sparkfun.com/products/338
- Mask Template
- sewing needle; such as from this set of five from SparkFun at https://www.sparkfun.com/products/10405
- craft felt, one 9 x 12-inch sheet makes one mask; or provide two half-sheets in different colors
To share with the entire class:
- conductive thread, 2 feet per mask/student; such as from the 30-ft stainless steel thread bobbin from SparkFun at https://www.sparkfun.com/products/10867
- scissors
- permanent markers, or any markers that work on felt
- hot glue gun and hot glue sticks
- elastic cord, string or ribbon
- (optional) assorted craft supplies for decoration, such as feathers, sequins, glitter glue, paint pens, beads and buttons
- (optional) hole punch, to make side holes in the felt for elastic cord, string or ribbons
Worksheets and Attachments
Visit [www.teachengineering.org/activities/view/spfun_masks_activity1] to print or download.Pre-Req Knowledge
A basic understanding of parallel circuits. Ability to hand sew using needle and thread.
Introduction/Motivation
Have you ever made a costume to wear on Halloween? Costumes are a creative way to make something fun and they can be made from almost anything!
Let’s think about masks. From what kinds of materials might you make a mask? (Listen to student ideas. Examples: Papier-mâché, craft paper, felt, fabric.) Costume design has expanded to include not only those materials, but electronics! We call these e-textiles and they are a great way to add flair to clothing, costumes and accessories.
When costume designers create e-textiles, they are thinking like engineers. Today, we will also think like engineers as we create our own light-up masks! We will sew circuits onto our face masks to incorporate three LEDs.
What are some things engineers keep in mind when making circuits? (Listen to student ideas. Example answers: Make a complete circuit, number of batteries, number of lights, kind of circuit, etc.) Engineers definitely think about the kind of circuit they need. What are the two kinds of circuits we often use? (Answer: Series and parallel circuits.) Today, we will be making parallel circuits to connect our lights. That way, each LED gets the same amount of power and shines just as brightly as the others.
Today, you will create a mask with three LEDs sewn into it using conductive thread, and then decorate it as you like to end up with a customized crafty creation! Let’s get started!
Procedure
Parallel Circuits Background
- Engineers connect things in parallel so that if one circuit part breaks, the rest of the circuit still works.
- Since each device connects across the same two nodes (a point where two wires intersect), the voltage across each device is the same.
- The total resistance for a parallel circuit is less than the resistance of any one branch.
- The total current divides among parallel branches. Branches with lower resistances have higher current, while branches with higher resistances have lower current.
- The total current is equal to the sum of the currents in the branches.
- The total voltage for identical batteries connected in parallel is the same as the voltage across any one battery.
E-Textiles Background
If unfamiliar with e-textiles, take a look at the following SparkFun tutorials:
Before the Activity
- Make copies of the Mask Template, one per student.
- Cut the conductive thread into two-foot (0.6 m) strands, one per student.
- Verify that all the batteries work.
- Gather all materials and organize them into piles, one per student.
With the Students: Template and Circuit Prep
- Hand out the mask templates and distribute the materials.
- Tell the students: Looking at the mask template, notice that the mask has two layers. You will sew the electronics onto the smaller layer. Then, at the end, you will glue on the larger mask shape to give the mask extra support.
- Tell the students: Hold the template up to your face and draw any adjustments to the overall size as well as the eye and nose shapes so that the mask fits the way you like. Then cut out and trace the template pieces onto felt sheets of any color you like.
- Tell the students: Set aside the bigger mask shape for now. Next, you will sew all of the electronics onto the top, smaller mask shape.
- Tell the students: Take a closer look at the mask template to notice the positive and negative sewing lines. This plan in a nice layout of the lights on the mask and results in a parallel circuit. In a parallel circuit, all of the components are aligned so that they get the same amount of voltage running through them. Each LED gets the same amount of power and shines just as brightly as the others.
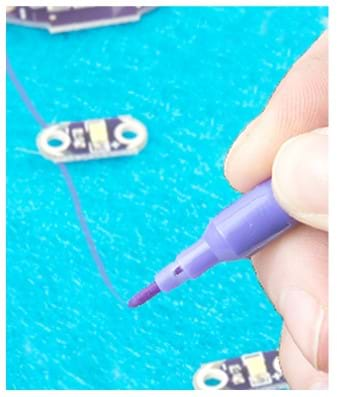
- Have students make their plans for placement of the electronic components onto the masks. Have them user markers to indicate where the components and stiches go. Draw dots for LED placement and lines for stitches. Then use just a dab of hot glue to attach the battery holder, making sure the opening for the battery is facing up.
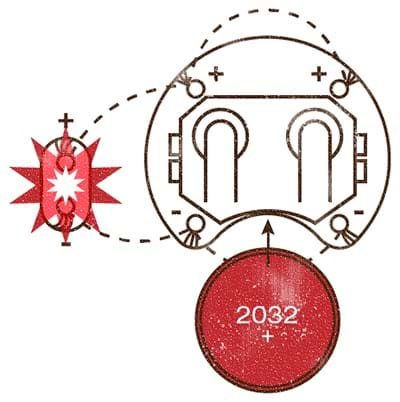
- Using the template layout as a guideline for placement of the components, have students arrange the three LEDs in a line across the top of the mask above the eye holes, with all of the positive ends facing down and all of the negative ends facing up so that they line up with the positive and negative holes on the battery holder. Suggest they space out the LEDs over the eyebrow region of the mask to make a pleasing line that draws attention to the eyes. Then, direct students to place a small dot of hot glue in the middle of each LED board to adhere them onto the felt, which makes sewing them to the felt easier. Tip: When gluing, make sure not to block the two holes at the ends of the LED boards or else a needle won’t be able to get through the dried glue!

With the Students: Construction & Testing
- Positive/Negative Sewing Lines: Direct students to each use a needle and conductive thread to sew the positive ends of the LEDs to the battery holder in a pleasing line. Have them sew three or four loop stiches through each LED end hole to secure it—and instead of knotting and cutting—continue onto the next LED positive end with the same needle and thread. Once they reach the end of the row, tie off and cut the conductive thread. Then direct students to repeat this for the negative sides of the LEDs. Tip: Suggest that students to do a “wiggle test.” If you can easily wiggle the LED back and forth after stitching it, then the stitches are too loose and the electrical connection is not secure enough.
- Have students insert the coin cell battery into the battery holder with the positive (labeled) side facing up. Direct them to test their circuits by turning on the switch to see if the LED row shines brightly!
- If the LEDs do not light up, have students examine their sewing work carefully. Refer to the Troubleshooting Tips section.

With the Students: Customize & Refine
- Once the LEDs are working, direct students use the assorted extra craft supplies to add creative decorations to their masks. Also have them:
- Consider hiding or enhancing the stitching that shows on the front of the mask.
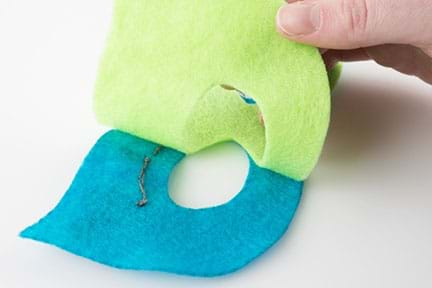
- Glue the second (larger) layer of felt on the back of the mask to add stability and insulate the back of the circuit.
- Make sure to leave a bit of room around the battery holder so they can replace the battery as necessary.
- Cut small holes on either side of the mask with scissors (or a hole punch) and tie on pieces of elastic, string or ribbons to hold the mask on.

Vocabulary/Definitions
conductive thread: Thread spun of stainless steel (or silver-coated nylon) that carries current like wires so that it can be used to create circuits that are flexible and require no soldering and thus are suitable for textile-based projects that use embedded electronics. Conductive thread tends to be more “twisty,” and so more difficult to sew with than non-conductive (regular) thread.
e-textiles: Clothing or accessories that includes electrical components such as LEDs.
LED: Abbreviation for light-emitting diode, which is a type of semiconductor called a diode that converts electrical energy into light.
trace: A physical pathway that permits conductive electricity to travel between electronic components.
Assessment
Pre-Activity Assessment
Brainstorming: As a class, brainstorm ideas about where e-textiles might be used. In what situations? For what purposes? Remind students that in brainstorming, no idea is “silly.” Brainstorming is the time to be wild and crazy in your ideas! (Example ideas: Fashion shows, Halloween costumes, night-wear for cyclists and joggers, a princess’ tiara, subway repairman coveralls, ice skater costumes, referee shirts, space suits, pet collars, etc.)
Activity Embedded Assessment
Participation: Make sure each student is participating in the activity by creating his/her own mask.
Why Go Parallel? As you walk around the class, ask students why engineers might arrange light circuitry in parallel instead of in series. (Answer: In parallel, if a light breaks the other lights still work. If a light breaks in series, the other lights will not work.) Also ask the Investigating Questions.
Post-Activity Assessment
Small Group Brainstorming: Divide the class into groups of three or four student each. Assign teams to each make a list of other objects and items that might have parallel circuits. Then, have each group share its list with the class. (Example answers: Lights in a house, appliances, computers, toys, CD players, strings of Christmas tree lights, cell phones.)
Investigating Questions
- How might you add LEDs in a parallel circuit without being in a straight line? How could you extend the traces so that you have LEDs around the eyes while still keeping the parallel circuit design?
- What would happen to our masks if the center LED broke? (Answer: The other LEDs would still light up). Why? (Answer: We made a parallel circuit.)
- Why do engineers make circuits in parallel? (Example answer: To ensure everything continues to light up [electricity continues to flow], even if one component breaks).
Safety Issues
Ask students not to play with the LEDs and battery holders so that they do not break and cause injury.
Troubleshooting Tips
If any LEDs are not illuminating, make sure the stitches are tight. For any that are not tight, have students sew with a bit of conductive thread over the connection point, holding the piece down tighter and making sure that the thread touches both the LED board and the original sewn line.
Watch that students do not inadvertently sew short circuits, which sometimes arise if the thread is loose.
Activity Extensions
Have students create this mask project using more than three LEDs. Explore how bright the LEDs can get while still having room to sew the traces.
Have students make new masks in different shapes, such as animal masks like wolverines or cat ears.
Activity Scaling
- For lower grades, cut out the felt mask shapes before beginning the activity, and have only adults use the hot glue gun(s) with the students giving them instructions about where they want the components placed.
- For higher grades, eliminate the mask template from the provided materials so students must create their own mask shapes. Direct students to draw their circuits onto the felt masks and approve the circuits before distributing LEDs, thread and battery holders.
Subscribe
Get the inside scoop on all things Teach Engineering such as new site features, curriculum updates, video releases, and more by signing up for our newsletter!More Curriculum Like This

Students are introduced to the technology of flexible circuits, some applications and the photolithography fabrication process. They are challenged to determine if the fabrication process results in a change in the circuit dimensions since, as circuits get smaller and smaller (nano-circuits), this c...

Students make design decisions about controlling LEDs in a light-up, e-textile circuit, plush toy project made using LilyPad ProtoSnap components and conductive thread. They follow instructions to assemble a product while applying their own creativity to customize it. In this sewable electronics pro...

Students learn the functions of pre-programmed microcontroller units such as the LilyMini ProtoSnap as they use them to create light-up pennants with LED components. Students design their own felt pennants and sew on circuit components using conductive thread.
References
Activity adapted from SparkFun’s E-Textile Mask activity at https://learn.sparkfun.com/tutorials/e-textile-mask.
Copyright
© 2017 by Regents of the University of Colorado; original © 2014 SparkFun EducationContributors
Angela Sheehan; Sabina SchillSupporting Program
SparkFun EducationLast modified: August 8, 2025


User Comments & Tips