Quick Look
Grade Level: Middle school
Time Required: 1 hour
Expendable Cost: US $2.99
Group Size: 3
Subject Areas: Measurement, Physical Science, Physics, Problem Solving, Science and Technology
Introduction
Bolded words are vocabulary and concepts to highlight with students during the activity.
Let’s begin by moving one finger at a time. (Let students try wiggling their fingers.) As you do this, think about the question: How do your fingers move if they do not have muscles in them? (Let students offer answers.) Try placing your other hand on your forearm while you wiggle your fingers—can you feel the muscles working there? That is because the muscles that control your fingers are actually in your forearm!
Let’s watch a short video of a robotic or prosthetic hand gripping an object. As you watch, ask yourself: What do you notice? What do you wonder? (They might wonder things like: How does it move? What powers it? Does it feel like a real hand?) (Show Reviewing a Bionic Hand!, 11:43 minutes.)
After watching that video, what do you think we need to understand in order to build a working hand ourselves? (Lead brief class discussion. Possible responses: joints, bending, pulling, control systems.)
Now it’s time for your challenge: Today, you are going to become an engineer and build a working finger—and maybe even a full hand—using only simple materials. Your goal is to make it move like your own hand.
Supplies
Each group needs:
- 10 large-diameter plastic straws (15 cm long)
- 10 popsicle sticks (11.5 cm x 1 cm)
- 10 small plastic beads (1 cm)
- 1 wooden paint paddle (or flat wood strip, 30 cm long)
- 1.5 m string or kite string
- tape (black electrical tape or masking tape)
- 1 glue gun and multiple glue gun sticks
- 1 scissors
- 1 saw or strong cutter (for trimming paddle)
- 1–2 bamboo skewers (for guiding string)
- scratch paper, sticky notes, or engineering journal (1 per student)
- writing utensils (1 per student)
For the entire class to share:
- laptop/tablet/computer with internet access and projector (to show YouTube video and Shorts)
Multimedia Resources:
- YouTube Short: Homemade Prosthetic Hand Made Of Paper #ytshorts #science #scienceproject - YouTube
- YouTube Short: DIY Robotic Hand - YouTube
- YouTube video: Reviewing a Bionic Hand! (11:43 minutes)
Subscribe
Get the inside scoop on all things Teach Engineering such as new site features, curriculum updates, video releases, and more by signing up for our newsletter!Procedure
Overview
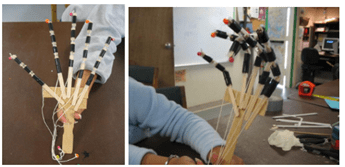
Students explore the mechanical principles behind hand movement by constructing a working model of a human finger and hand. Using popsicle sticks, straws, string, and a paint paddle, they simulate the function of tendons and joints. Through guided construction, they build individual finger segments with joint flexibility and simulate tendon function by threading string through the model. The completed hand allows each finger to bend when its corresponding string is pulled, providing a tangible understanding of biomechanics and mechanical linkages.
Safety
This project uses tools and materials that can result in injury if not used with care. It is important to train students in the correct use of the materials before engaging in the activity. The glue gun and saws should only be used with adult supervision, typically a second person solely tasked with overseeing their use.
During the Activity
Ask (Identify the Problem)
- Read through the Introduction and Motivation section.
- Organize groups of 3-4 students.
- Have students examine and move their own hands.
- Ask them to record their answers to the following questions in their engineering design notebooks or on a piece of paper:
- What parts of their hand move?
- Where do they feel the movement originates?
- What questions do they have about how their fingers move?
- Have students share their ideas in pairs/small groups.
- Compile class observations/questions on the board. (Embedded pre-assessment: Use this discussion to check prior knowledge of anatomy and mechanics.)
Imagine (Brainstorm Solutions)
- Present the design challenge: Using strings, straws, and popsicle sticks, design and build a model of a human hand that mimics the movement of real fingers.
- Introduce the materials and tools available for each group to build their design. (Note: For younger students or those with physical limitations, components may be pre-cut, but the full process should be demonstrated.)
- Have students sketch possible designs in their engineering design notebooks, making sure to label joints, “muscles” (strings), and “bones” (sticks/straws).
Plan (Select and Prepare a Design)
- Have groups share their sketches and then finalize their group-chosen design.
- Have each group explain their design and plan to you before starting construction. (This is the embedded formative check.)
- Optional: Guide students to design their hand prototype similar to the directions below.
Create (Build the Prototype)
- Have each group start by building one finger of their design.
- Optional: Guide students to build one finger using the following directions:
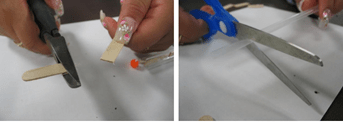
- Cut one Popsicle stick into three pieces, about one-third of the length of a full stick. Cut three pieces of straw slightly shorter than the sticks.
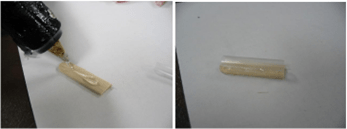
- Glue the pieces of straw to the Popsicle pieces. Put the glue on the Popsicle piece, not the straw, or the straw may melt. Do this to all three pieces.
- Glue all three stick segments onto a full straw. The sticks should be sandwiched between the straws now. Leave a small space in between each segment, so that bending is possible at each joint.
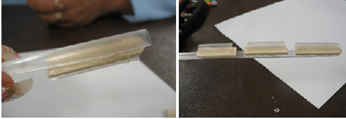
- Trim and glue onto a full-length Popsicle stick. Glue one more straw segment onto the top of the full-length Popsicle stick in line with the other three segments.
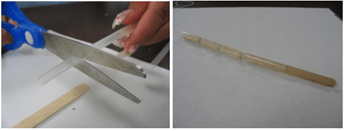
- Tie a bead onto the end of the piece of string. Use the bamboo skewer to thread the other end of the string through all four short straw segments.
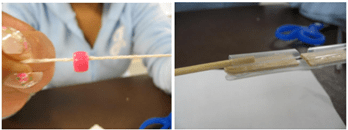
- Tie a bead onto the other end of the string. This is one complete finger.
- Wrap each segment with tape to reinforce the glue. Note: Masking tape works, but black tape looks nice.
- Alternatively, you can just use tape and no glue to avoid burns, but it is harder to hold the small sections in the correct position as you tape them together.
- Pre-bend the finger at each joint.
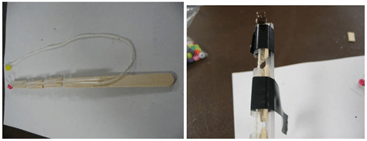
- Have students test their finger design. They should be able to hold the long stick and pull the string to make the finger bend.
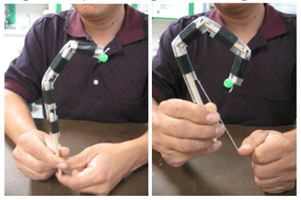
- Once groups have successfully built one finger, given them time to build the rest of the hand.
- Optional: Guide students to build the whole hand using the following directions:
- Cut a paint paddle in half, then one half into two pieces, one about an inch shorter than the other.
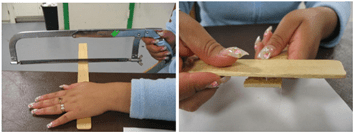
- Glue the larger piece to the top of the full half of the paint paddle to form a T. Glue the smaller piece right underneath it.

- Make three more fingers and a thumb. The thumb has one less segment than the other fingers. Glue the fingers to the paint paddle frame.
- Glue on the thumb more toward the side of the hand. Each finger should move when pulling on its string.

Test (Evaluate the Design)
- Instruct each group to test their whole hand models by pulling strings to mimic motions.
- Optional challenge: Have the students try picking up different objects (cotton ball, pencil, paper clip) and record results in their engineering design notebooks.
Improve (Redesign and Refine)
- Have students reflect on what worked and what did not in their whole hand model.
- Give students time to modify their designs to improve grip, flexibility, or object-holding ability.
Wrap Up - Thought Questions
- How do your fingers move if there are no muscles inside them? (Answer: Tendons pull on bones, controlled by muscles in your hand and forearm.)
- How can we design a mechanical finger that bends like a real one? (Answer: Use straws as joints and string as tendons.)
- What happens if we change the length of the string or segment? (Answer: It affects the range of motion and responsiveness of the finger.)
- Why might engineers want to replicate human motion in robots? (Answer: To assist people with disabilities, build responsive machines, or improve robotic tasks.)
Other potential questions:
- What did you change or improve after testing your design?
- What would you do differently if you had more time or materials?
- How does this activity connect to what engineers do in the real world?
- How could this be useful in real-world applications like robotics or prosthetics?
Other Related Information
This informal learning activity gives students a look into the biomechanics of how our fingers work. It can be argued that the opposable thumb is a physiological advantage that has allowed humans to use tools and develop societies. To take this activity to the next level, have students use the engineering design process to redesign their hand to:
- Incorporate an opposable thumb.
- Integrate a system for pulling the strings to not interfere with picking up objects.
- Pick up a small object.
Copyright
© 2025 by Regents of the University of Colorado; original © 2025 Dr. Darin GrayContributors
Dr. Darin Gray, Ed.D., Director, USC Viterbi K-12 STEM Center, USC Viterbi MESA University Program; Chhavi Kumari, MS, Engineering Management; Jnana Kundur Prakash, MS Business AnalyticsAcknowledgements
This project started as a part of the NSF Community Science Workshops in 1998.
Last modified: November 4, 2025


User Comments & Tips