
Quick Look
Grade Level: 10 (9-11)
Time Required: 45 minutes
Expendable Cost/Group: US $7.00 The activity also uses non-expendable materials such as a digital multimeter, 3D printer, and 3D printed prosthetic hand; see the Materials List for details.
Group Size: 2
Activity Dependency: None
Subject Areas: Computer Science, Data Analysis and Probability, Measurement, Physics, Problem Solving, Science and Technology
Quick Look

- Grade Level:
- 10 (9 – 11)
- Time Required:
- 45 minutes
- Group Size:
- 2
- Subject Areas:
-
Computer Science Data Analysis and Probability Measurement Physics Problem Solving Science and Technology

Summary
In this activity, students apply their newfound knowledge of 3D printing and strain sensors and use it to create their own prototype. Students investigate how to integrate 3D printed strain sensors into a glove and analyze how the sensors work in relation to the feedback that they provide. Students also learn how to measure electrical resistance using a multimeter and apply their knowledge of data analysis track the effectiveness of their prototype.Engineering Connection
Engineers have to construct prototype devices and test them. In addition, engineers have to develop experiments that eliminate extraneous variables and prove the concept that they are working on. Computer engineers and electrical engineers have to figure out how to integrate devices into other objects or systems. By using 3D printing to create a prototype, engineers can collaborate to design a specific product.
Learning Objectives
After this activity, students should be able to:
- Measure electrical resistance.
- Integrate 3D printed strain sensors into a glove.
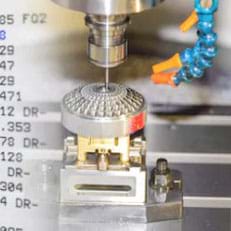
- Utilize a 3D printer to print sensors.
Educational Standards
Each Teach Engineering lesson or activity is correlated to one or more K-12 science,
technology, engineering or math (STEM) educational standards.
All 100,000+ K-12 STEM standards covered in Teach Engineering are collected, maintained and packaged by the Achievement Standards Network (ASN),
a project of D2L (www.achievementstandards.org).
In the ASN, standards are hierarchically structured: first by source; e.g., by state; within source by type; e.g., science or mathematics;
within type by subtype, then by grade, etc.
Each Teach Engineering lesson or activity is correlated to one or more K-12 science, technology, engineering or math (STEM) educational standards.
All 100,000+ K-12 STEM standards covered in Teach Engineering are collected, maintained and packaged by the Achievement Standards Network (ASN), a project of D2L (www.achievementstandards.org).
In the ASN, standards are hierarchically structured: first by source; e.g., by state; within source by type; e.g., science or mathematics; within type by subtype, then by grade, etc.
NGSS: Next Generation Science Standards - Science
-
Analyze data using tools, technologies, and/or models (e.g., computational, mathematical) in order to make valid and reliable scientific claims or determine an optimal design solution.
(Grades 9 - 12)
More Details
Do you agree with this alignment?
-
Use mathematical representations of phenomena to describe explanations.
(Grades 9 - 12)
More Details
Do you agree with this alignment?
-
Models (e.g., physical, mathematical, computer models) can be used to simulate systems and interactions—including energy, matter, and information flows—within and between systems at different scales.
(Grades 9 - 12)
More Details
Do you agree with this alignment?
Common Core State Standards - Math
-
Represent data on two quantitative variables on a scatter plot, and describe how the variables are related.
(Grades
9 -
12)
More Details
Do you agree with this alignment?
-
Summarize, represent, and interpret data on two categorical and quantitative variables
(Grades
9 -
12)
More Details
Do you agree with this alignment?
International Technology and Engineering Educators Association - Technology
-
Students will develop an understanding of the characteristics and scope of technology.
(Grades
K -
12)
More Details
Do you agree with this alignment?
-
Students will develop an understanding of the attributes of design.
(Grades
K -
12)
More Details
Do you agree with this alignment?
-
Students will develop an understanding of engineering design.
(Grades
K -
12)
More Details
Do you agree with this alignment?
Materials List
Each group needs:
- 0.61 m of 30SNSP 30 AWG Magnet Wire, enameled copper wire, 0.274 mm in diameter, available online
- two medium polyester garden gloves, available in hardware stores or online
- LOCTITE Ultra Gel Control 5-gram clear multipurpose adhesive, hardware stories or online
- digital multimeter, available online
- scissors
- permanent marker
- 3D printed prosthetic hand, pre-printed and assembled, available online
To share with the entire class:
- 3D printer; example of the one used for this activity
- filament Proto-Pasta (conductive PLA) - 1.75mm (0.5kg), example online
- soldering iron
- graph paper, or a computer with Microsoft Excel (optional)
Worksheets and Attachments
Visit [www.teachengineering.org/activities/view/mis-2480-constructing-testing-3d-printed-glove-activity] to print or download.Pre-Req Knowledge
The students need to be familiar with how 3D printing works and some of the capabilities of a 3D printer. Students need to know how to use a digital mutimeter and measure electrical resistance. Students should have experience using a soldering iron.
Introduction/Motivation
What do you think about the data sensing glove we discussed? What advantages can a data sensing glove offer? How expensive do you think the data sensing glove is in the following video? (Watch (Show students the video, HANDi Hand Demo with Data Glove by BLINC Lab. This particular model cost about $300 to make. Other than the price, what are the disadvantages of the data sensing glove? Let’s take a look at another video, “This 3D printed cast is revolutionizing how we heal broken bones” by Insider. What do you think about the 3D printed cast? What advantages can a 3D printed cast offer? How expensive do you think the 3D printed cast is in the video? (This prototype is far cheaper at $20.) What are the disadvantages of the 3D printed cast? If the data sensing glove could be 3D printed, then what advantages would be gained? As a class, we are going to take on designing and constructing our own prototype and then we can examine if there are any advantages or disadvantages to our process, just like real engineers!
Procedure
Background
Know how to load a file into a 3D printer and then print the file before beginning this activity.
It is also important to know how to use a digital multimeter to measure resistance. A set of general instructions for the multimeter listed above are as follows: Ensure that there are working batteries in the multimeter. Plug the back cable into the “COM” input and the red cable into the “VΩmA” input. Turn the switch to the “Ω” setting. Your multimeter may have several selections of scale for reading resistance; choose the number closest to the resistance you are measuring. For example, if you are on setting ‘20k’ and are getting a very tiny reading for resistance, change the setting to ‘200’ to see a better reading.
Before the Activity
Note: students may participate in printing the prosthetic hand and strain sensors beforehand.
- Have the 3D prosthetic hand printed and assembled using the files from Thingiverse.
- Have the 3D printed strain sensors printed using the attachment Strain Sensor.stl.
- Make copies of the Data Sensing Glove Lab Worksheet so that every student has a copy.
- Gather materials other materials and set them up at a separate workstation.
With the Students
- Divide the class into groups of two students each. Distribute copies of the Data Sensing Glove Lab Worksheet. Have them follow the steps below (also listed on the worksheet) to complete the activity.
- Construct the strain sensors:
i. Cut the length of wire into eight segments.
ii. Strip about 2.5 cm off each end of every wire segment.
iii. Use the soldering iron to melt the exposed end of the wire into the end of one of the 3D printed sensors.
iv. Repeat this for the other end of the sensor.
v. Repeat this method for the other three sensors.
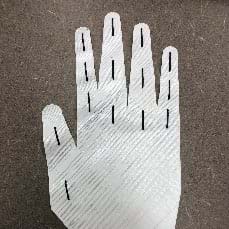
- Construct the data sensing glove:
i. Cut the glove about 2.5 cm below the thumb all the way across.
ii. Attach a conductive PLA sensor to the index finger on the rubberized side of the glove using superglue.
iii. Attach the second conductive PLA sensor to the middle finger on the rubberized side of the glove using superglue.
iv. Label this glove with the permanent market as “PLA”.
v. Make the second glove in the same manner using the ETPU sensors and label the glove as “ETPU”.
- Construct the experimental setup:
i. Put the glove on the 3D printed prosthetic hand with the rubberized side (the side with the sensors) on the back of the hand. (See Figure 1.)
ii. Attach the digital multimeter leads to the wires so that a completed circuit is made.
iii. Record the electrical resistance in the data tables when the sensor is at 0° of bending, 45°, and 90°. (See Figure 2.)
iv. Repeat this process two more times for the same glove, then repeat for the other sensor on the glove.
- After the data has been collected, students will need to graph it using graph paper or in Excel.
- The class will then discuss the graphs and what the results mean in relation to what material would work better in a 3D printed data glove.


Vocabulary/Definitions
3D Printing: The act of creating something using a 3D printer, which works by creating a product by adding material (such as a filament) to a base using a program until the product is finished. 3D printing is the opposite of machining, in which an object is carved out of piece of raw material.
electrical resistance: The measurement of how well electrons flow through a substance.
prosthetic : A device that is used to help a person who is missing a limb and/or appendage.
resolution: The level of detail in a print.
strain sensor: A sensor that detects differences of movement or deformation through changes in electrical resistance.
Assessment
Pre-Activity Assessment
Discussion: Conduct a class discussion at the beginning of the activity (during the Introduction/Motivation section). Ask students the following questions:
- What do you think about the data sensing glove? (Example answer: it looked cool/futuristic)
- What advantages can a data sensing glove offer? (Example answers: allow people to work on things that would be dangerous for them to do in person; allow for virtual physical therapy for hands)
- How expensive do you think the data sensing glove is in the video? (Answer: It is $300)
- Other than the price, what are the disadvantages of the data sensing glove? (Example answers: bulky; delay between human movement and machine movement)
- What do you think about the 3D printed cast? (Example answer: neat design and looked nicer than traditional cast)
- What advantages can a 3D printed cast offer? (Example answers: lightweight, probably cheap)
- How expensive do you think the 3D printed cast is in the video?
- What are the disadvantages of the 3D printed cast? If the data sensing glove could be 3D printed then what advantages would be gained?
Activity Embedded Assessment
Checking in: Circulate around to the different groups while the students are conducting the activity. Make sure that the groups are not hitting any troubles or having any unanswered questions.
Post-Activity Assessment
Graphing: Have students create a graph from the data they have collected in the lab. The students will analyze their graphs and prepare to answer a question in a class discussion. The question will be: “How do we know what the best material, between conductive PLA and ETPU, would be for 3D printing strain sensors that would be integrated into a data sensing glove?”
Investigating Questions
How do we know what the best material, between conductive PLA and ETPU, would be for 3D printing strain sensors that would be integrated into a data sensing glove?
Safety Issues
- Best practices should be followed when using the 3D printer (if available, the soldering iron, and cutting any pieces of wire for the prototypes.
Troubleshooting Tips
Students will need to be precise and careful when gluing the sensors on the glove. They should also not use too much glue and let the glue dry fully before bending the glove.
Additional Multimedia Support
Instructions for a prosthetic hand on Thingiverse.
Subscribe
Get the inside scoop on all things Teach Engineering such as new site features, curriculum updates, video releases, and more by signing up for our newsletter!More Curriculum Like This

Students learn about 3D printing and what considerations to make in the engineering design process to print an object with quality and to scale. Students learn the basic principles of computer-aided design (CAD) and how data points can be turned into a program that operates the 3D printer. Students ...
3D printed sensors are a novel design that can be customized in wearable technology. In this lesson, students are introduced to the concepts of electrical resistance and how it relates to sensors.
Copyright
© 2020 by Regents of the University of Colorado; original © 2019 Michigan State UniversityContributors
Jeff ParksSupporting Program
RET Program, College of Engineering, Michigan State UniversityAcknowledgements
This material is based upon work supported by the National Science Foundation under grant no. CNS-1854985—a Research Experience for Teachers program titled “Multidisciplinary Computational Solutions to Smart Sensors and Sensing Systems” at Michigan State University. Any opinions, findings, and conclusions or recommendations expressed in this material are those of the author and do not necessarily reflect the views of the National Science Foundation.
Last modified: May 16, 2023
User Comments & Tips