
Quick Look

- Grade Level:
- 7 (6 – 8)
- Time Required:
- 6 hours 30 minutes
(7 x 55-minute class periods)
- Group Size:
- 3
- Subject Areas:
-
Science and Technology -
NGSS Performance Expectations:

MS-ETS1-1 MS-ETS1-2
Summary
Students follow the steps of the engineering design process while learning more about assistive devices and biomedical engineering applied to basic structural engineering concepts. Their engineering challenge is to design, build and test small-scale portable wheelchair ramp prototypes for fictional clients. They identify suitable materials and demonstrate two methods of representing design solutions (scale drawings and simple models or classroom prototypes). Students test the ramp prototypes using a weighted bucket; successful prototypes meet all the student-generated design requirements, including support of a predetermined weight.
Engineering Connection
The engineering design process is a widely accepted way of arriving at desirable solutions to identified problems. This activity guides students through the engineering design process steps as they apply basic engineering concepts to real-world design problems. Through the development of assistive devices, students are exposed to the humanitarian nature of engineering.
Learning Objectives
After this activity, students should be able to:
- Identify and describe the steps of the engineering design process.
- Describe how to use the engineering design process to develop solutions to problems.
- Explain the reasons for their selected designs and material choices.
Educational Standards
Each Teach Engineering lesson or activity is correlated to one or more K-12 science,
technology, engineering or math (STEM) educational standards.
All 100,000+ K-12 STEM standards covered in Teach Engineering are collected, maintained and packaged by the Achievement Standards Network (ASN),
a project of D2L (www.achievementstandards.org).
In the ASN, standards are hierarchically structured: first by source; e.g., by state; within source by type; e.g., science or mathematics;
within type by subtype, then by grade, etc.
Each Teach Engineering lesson or activity is correlated to one or more K-12 science, technology, engineering or math (STEM) educational standards.
All 100,000+ K-12 STEM standards covered in Teach Engineering are collected, maintained and packaged by the Achievement Standards Network (ASN), a project of D2L (www.achievementstandards.org).
In the ASN, standards are hierarchically structured: first by source; e.g., by state; within source by type; e.g., science or mathematics; within type by subtype, then by grade, etc.
NGSS: Next Generation Science Standards - Science
| NGSS Performance Expectation | ||
|---|---|---|
|
MS-ETS1-1. Define the criteria and constraints of a design problem with sufficient precision to ensure a successful solution, taking into account relevant scientific principles and potential impacts on people and the natural environment that may limit possible solutions. (Grades 6 - 8) Do you agree with this alignment? |
||
| Click to view other curriculum aligned to this Performance Expectation | ||
| This activity focuses on the following Three Dimensional Learning aspects of NGSS: | ||
| Science & Engineering Practices | Disciplinary Core Ideas | Crosscutting Concepts |
| Define a design problem that can be solved through the development of an object, tool, process or system and includes multiple criteria and constraints, including scientific knowledge that may limit possible solutions. Alignment agreement: | The more precisely a design task's criteria and constraints can be defined, the more likely it is that the designed solution will be successful. Specification of constraints includes consideration of scientific principles and other relevant knowledge that is likely to limit possible solutions. Alignment agreement: | All human activity draws on natural resources and has both short and long-term consequences, positive as well as negative, for the health of people and the natural environment. Alignment agreement: The uses of technologies and any limitations on their use are driven by individual or societal needs, desires, and values; by the findings of scientific research; and by differences in such factors as climate, natural resources, and economic conditions.Alignment agreement: |
| NGSS Performance Expectation | ||
|---|---|---|
|
MS-ETS1-2. Evaluate competing design solutions using a systematic process to determine how well they meet the criteria and constraints of the problem. (Grades 6 - 8) Do you agree with this alignment? |
||
| Click to view other curriculum aligned to this Performance Expectation | ||
| This activity focuses on the following Three Dimensional Learning aspects of NGSS: | ||
| Science & Engineering Practices | Disciplinary Core Ideas | Crosscutting Concepts |
| Evaluate competing design solutions based on jointly developed and agreed-upon design criteria. Alignment agreement: | There are systematic processes for evaluating solutions with respect to how well they meet the criteria and constraints of a problem. Alignment agreement: | |
Common Core State Standards - Math
-
Fluently add, subtract, multiply, and divide multi-digit decimals using the standard algorithm for each operation.
(Grade
6)
More Details
Do you agree with this alignment?
-
Solve problems involving scale drawings of geometric figures, including computing actual lengths and areas from a scale drawing and reproducing a scale drawing at a different scale.
(Grade
7)
More Details
Do you agree with this alignment?
International Technology and Engineering Educators Association - Technology
-
Students will develop an understanding of the attributes of design.
(Grades
K -
12)
More Details
Do you agree with this alignment?
-
Students will develop an understanding of engineering design.
(Grades
K -
12)
More Details
Do you agree with this alignment?
-
Students will develop an understanding of the role of troubleshooting, research and development, invention and innovation, and experimentation in problem solving.
(Grades
K -
12)
More Details
Do you agree with this alignment?
-
Evaluate designs based on criteria, constraints, and standards.
(Grades
3 -
5)
More Details
Do you agree with this alignment?
-
Design involves a set of steps, which can be performed in different sequences and repeated as needed.
(Grades
6 -
8)
More Details
Do you agree with this alignment?
State Standards
Massachusetts - Science
-
Given a design task, identify appropriate materials (e.g., wood, paper, plastic, aggregates, ceramics, metals, solvents, adhesives) based on specific properties and characteristics (e.g., strength, hardness, and flexibility).
(Grades
6 -
8)
More Details
Do you agree with this alignment?
-
Identify and explain the steps of the engineering design process, i.e., identify the need or problem, research the problem, develop possible solutions, select the best possible solution(s), construct a prototype, test and evaluate, communicate the solution(s), and redesign.
(Grades
6 -
8)
More Details
Do you agree with this alignment?
-
Demonstrate methods of representing solutions to a design problem, e.g., sketches, orthographic projections, multiview drawings.
(Grades
6 -
8)
More Details
Do you agree with this alignment?
-
Explain examples of adaptive or assistive devices, e.g., prosthetic devices, wheelchairs, eyeglasses, grab bars, hearing aids, lifts, braces.
(Grades
6 -
8)
More Details
Do you agree with this alignment?
Materials List
Each group needs:
- cardstock strips
- cardboard strips
- cardstock sheets
- plastic drinking straws
- plastic coffee stirrers
- hot glue gun with hot glue sticks
- scissors
- 3 rulers, one per student
- measuring tape
- graph paper and pencils
- Portable Wheelchair Ramp Packet, one per student
- model all-terrain wheelchair prototype created in Off-Road Wheelchair Challenge, for sizing prototype ramp
To share with the entire class (for testing):
- 1 bucket, to hold weights
- 2 7-lb (~3 kg) weights
Worksheets and Attachments
Visit [www.teachengineering.org/activities/view/wpi_empathy_activity3] to print or download.Pre-Req Knowledge
Familiarity with the engineering design process and recognition that the process works in a circular fashion rather than a linear process with a beginning and an end.
Introduction/Motivation

In our last activity, we developed an off-road wheelchair so that our 18-year old client who was once a competitive mountain biker and now confined to a wheelchair, can travel on rough terrain that would otherwise be inaccessible to him/her.
Will our off-road wheelchairs enable our client access to everywhere? (Listen to student responses.) No, other everyday obstacles will stop the wheelchair. One example is stairs.
How do people restricted to wheelchairs usually overcome the problem of stairs? (Answer: They use ramps or take an elevator.) That's right!
In today's activity, we will again use the engineering design process to help us develop a wheelchair ramp for our client. Since we want our client to be able to access as many places as possible, our goal is to design, create and test designs for portable wheelchair ramps.
Procedure
Background
Throughout history, people developed devices to help people with disabilities. These devices have become a benefit to us all. For example, the first typewriter was built in 1808 by Pellegrino Turri with the purpose to help a blind friend write more legibly, and in 1920, Harvey Fletcher developed the first hearing aids, which eventually led to today's public address systems.
Today's assistive devices are as varied as the people who use them. Can you think of any examples of assistive devices? (Possible answers: Wheelchairs, canes, handicap-accessible elevators and ramps, hearing devices, eyeglasses, etc.) Great! Other examples include technology that helps people use computers and other technologies. For example, engineers have designed keyboards with large keys and special mice for people with limited fine motor skills. Software has been designed to read computer screen text in an audible computer-generated voice so that blind people have the same access to information as everyone else. Other devices help people with speech impairments by speaking for them out loud when text is entered on a keyboard. These are just a few examples of the assistive technology that is available today.
Some of the most important assistive devices can be as simple as a ramp. The ADA (Americans with Disabilities Act) provides accessibility guidelines for the construction of ramps in public places, such as a maximum slope of 1:12. Unfortunately, most homes have steps, but no ramps, which can drastically limit a person with a physical disability. A simple web search reveals many companies that have developed portable wheelchair ramps, but they are often heavy and difficult to transport. (As time permits, shows students videos on this topic; see suggestions in the Additional Multimedia Support section.) As our understanding of material science continues to grow, we are able to develop stronger and lighter ways to achieve our goals, even if they are as simple as a portable wheelchair ramp. We are going to design and develop a wheelchair ramp that meets all the needs of our "client." Let's begin!
Before the Activity
- Gather and prepare supplies for the student groups.
- Make copies of the Portable Wheelchair Ramp Packet.
- As pre-activity homework, have students sketch and measure the entrances to their homes with as many details as possible, as described in the Assessment section.
With the Students
- As a class, discuss the idea of a physical disability and assistive devices.
- Have students share some of their home (or school) entrance measurements and details. How would someone with a cane, a walker or a wheelchair navigate each entry (steps, doorways, landings, railings, etc.)?
- Ask: How would you feel if a good friend could no longer visit your home because of the physical layout of its entrance?
- Ask: What if technology could enable your friend to continue to visit your home, and other friends' homes, too?
- Introduce students to the portable wheelchair ramp challenge project.
- Have students describe examples of good friends who visit their homes regularly and the activities that they do when they visit. Have students next imagine that this friend has been injured and no longer can use his/her legs. This friend is the end-user for the design project.
- Hand out the packets to students.
- Read aloud the project introduction and client statement from packet.
- Divide the class into groups of three students each.
- Direct groups to follow the steps of the engineering design process to design and build a small-scale prototype of a portable ramp that can make buildings temporarily handicap accessible. Have them complete the packet as they go along, and use it as a guide for each step of the process.
- As students move through the process, have them conference with the teacher at the following points before moving ahead.
- Identify the need (problem statement, function, constraint, objective)
- Research
- Develop possible solutions (minimum of three)
- Select the best solution
- Blueprint and prototype
- Test and evaluate
- Communicate solutions
- Redesign (future recommendations)
- Have groups begin by completing the definitions for structural engineering, universal design and assistive device on page 1 of the packet. If they are unsure of any definitions, have them use the internet to research those items.
- Identify the need: Have students write problem statements, considering the information provided in the introduction and the client statement in the packet. Have them write paragraphs for each of the following:
- How the wheelchair ramp functions (what it does)
- The objectives for the wheelchair ramp (what it is)
- The constraints (include materials, timeframe, etc.)
- Research: Have students use the internet to research past and present ramp designs, ramp standards and materials, and any other relevant topics. Have them keep records of all relevant information found, as well as website sources.
- Develop possible solutions: Require each group to develop at least three possible designs for their portable wheelchair ramps, documenting them in the packet. Suggest group brainstorming to come up with designs together and/or have students individually draw their own ideas to share with the group.
- Select the best solution: Together as a group, discuss the pros and cons of each design and decide which of the possible three (or more) designs (or a combination of more than one design) is the most promising design solution to meet the objectives and constraints. Remind students to be prepared to explain to the teacher the reasons for their decisions.
- Blueprint and prototype: Have students complete final design drawings that include labeled dimensions and materials. Make the drawings clear enough that another person could readily learn what is needed and how to create the prototypes. Once the final design is complete, use the provided materials to construct the prototype.
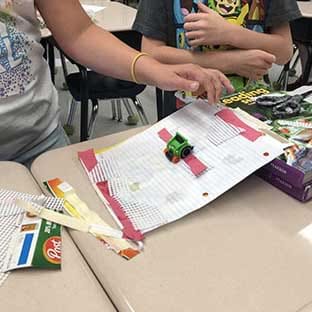
- Test and evaluate: Once student groups have finished building their wheelchair ramp prototypes, have them test how the ramps work. Do this by placing a ramp prototype between two desks. Then have students use the load applicator to apply increasing weights to the prototype. Apply increasing amounts of weight to the middle of the ramp until it holds the minimum required weight (based on the problem statement). Have groups write in their packets paragraphs describing the test and results, as well as evaluations of the results that explain whether the designs were effective and provide reasons.
- Communicate solutions: When groups are ready, have students present their prototypes to the class. Include in the presentation descriptions of how they developed the designs, how the tests went, and prototype evaluations. Have the rest of the class ask questions and offer comments.
- Redesign (future recommendations): Have students finish their packets by writing recommendations on ideas for further research, and what they would improve in a redesign.
- Have students turn in their completed packets for grading.
- As time permits, lead a class discussion to compare results and conclusions.
Vocabulary/Definitions
assistive device: A device designed and constructed to assist people in carrying out tasks. Also called assistive technology devices.
bioengineering: A field of engineering that solves problems related to life sciences by the application of physics, chemistry and mathematics concepts, as well as the engineering design process.
biomedical engineering: A field of engineering that collaborates with doctors, surgeons and other medical professionals to produce technology to promote the lives of patients.
constraint: A limitation or restriction. For engineers, constraints are the limitations that must be considered when designing a workable solution to a problem.
engineering design process: The iterative process through which engineers develop solutions to meet an objective. The steps of the process include: identifying a problem, brainstorming, designing, constructing, testing, analysis and evaluation, redesigning, retesting, and sharing a solution. Science, mathematics and engineering science concepts are applied throughout the process to optimize the solution.
functions: The capabilities or tasks that an engineering solution is able to perform.
objectives: Desired outcomes for an engineering design or product.
problem statement: A sentence or two that describes the identified problem or challenge an engineer or engineering team is working to solve.
prototype: An early functional version (a model, a mock-up) of a design to help move the design process forward by improving the team's understanding of the problem, identifying missing requirements, evaluating design objectives and product features, and getting feedback from others.
requirements: The overall objectives, functions and constraints of a project.
structural engineering: A field of engineering that focuses on the design of structures through using physics and mathematics principles, as well as the engineering design process with the intent to make sure structures are built adequately to support or resist loads, including environmental conditions.
universal design: The concept of designing buildings, products and technologies so that they are accessible to all people regardless of age, physical abilities or status. Universal design takes into account assistive technology considerations as well as aesthetic aspects of design.
Assessment
Pre-Activity Assessment
Real-Life Details: As pre-activity homework, have students sketch the entrances to their homes with as many details as possible. Measure the height of the stairs and doorway openings and the length of the stairs and any landings, and document the dimensions on their drawings. Alternatively, do the same for various entrances to the school.
Class Discussion: Informally evaluate students' prior knowledge about engineering and the engineering design process, assistive technologies and disabilities.
Activity Embedded Assessment
As We Work: During the course of the activity, students work on the Portable Wheelchair Ramp Packet, which serves as formative assessment of their abilities to follow the engineering design process while creating and testing their portable wheelchair ramp prototypes.
Design Drawing and Prototype: Ask students to draw a picture of the ramp that they have chosen to design. The sketch should include dimensions (i.e., length of the ramps). You might want them to include both the real-life dimensions (as if it were to be built at full scale) and the dimensions of the scaled prototype. Examine students' drawings and prototypes to gauge their abilities to demonstrate methods of representing solutions to design problems.
Post-Activity Assessment
Final Documentation: Evaluate students' completed Portable Wheelchair Ramp Packets as summative assessment of their abilities to accurately use the engineering design process to create and test portable wheelchair ramp design prototypes. Evaluate their vocabulary word definitions and answers to other questions to gauge their comprehension of the process and project components. Example answers:
- Problem Statement: The problem our group is working with is that our good friend is confined to a wheelchair and cannot visit our homes, as well as many other places that do not have wheelchair ramps. We aim to solve this problem by creating a portable wheelchair ramp. First we will create a small-scale prototype that should support 25 pounds of weight.
- Function: Our wheelchair ramp should support the weight of our friend and his/her wheelchair, as well as fold up and fit in the trunk of a car. Our small-scale prototype should function as a small-scale version, able to support 25 pounds of weight.
- Objective: Our objective is to design a prototype for a portable wheelchair ramp that can support at least 25 pounds of weight when placed across a space between two desks.
- Constraints: We can use only provided materials and must complete the entire engineering design process for our protytpe in the seven class periods provided.
Final Prototype: Examine students' completed drawings and portable ramp design prototypes to gauge their abilities to demonstrate methods of representing solutions to design problems.
Additional Multimedia Support
Ramps evaluated by wheelchair users; design considerations (YouTube; 5:21 minutes): http://www.youtube.com/watch?v=w9asMwsjKjM
Portable Wheelchair Ramps (YouTube; 7:55 minutes): http://www.youtube.com/watch?v=BNm2zFZreiI
Roll a Ramp System for Wheel Chairs, Scooters & Power Chairs (YouTube; 6:17 minutes): http://www.youtube.com/watch?v=ojzq0SpdsyA
For more videos, search YouTube for "portable ramp" or "rolling portable ramp."
Subscribe
Get the inside scoop on all things Teach Engineering such as new site features, curriculum updates, video releases, and more by signing up for our newsletter!More Curriculum Like This

Students further their understanding of the engineering design process (EDP) while being introduced to assistive technology devices and biomedical engineering. They are given a fictional client statement and are tasked to follow the steps of the EDP to design and build small-scale, off-road wheelcha...

In this maker challenge, students use the engineering design process to design a covering for a portable wheelchair ramp for their school. The design must be easy to use, and allows people to move up the ramp easily and go down slowly.
Students learn more about assistive devices, specifically biomedical engineering applied to computer engineering concepts, with an engineering challenge to create an automatic floor cleaner computer program. Following the steps of the design process, they design computer programs and test them by pr...

Students follow the steps of the engineering design process (EDP) while learning about assistive devices and biomedical engineering. They first go through a design-build-test activity to learn the steps of the cyclical engineering design process. Then, during the three main activities (7 x 55 minute...

References
ADA Wheelchair Ramp Specs. 2012. Mobility-Advisor.com. Accessed November 28, 2012. http://www.mobility-advisor.com/wheelchair-ramp-specs.html
Kaye, H. Stephen, Kang, Taewoon, and LaPlante, Mitchell. Wheelchair Use in the United States, Disability Statistics Center, Abstract 23. May 2002. University of California-San Francisco. Accessed November 28, 2012. http://dsc.ucsf.edu/publication.php
Reinhart, Kevin A. The History of Assistive Technology. 2010. eHow-Health, Demand Media Inc. Accessed March 29, 2011. http://www.ehow.com/about_6802248_history-assistive-technology.html
Storr, Tim, et al. Design Features of Portable Wheelchair Ramps and their Implications for Curb and Vehicle Access. May/June 2004. Journal of Rehabilitation Research & Development. Volume 41, No. 3B, pp. 443-452. Accessed November 28, 2012. (Evaluation of 12 different portable ramps and their different product features; includes photos) http://www.rehab.research.va.gov/jour/04/41/3b/storr.html
Copyright
© 2013 by Regents of the University of Colorado; original © 2011 Worcester Polytechnic InstituteContributors
Jared R. Quinn; Kristen Billiar; Terri CamesanoSupporting Program
Inquiry-Based Bioengineering Research and Design Experiences for Middle-School Teachers RET Program, Department of Biomedical Engineering, Worcester Polytechnic InstituteAcknowledgements
Developed by the Inquiry-Based Bioengineering Research and Design Experiences for Middle-School Teachers RET Program under National Science Foundation Research Experiences for Teachers grant no. EEC 0743037, and collaboration with Overlook Middle School, Ashburnham-Westminster Regional School District, Ashburnham, MA. However, these contents do not necessarily represent the policies of the National Science Foundation, and you should not assume endorsement by the federal government.
Last modified: March 3, 2021
User Comments & Tips