Quick Look
Grade Level: High school; also scalable for middle school
Time Required: 1 hours 30 minutes (wild guess!)
(over two days)
Subject Areas: Physical Science, Physics, Problem Solving, Science and Technology

Maker Challenge Recap
Students work through the engineering design process to design and create their own nano-polymer smartphone or tablet case. Students choose their design, mix their nano-polymer (based in silicone) with starch and add coloring of their choice. While thinking critically about their design, students embed strings in the nano-polymer to optimize both case strength and flexibility. Students may apply strings in a variety of ways in order to maximize their individual design’s potential. Determining the best mixing ratio is also key for success in this challenge.
Maker Materials & Supplies
- silicone (construction silicone will work)
- silicone gun
- silicone pigmenting (liquid coloring works well)
- corn starch or potato starch
- gloves
- braided fishing string, or a similar type of robust string
- scissors
- scalpel
- table cover
- plastic wrap
- aluminum foil
- construction paper (for embossing; the thicker, the better)
- sandpaper (used for smoothing the cases)
- several objects that are the approximate size of a smartphone for students who do not want to model their cases off their actual phones (optional)
Worksheets and Attachments
Visit [www.teachengineering.org/makerchallenges/view/rice-2136-design-nano-polymer-smartphone-case-maker-challenge] to print or download.Subscribe
Get the inside scoop on all things Teach Engineering such as new site features, curriculum updates, video releases, and more by signing up for our newsletter!More Curriculum Like This

Students explore the basic characteristics of polymers through the introduction of two polymer categories: thermoplastics and thermosets. During teacher demos, students observe the unique behaviors of thermoplastics.

Students explore the chemical identities of polymeric materials frequently used in their everyday lives. They learn how chemical composition affects the physical properties of the materials that they encounter and use frequently, as well as how cross-linking affects the properties of polymeric mater...

High school students learn how engineers mathematically design roller coaster paths using the approach that a curved path can be approximated by a sequence of many short inclines. They apply basic calculus and the work-energy theorem for non-conservative forces to quantify the friction along a curve...
Kickoff
Does anyone know what a compound is? (Listen to students answers). A compound is a pure substance composed of two or more different atoms chemically bonded to one another. That means that it can not be separated into its constituents by mechanical or physical means and only can be destroyed by chemical means. A compound is a homogeneous substance. That is, it is same throughout in properties and composition. Compounds also have fixed melting and boiling points.
Nano-polymers, also known as silicones, are any type of synthetic compound made up of a chain of silicon atoms and oxygen atoms and combined with carbon, hydrogen, and other elements. Nano-polymers are widely used in our daily lives. (Question for the class: ask students to give one example of when they may have used silicone in the past.) Because silicones are flexible and durable, one way to use them is to create molds for specific objects. Silicone is also relatively easy to work with as far as adding design elements. Based on what you know about silicone, today’s challenge will be to design an object that projects one of our most valuable pieces of technology: our smartphones!
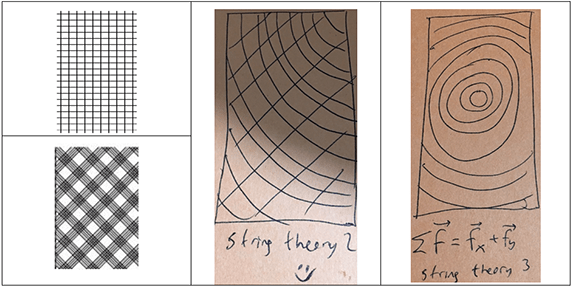
Using silicone, you will mold flexible structures into smartphone case prototypes and embed fishing string either inside the prototypes or on the surface of the case to increase durability of the model. Think critically about the placement of the strings and brainstorm about how they affect the structure’s durability.
Some key concepts while constructing your models are:
- Tension – the pulling force transmitted by each end of an object
- Compression – the application of pushing forces at different points of a material
- Torsion – twisting of an object due to an applied torque
- Shear – when force is applied to a parallel of a material while the other parallel is held in place
- Bending – the behavior of a slender structural element subjected to an external force; also known as flexure
Resources
- Refer to the Engineering Design Process hub on TeachEngineering to guide your students through the challenge.
- As needed, utilize the Engineering Design Process Notebook for engineering process documentation.
- How It's Made - Industrial Wire Ropes - https://www.youtube.com/watch?v=eDVf71xd2cQ
- Concrete screed rail system - Acra Screed - https://www.youtube.com/watch?v=ar03sj-gfyY
- Mold Making & Casting Tutorial - https://www.youtube.com/watch?v=Zs9SBpday84
- Examples to use as guidance are located in the NanoPolymer Maker Challenge album. More examples are located within the Polymer Challenge Visual Guidebook.

Maker Time
Use the following steps as well as the Polymer Challenge Visual Guidebook to guide students through the design process. These steps are intended to help the teacher move the students through building their cases and provide background or pointers in case the students are stuck.
- Step 1: Set a thick, protective cover on the design table; aluminum foil also works well.
- Step 2: Have students to design their structure on paper. Have them partner up or discuss the designs in groups.
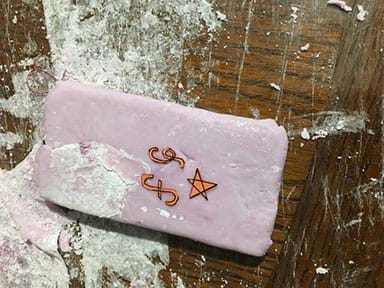
- Step 3: Tell students to design a symbol or initials by cutting out a piece of construction paper (thicker paper works better for embossing the mold.) This design will be pressed on to the back of the mold to personalize their product.
- Step 4: Have students wear gloves and determine if they will use their cell phone (or another object) for the molding. Instruct them to estimate the amount of silicone and starch mixture they will need by calculating the volume of the object.
- Step 5: Wrap the smartphones with one layer of plastic wrap (if the students choose to use their own electronic devices).
- Step 6: Mix the estimated amount of silicone and starch. At this point students can add silicone dye. Add more starch if the mixture is too watery; add more silicone if the mixture is too viscous.
- Step 7: Roll the silicone mixture out into a 1-3 mm thick layer using a cylindrical object like the silicone tube. Sprinkle starch on the silicone mixture to prevent it from sticking.
- Step 8: Place the strings either inside or outside the silicone mixture and then embed them by applying pressure. Ensure sure the strings do not overlap the front edge of the phone as it is a struggle to cut off excess after the molds have cured.
- Step 9: Place the device in the silicone mixture and bend the edges over the sides and front. Using a ruler or flat object to help bend the mixture over the edges will ensure an even surface.
- Step 10: Place the cardboard logo or initial design on the table and press the phone on top of the design to embed it.
- Step 11: Leave it to cure for a minimum of four hours (and up to 12 hours). Preparing the cover in one day and allowing it to cure overnight will produce the best rests. Students can then trim and sand the excessive silicone on the next day.
- Step 12: Cut off the excess pieces and any other pieces that hinder the smartphone buttons.
- Step 13: Use sandpaper to smooth the surface of the now-cured silicone case, if desired. Remove the device carefully and remove the plastic wrap then place the device back in the case, and you’re done! Your personalized smartphone case is ready!
- Instruct students to clean up their areas, properly dispose of unnecessary items, and return tools.
Wrap Up
- Have students share their final product and their designs. Analyze a few different styles.
- Ask them to describe at least three different occasions that they would use this methodology.
- Have students research more about nano-polymers and their bonding chemistry; follow-up with a class discussion.
Tips
Instructors should do the activity on their own beforehand in order to better guide students during the challenge.
Check the freshness of the silicone; do not rely on old stacks in the lab.
For an extended activity, the teacher may want to consider testing the key concepts (torsion, compression, tension, shear, bending) on a test case. This is a great way to include a qualitative analysis in the maker challenge.
Copyright
© 2019 by Regents of the University of Colorado; original © 2018 Rice UniversityContributors
Fatih GozuacikSupporting Program
Nanotechnology RET, Department of Earth Science, School Science and Technology, Rice UniversityAcknowledgements
This material was developed in collaboration with the Rice University Office of STEM Engagement, based upon work supported by the National Science Foundation under grant no. EEC 1406885—the Nanotechnology Research Experience for Teachers at the Rice University School Science and Technology in Houston, TX. Any opinions, findings and conclusions or recommendations expressed in this material are those of the authors and do not necessarily reflect the views of the National Science Foundation or Rice University.
Last modified: November 14, 2024


User Comments & Tips