
Quick Look
Grade Level: 6 (6-8)
Time Required: 3 hours
Two to three days depending on printing time
Expendable Cost/Group: US $15.00 This activity also uses some non-expendable (reusable) items and requires access to a MakerBot 3D printer. See Materials List note for details.
Group Size: 2
Activity Dependency: None
Subject Areas: Science and Technology
NGSS Performance Expectations:

| MS-ETS1-1 |
| MS-ETS1-2 |
| MS-ETS1-4 |
Quick Look

- Grade Level:
- 6 (6 – 8)
- Time Required:
- 3 hours
Two to three days depending on printing time
- Group Size:
- 2
- Subject Areas:
-
Science and Technology -
NGSS Performance Expectations:
MS-ETS1-1 MS-ETS1-2 MS-ETS1-4

Summary
Students use the engineering design process to assemble an electric racer vehicle. After using Tinkercad to design blades for their racers, students print their designs using a MakerBot printer. Once the students finish assembly and install their vehicle’s air blades, they race their vehicles to see which design travels the furthest distance in the least amount of time. A discussion at the end of the activity allows students to reflect on what they learned and to evaluation the engineering design process as a group.Engineering Connection
Throughout this project, students apply various engineering design concepts to design, build, and test a maker racer. Students begin their design by sketching out a plan for their maker racer car. They employ novel technologies in the form of 3D printers to build prototypes and components. Students also reflect on what worked well in the design, what did not, and brainstorm on how to iterate. Just as engineers use the engineering design process to invent and innovate, students have the opportunity to engineer their own unique maker racer while sparking their creativity and collaborating with their partner and groups.
Learning Objectives
After this activity, students should be able to:
- Design and prototype an air car racer.
- Test the racer in a controlled environment.
- Use the 3D modeling software Tinkercad to create blades for their vehicle.
- Print 3D generated blades using a MakerBot printer.
- Apply the engineering design process to their project.
Educational Standards
Each Teach Engineering lesson or activity is correlated to one or more K-12 science,
technology, engineering or math (STEM) educational standards.
All 100,000+ K-12 STEM standards covered in Teach Engineering are collected, maintained and packaged by the Achievement Standards Network (ASN),
a project of D2L (www.achievementstandards.org).
In the ASN, standards are hierarchically structured: first by source; e.g., by state; within source by type; e.g., science or mathematics;
within type by subtype, then by grade, etc.
Each Teach Engineering lesson or activity is correlated to one or more K-12 science, technology, engineering or math (STEM) educational standards.
All 100,000+ K-12 STEM standards covered in Teach Engineering are collected, maintained and packaged by the Achievement Standards Network (ASN), a project of D2L (www.achievementstandards.org).
In the ASN, standards are hierarchically structured: first by source; e.g., by state; within source by type; e.g., science or mathematics; within type by subtype, then by grade, etc.
NGSS: Next Generation Science Standards - Science
| NGSS Performance Expectation | ||
|---|---|---|
|
MS-ETS1-1. Define the criteria and constraints of a design problem with sufficient precision to ensure a successful solution, taking into account relevant scientific principles and potential impacts on people and the natural environment that may limit possible solutions. (Grades 6 - 8) Do you agree with this alignment? |
||
| Click to view other curriculum aligned to this Performance Expectation | ||
| This activity focuses on the following Three Dimensional Learning aspects of NGSS: | ||
| Science & Engineering Practices | Disciplinary Core Ideas | Crosscutting Concepts |
| Define a design problem that can be solved through the development of an object, tool, process or system and includes multiple criteria and constraints, including scientific knowledge that may limit possible solutions. Alignment agreement: | The more precisely a design task's criteria and constraints can be defined, the more likely it is that the designed solution will be successful. Specification of constraints includes consideration of scientific principles and other relevant knowledge that is likely to limit possible solutions. Alignment agreement: | All human activity draws on natural resources and has both short and long-term consequences, positive as well as negative, for the health of people and the natural environment. Alignment agreement: The uses of technologies and any limitations on their use are driven by individual or societal needs, desires, and values; by the findings of scientific research; and by differences in such factors as climate, natural resources, and economic conditions.Alignment agreement: |
| NGSS Performance Expectation | ||
|---|---|---|
|
MS-ETS1-2. Evaluate competing design solutions using a systematic process to determine how well they meet the criteria and constraints of the problem. (Grades 6 - 8) Do you agree with this alignment? |
||
| Click to view other curriculum aligned to this Performance Expectation | ||
| This activity focuses on the following Three Dimensional Learning aspects of NGSS: | ||
| Science & Engineering Practices | Disciplinary Core Ideas | Crosscutting Concepts |
| Evaluate competing design solutions based on jointly developed and agreed-upon design criteria. Alignment agreement: | There are systematic processes for evaluating solutions with respect to how well they meet the criteria and constraints of a problem. Alignment agreement: | |
| NGSS Performance Expectation | ||
|---|---|---|
|
MS-ETS1-4. Develop a model to generate data for iterative testing and modification of a proposed object, tool, or process such that an optimal design can be achieved. (Grades 6 - 8) Do you agree with this alignment? |
||
| Click to view other curriculum aligned to this Performance Expectation | ||
| This activity focuses on the following Three Dimensional Learning aspects of NGSS: | ||
| Science & Engineering Practices | Disciplinary Core Ideas | Crosscutting Concepts |
| Develop a model to generate data to test ideas about designed systems, including those representing inputs and outputs. Alignment agreement: | Models of all kinds are important for testing solutions. Alignment agreement: The iterative process of testing the most promising solutions and modifying what is proposed on the basis of the test results leads to greater refinement and ultimately to an optimal solution.Alignment agreement: | |
International Technology and Engineering Educators Association - Technology
-
Students will develop an understanding of the attributes of design.
(Grades
K -
12)
More Details
Do you agree with this alignment?
-
Students will develop an understanding of engineering design.
(Grades
K -
12)
More Details
Do you agree with this alignment?
-
Students will develop an understanding of the role of troubleshooting, research and development, invention and innovation, and experimentation in problem solving.
(Grades
K -
12)
More Details
Do you agree with this alignment?
-
Evaluate designs based on criteria, constraints, and standards.
(Grades
3 -
5)
More Details
Do you agree with this alignment?
-
Modeling, testing, evaluating, and modifying are used to transform ideas into practical solutions.
(Grades
6 -
8)
More Details
Do you agree with this alignment?
-
Refine design solutions to address criteria and constraints.
(Grades
6 -
8)
More Details
Do you agree with this alignment?
State Standards
North Dakota - Science
-
Design a product or solution to a problem given constraints (e.g., limits of time, costs, materials and environmental factors)
(Grade
6)
More Details
Do you agree with this alignment?
Materials List
Each group needs:
- maker racer kit (via TeacherGeek)
- maker tool set (via TeacherGeek)
- 2 AA batteries
- scissors
- safety goggles
- electrical tape
- duct tape
- PLA Filament, 20 g (via Amazon)
- recyclable materials such as plastic, paper, or aluminum (optional: see note on MakerBot 3D Printer below)
To share with the entire class:
- MakerBot 3D Printer (Note: this activity encourages the use of a 3D printer so students may design and build fins for the air racer. If your school does not have access to a 3D printer or a makerspace in your community, you have the option to build fins out of recycled materials. Refer to the maker racer kit PDF on TeacherGeek for more details.)
- laptop with WiFi to access Tinkercad
- a controlled area for testing
- a stopwatch or tape measure to measure racers during the distance test
- Criteria and Constraints Sheet
- Design Rubric and Worksheet
Worksheets and Attachments
Visit [www.teachengineering.org/activities/view/nds-2337-air-racer-cars-design-tinkercad] to print or download.Pre-Req Knowledge
Students should have a general knowledge of aerodynamics and understand the basic steps of the engineering design process. Students should also have an introduction prior to using Tinkercad.
Introduction/Motivation
Can anyone name a new technology or engineering technique that has only been around for the last 30 years or so? Here is a hint: it has to do with printing. (Allow students to offer up answers.) 3D printing has been around for about three decades, but it’s only been within the last five or ten years that the technology has been made widely accessible. Now, can anyone name a technology that has been around for the last 3000 years? Here’s another hint: it has to do with the planet’s rotation. (Again, allow students to offer up answers.) Indeed, humans have been harnessing wind power for millennia. Wind power is used in a variety of engineering applications, such as generating electricity, extracting water, or moving ships.
In this activity, we are going to combine a relatively new technology (3D printing) with an older, more established engineering application (wind power) to make air car racers! We will use the engineering design process to guide our discovery. Wind turbines harness clean renewable energy and help reduce our dependence on fossil fuels. Using your knowledge of wind turbine blades, 3D printing, and motors, can you create a vehicle that uses wind energy to travel the furthest distance in the shortest period of time?
Procedure
Background
In engineering, the cost of a given material (or materials) influences the overall design. To connect this activity with a real-world scenario, students work within a number of constraints. For example, if a 3D printer is unavailable, a teacher may opt to use recycled materials such as plastic, paper, or aluminum to build the air racer fins or other components. Using these materials, they may still follow the design constraints found within the Criteria and Constraints Sheet.
The propeller design works well in the shape of a wind turbine, and it may be helpful to teach students about aerodynamics and wind blade design before this activity. TeachEngineering contains activities that can provide background information on wind blade design, such as the What a Drag! activity.
This activity uses Tinkercad to design and 3D print the propeller blades. View a Tinkercad tutorial here: https://www.youtube.com/watch?v=60xfIu-lqAs

Engineers employ the design process to solve problems. Each step guides the engineer in researching, developing, and revising a solution. The steps show the circular pattern that engineers follow to improve upon their ideas so they can design best product. For more background on this process, visit the Creative Engineering Design unit on TeachEngineering.
Before the Activity
- This activity will take two or three days and depends on either the 3D printing process or how long it takes to assemble fins from recycled materials. Organize parts from the maker kits based on the number of groups you anticipate per class.
- Set aside some floor space that students will use to test their racer; the more controlled the space, the better.
- Teachers should build a prototype maker racer model so the students can conceptualize the idea of the car and blade design. One example is included in the Maker Racer PowerPoint Presentation.
With the Students
Day 1:
- Explain the summary prompt, on Maker Racer PowerPoint Presentation on Day 1 (see teacher comments on the PowerPoint). Walk through Tinkercad with students. Explain how to see different views, design different shapes and holes, and how the Makerbot prints designs, layer by layer. Use this time to show the video of a Makerbot printing (included in the Maker Racer PowerPoint Presentation).
- Have students design propellers on Tinkercad and print blades outside of class time. (Tinkercad limits blade design options, so ensure students have the right design in Tinkercad.) Note: Printing will take time! Teacher can print propellers outside of class time, or, as an alternative plan, have students build blades out of recycled materials by following the constraints laid out in the Maker Racer PowerPoint Presentation.
Day 2:
- Hand out pre-organized maker racer activity kits to each group. Each kit contains all the necessary materials to construct their maker racer.
- Present a brief overview of new vocabulary terms and explain the maker racer activity using the Maker Racer PowerPoint Presentation.
- Show an example of a maker racer car model and demonstrate how the electric motor powers the car.
- After printing the blades, distribute them along with the Criteria and Constraints Sheet and Design Rubric and Worksheet. Students can then begin building their maker racers by following the design steps on the worksheet.
- Once the cars are built, have students line up their cars and prepare them for racing. The goal is to create a car that will travel the farthest in the shortest amount of time. Choose a set distance and time. Have students evaluate their cars for strengths and weaknesses and record test data.
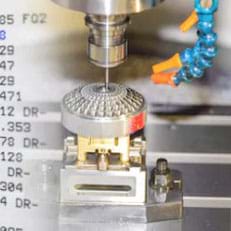
- Students will decide how they need to redesign their racer. They will then draw their redesign, alter their racer, and retest. Figure 1 shows a possible maker racer blade design. The blades should be thin, long, and as light as possible.
- Have students share what worked well, what they changed, and what they learned.

Vocabulary/Definitions
constraint: The limiting factors that come into any design; this may include materials, time, budget, or scope.
criteria: Required specifications in a given design such as size, mass, or material.
iteration: A process by which an engineer evaluates a current design and makes modifications to better suit the criteria, constraints, or to simply improve upon the prototype.
Tinkercad: An application for 3D design, electronics, and coding.
working plane: The platform on which things are built in Tinkercad.
Assessment
Pre-Activity Assessment
Thinking Questions: Ask students the following questions to get them thinking about forces and simple machines.
- Think about things that are pushed by wind (such as feathers, wind turbines, fans). What do they all have in common?
- Can you list any simple machines found in a car? Explain where you would find them in a car.
Activity Embedded Assessment
Reflection and Discussion: Facilitate student reflections on their designs and results. Leading questions include:
- What were some modifications you had to do to your car?
- Why did you design your blades like you did?
- How long did it take for your car to complete the distance?
- Did your redesign modifications improve the time?
Post-Activity Assessment
Rubric: Have students self-assess by completing the Design Rubric and Worksheet. Use the rubric to provide a separate assessment after the self-assessment.
Investigating Questions
- What surface will the cars be raced on?
- Sample Answer: Cars will be raced on a smooth flat surface, such as a tile hallway.
- Can I make any blade I want?
- Sample Answer: Within the restraints of Tinkercad as well as your design constraints, you can design any type of blade you want.
Safety Issues
- Make sure the blades are securely attached to the toothpicks, if they are not the blades could spin off and hit someone.
- Wear safety goggles when cutting materials and when racing vehicles.
- When putting the dowels into the connector strips use caution as they are hard to install.
- The multi-cutter is for cutting the dowels and should not be used as scissors.
Troubleshooting Tips
- Check the leads to make sure they are connected to the motor.
- Make sure the batteries are sitting properly in the holder.
- Check to see if the blades are securely attached to the vehicle.
- Ensure that toothpicks are not interfering with the vehicles moving parts.
- Check that the battery holder is attached securely to the base of the vehicle.
- Before testing, check to make sure all the dowels secure within the connector strips.
- Make sure the wires leading to the battery holder will not get twisted up within the wheels.
Activity Scaling
- For lower grades, design sample blade designs in advance and allow students to choose from the samples.
- For higher grades, students can make more complex designs within Tinkercad and print their designs with limited supervision. Give students more constraints on their design or provide them with a more robust testing challenge.
Additional Multimedia Support
Tinkercad basic tutorial: https://www.youtube.com/watch?v=60xfIu-lqAs
Subscribe
Get the inside scoop on all things Teach Engineering such as new site features, curriculum updates, video releases, and more by signing up for our newsletter!More Curriculum Like This

Students learn about the different types of 3D printers. They focus on Fused Deposition Modeling printing, the parts of 3D printers, how to use CAD software (in particular, OnShape), and complete an engineering challenge (a hook to hold a mass) using 3D printing.

Students learn about 3D printing and what considerations to make in the engineering design process to print an object with quality and to scale. Students learn the basic principles of computer-aided design (CAD) and how data points can be turned into a program that operates the 3D printer. Students ...
Copyright
© 2019 by Regents of the University of Colorado; original © 2018 North Dakota State UniversityContributors
Quenna Beston; Kara Eken; Beth PodollSupporting Program
RET Program, College of Engineering, North Dakota State University FargoAcknowledgements
This curriculum was developed in the College of Engineering’s Research Experience for Teachers: Engineering in Precision Agriculture for Rural STEM Educators program supported by the National Science Foundation under grant no. EEC 1542370. Any opinions, findings, and conclusions or recommendations expressed in this material are those of the authors and do not necessarily reflect the views of the National Science Foundation.
Special thanks to Alan Kallmeyer and Bradley Bowen.
Last modified: July 17, 2023
User Comments & Tips