Quick Look
Grade Level: 5 (4-6)
Time Required: 4 hours 15 minutes
(five 50-minute class periods)
Expendable Cost/Group: US $0.00
Group Size: 3
Activity Dependency: None
Subject Areas: Physical Science, Problem Solving, Science and Technology
NGSS Performance Expectations:

| 3-5-ETS1-1 |
| 3-5-ETS1-2 |
| 3-5-ETS1-3 |
| 5-PS1-3 |
| 5-PS1-4 |
Summary
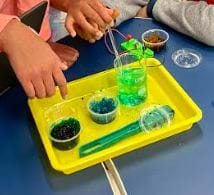
Which properties of matter work best in a particular design? In this activity, students explore the physical properties of matter and experience the engineering design process by designing, creating, and testing gels. Their challenge is to design gels to exhibit a specific property of matter, such as magnetism, conductivity, or high density. In this collaborative, hands-on activity students become engineers who design their own gels as a team.Engineering Connection
Exploring properties of matter and how they can be used in a design is a focus of many engineers, especially chemical and materials engineers. Hydrogels are a specific type of polymeric material used in a variety of applications, including soft contact lenses, hygiene products, and medical dressings. Hydrogels may exist in future applications, and engineers often lead the way in developing designs for new and improved products.
Learning Objectives
After this activity, students should be able to:
- Design mixtures so each mixture displays one specific physical property.
- Test the physical properties of mixtures.
- Describe the physical properties of mixtures.
- Analyze how a mixture could be changed and improved to fulfill a real-life application.
Educational Standards
Each Teach Engineering lesson or activity is correlated to one or more K-12 science,
technology, engineering or math (STEM) educational standards.
All 100,000+ K-12 STEM standards covered in Teach Engineering are collected, maintained and packaged by the Achievement Standards Network (ASN),
a project of D2L (www.achievementstandards.org).
In the ASN, standards are hierarchically structured: first by source; e.g., by state; within source by type; e.g., science or mathematics;
within type by subtype, then by grade, etc.
Each Teach Engineering lesson or activity is correlated to one or more K-12 science, technology, engineering or math (STEM) educational standards.
All 100,000+ K-12 STEM standards covered in Teach Engineering are collected, maintained and packaged by the Achievement Standards Network (ASN), a project of D2L (www.achievementstandards.org).
In the ASN, standards are hierarchically structured: first by source; e.g., by state; within source by type; e.g., science or mathematics; within type by subtype, then by grade, etc.
NGSS: Next Generation Science Standards - Science
| NGSS Performance Expectation | ||
|---|---|---|
|
3-5-ETS1-1. Define a simple design problem reflecting a need or a want that includes specified criteria for success and constraints on materials, time, or cost. (Grades 3 - 5) Do you agree with this alignment? |
||
| Click to view other curriculum aligned to this Performance Expectation | ||
| This activity focuses on the following Three Dimensional Learning aspects of NGSS: | ||
| Science & Engineering Practices | Disciplinary Core Ideas | Crosscutting Concepts |
| Define a simple design problem that can be solved through the development of an object, tool, process, or system and includes several criteria for success and constraints on materials, time, or cost. Alignment agreement: | Possible solutions to a problem are limited by available materials and resources (constraints). The success of a designed solution is determined by considering the desired features of a solution (criteria). Different proposals for solutions can be compared on the basis of how well each one meets the specified criteria for success or how well each takes the constraints into account. Alignment agreement: | People's needs and wants change over time, as do their demands for new and improved technologies. Alignment agreement: |
| NGSS Performance Expectation | ||
|---|---|---|
|
3-5-ETS1-2. Generate and compare multiple possible solutions to a problem based on how well each is likely to meet the criteria and constraints of the problem. (Grades 3 - 5) Do you agree with this alignment? |
||
| Click to view other curriculum aligned to this Performance Expectation | ||
| This activity focuses on the following Three Dimensional Learning aspects of NGSS: | ||
| Science & Engineering Practices | Disciplinary Core Ideas | Crosscutting Concepts |
| Generate and compare multiple solutions to a problem based on how well they meet the criteria and constraints of the design problem. Alignment agreement: | Research on a problem should be carried out before beginning to design a solution. Testing a solution involves investigating how well it performs under a range of likely conditions. Alignment agreement: At whatever stage, communicating with peers about proposed solutions is an important part of the design process, and shared ideas can lead to improved designs.Alignment agreement: | Engineers improve existing technologies or develop new ones to increase their benefits, to decrease known risks, and to meet societal demands. Alignment agreement: |
| NGSS Performance Expectation | ||
|---|---|---|
|
3-5-ETS1-3. Plan and carry out fair tests in which variables are controlled and failure points are considered to identify aspects of a model or prototype that can be improved. (Grades 3 - 5) Do you agree with this alignment? |
||
| Click to view other curriculum aligned to this Performance Expectation | ||
| This activity focuses on the following Three Dimensional Learning aspects of NGSS: | ||
| Science & Engineering Practices | Disciplinary Core Ideas | Crosscutting Concepts |
| Plan and conduct an investigation collaboratively to produce data to serve as the basis for evidence, using fair tests in which variables are controlled and the number of trials considered. Alignment agreement: | Tests are often designed to identify failure points or difficulties, which suggest the elements of the design that need to be improved. Alignment agreement: Different solutions need to be tested in order to determine which of them best solves the problem, given the criteria and the constraints.Alignment agreement: | |
| NGSS Performance Expectation | ||
|---|---|---|
|
5-PS1-3. Make observations and measurements to identify materials based on their properties. (Grade 5) Do you agree with this alignment? |
||
| Click to view other curriculum aligned to this Performance Expectation | ||
| This activity focuses on the following Three Dimensional Learning aspects of NGSS: | ||
| Science & Engineering Practices | Disciplinary Core Ideas | Crosscutting Concepts |
| Make observations and measurements to produce data to serve as the basis for evidence for an explanation of a phenomenon. Alignment agreement: | Measurements of a variety of properties can be used to identify materials. (Boundary: At this grade level, mass and weight are not distinguished, and no attempt is made to define the unseen particles or explain the atomic-scale mechanism of evaporation and condensation.) Alignment agreement: | Standard units are used to measure and describe physical quantities such as weight, time, temperature, and volume. Alignment agreement: |
| NGSS Performance Expectation | ||
|---|---|---|
|
5-PS1-4. Conduct an investigation to determine whether the mixing of two or more substances results in new substances. (Grade 5) Do you agree with this alignment? |
||
| Click to view other curriculum aligned to this Performance Expectation | ||
| This activity focuses on the following Three Dimensional Learning aspects of NGSS: | ||
| Science & Engineering Practices | Disciplinary Core Ideas | Crosscutting Concepts |
| Conduct an investigation collaboratively to produce data to serve as the basis for evidence, using fair tests in which variables are controlled and the number of trials considered. Alignment agreement: | When two or more different substances are mixed, a new substance with different properties may be formed. Alignment agreement: | Cause and effect relationships are routinely identified, tested, and used to explain change. Alignment agreement: |
State Standards
Texas - Science
-
collect, record, and analyze information using tools, including calculators, microscopes, cameras, computers, hand lenses, metric rulers, Celsius thermometers, prisms, mirrors, pan balances, triple beam balances, spring scales, graduated cylinders, beakers, hot plates, meter sticks, magnets, collecting nets, and notebooks; timing devices, including clocks and stopwatches; and materials to support observations of habitats or organisms such as terrariums and aquariums; and
(Grade
5)
More Details
Do you agree with this alignment?
-
identify changes that can occur in the physical properties of the ingredients of solutions such as dissolving salt in water or adding lemon juice to water.
(Grade
5)
More Details
Do you agree with this alignment?
Materials List
Each individual needs:
- laptop/computer
Each group needs:
- box of food coloring
- set of measuring spoons
- set of measuring cups
- stirring spoon or stirring rod
- mixing bowl
- glass beaker
For the entire class to share:
- 1 lb. of sodium polyacrylate, available from Amazon (optional)
- Small plastic cups or portion cups
- Some of the following: (Note: These materials are used in the Create section of the investigation. Because the creation of the gels is an inquiry-based, student-led activity, the students themselves will decide which of those materials to use when they create their gels. Each group's gel will be different, and will likely contain some different ingredients, based on the plans that each group makes for their gels.)
- gel toothpaste
- gel hand sanitizer
- hair styling gel
- salt
- iron filings
- baking soda
- cornstarch
- flour
- sugar
- vinegar
- lemon juice
- vegetable oil
- miniature marshmallows
- magnets
- flashlight
- circuit materials, such as wires, battery, and a load (optional)
- access to a refrigerator and/or freezer
- chart paper or a dry erase board (for class responses)
- colored pencils
- plain white paper
Worksheets and Attachments
Visit [www.teachengineering.org/activities/view/uot-2766-gel-engineering-mixture-solution-activity] to print or download.Pre-Req Knowledge
Students should have a basic knowledge of:
- the three basic states of matter
- the physical properties of matter
- mixtures and solutions
Introduction/Motivation
What is an engineer? What is engineering? In this activity, let’s encourage each other to take a risk by suggesting answers even though they aren’t sure!
(Project the Gel Engineering Journal in presentation mode.) This journal is shared with each of you so you will have your own copy to work with. In slide 3, we have a short list of things engineers design, improve upon, or help problem solve. What specific things might engineers design and/or create that are not on this list? Remember to be open-minded and think outside of the box.
(Jot the student responses on chart paper or a dry erase board under the heading “What do engineers design?”)
Now that we have some ideas written down about what engineers do, let’s talk about who can become an engineering. Based on this description in the slides, what does it take to be an engineer?
In this activity, we are going to discover a little bit about the engineering design process and learn what it takes to be an engineer. You might be surprised by this fact: anyone can do engineering! While engineers have specific roles, engineering is about problem solving and learning from failure. We’re going to work through the engineering design process to learn how to design a particular type of gel used in a variety of applications.
How Does Engineering Happen? (Go to the TeachEngineering: The Engineering Design Process webpage and show its video clip to the class. As a class, read and discuss the Engineering Process diagram on slide 5. Now, let’s look at the table of contents: What do you notice? What does this mean for our activity? Let’s get started by asking more questions and researching our problem!
Procedure
Before the Activity
- Collect the materials for the activity and have them ready for student use.
- Be prepared to divide students in groups of 4 – 5.
- Share the Gel Engineering Journal with students, so that every student will have his or her own copy to work in.
- Prepare to project the Gel Engineering Journal in presentation mode, with slide 3, “What is Engineering?” being the first slide to show.
- Prepare chart paper or a dry erase board for class responses.
- Place samples of gel toothpaste, gel hand sanitizer, hair styling gel, and/or other types of gel products, into small plastic cups or portion cups – One set per student group.
With the Students
Day 1: Ask
Part 1: Introduction to the Engineering Design Process
- Tell the students that today they are going to become engineers of gels. Ask the class, “What is an engineer?” and “What is engineering?” Encourage students to take a risk by suggesting answers even though they aren’t sure.
- Project the Gel Engineering Journal in presentation mode.
- Tell the students that this journal has been shared with each of them so they will have their own copy to work with.
- Go to slide 3 and read the slide’s title, “What is Engineering?”
- Have a student volunteer read the response to the prompt.
- Lead the class to brainstorm specific things that engineers might design and create that are not on that list.
- Encourage students to be open-minded and think outside of the box.
- Jot the student responses on chart paper or a dry erase board under the heading “What do engineers design?”
- Show slide 4 and read its title, “Who Becomes an Engineer?”
- Have a volunteer read the description of who becomes an engineer.
- Have additional volunteers read the names of the individual student engineers in the photographs.
- Show slide 5 and read its title “How Does Engineering Happen?” Go to the TeachEngineering: The Engineering Design Process webpage and show its video clip to the class.
- As a class, read and discuss the Engineering Process diagram on slide 5.
- Click on the Table of Contents and ask students what they notice. (They will notice that the contents reflect the engineering design process.
- Ask them what that means for what they are going to do. Students will deduce that they will use the design engineering method.)
Part 2: Ask
- Put the students in their groups and have each student open their digital Gel Engineering Journal.
- Tell students to go to the “Ask” slide.
- Give each student group their prepared gel samples.
- Review the “Ask” slide questions with students and tell them to respond to those questions after observing and discussing the gels with their teammates.
- As a class, discuss student responses to the questions on the “Ask” slide. For example, ask students if gels fit the criteria for one of the three states of matter. (Students will describe how a gel acts like a liquid in some ways, and like a solid in other ways. You can share that a gel is a special type of solution called a colloid, in which a liquid is dissolved within a solid.)
- Tell the class that this week, students are going to be designing, creating, and improving (that is, engineering) gels of their own.
Day 2: Research and Imagine
Part 1: Research
- Project the Gel Engineering Journal, slide 5.
- Review the engineering design process with the class.
- Remind students that they are going to be designing gels this week.
- Ask, “Why might real engineers design gels?” Take student responses, then tell the class that their engineering design process continues with research.
- Tell students, they are going to research different real-life uses for gels. Each group is responsible for finding five.
- Have students use the school’s approved online research resources to find real-life applications.
- Have students write their responses in complete sentences on the research section of their Gel Engineering Journals. If they need to duplicate the slide to add more information, that is fine.
- Have student groups share out the applications they discovered with the class.
Part 2: Imagine
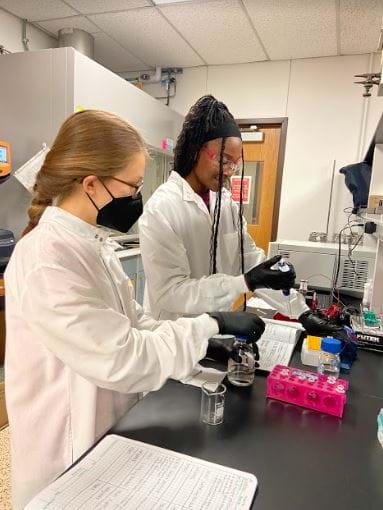
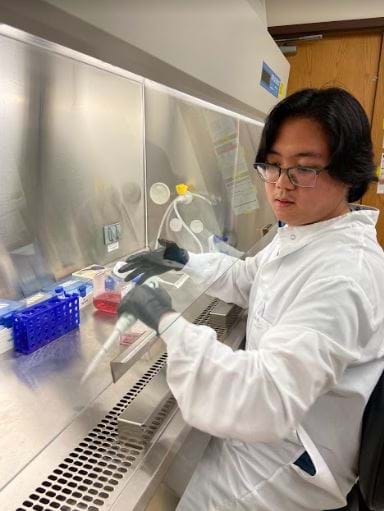
- Tell students that based on their research, what do they imagine they could get a gel to do? What is a new application that no one has thought of before?
- Encourage students to think outside of the box, and not be afraid of coming up with an idea that might not work.
- Tell students they only need to come up with one idea, and it can be their own idea or the same idea as others in their group.
- Have students write the idea in a complete sentence in the Imagine slide of their Gel Engineering Journal.
- Have students use colored pencils to draw a colored sketch of their idea on a piece of white paper. They should then use their computer to take a picture of that illustration and upload it onto their Imagine slide. Give students a few minutes to informally go to students in other groups and share their ideas.
Day 3: Plan
Part 1:
- Tell students that in small groups they are going to plan a design for three different gels. Each gel is going to be made to exhibit one of the physical properties we’ve learned about in science. For example, one group might make a gel that has a lesser relative density than water. How would they do that? (Don’t take any answers, as that could be someone’s actual design.)
- Brainstorm other possibilities as a class, including being a conductor of electricity, being attracted to a magnet, becoming totally solid, becoming brittle, being able to reflect or refract light, etc.
- Solicit other examples of physical properties that students could manipulate with gels.
- Tell students that is what they are going to plan as a team today. First, they must choose three physical properties for the gel to exhibit, each using a different gel. They should record this on the slides for gels 1, 2 and 3.
- Next, they must plan how they will create the gel to be able to exhibit that physical property.
- Show students the materials they have available to work with.
- Tell them that engineers operate within the constraints of the materials they have available.
- Tell students that their constraints are the materials they have available today.
- Tell them they can use the package directions for the gelatin or the sodium polyacrylate as needed in the creation of their gels.
- For sodium polyacrylate, the only guideline is to add water and stir. The amount of water will vary based on the amount of sodium polyacrylate and the other ingredients involved, so students will need to determine the amount of sodium polyacrylate and water to mix themselves.
- Tell students that they should add a different color food coloring to each gel type, to easily keep track of which gel is which.
- In their Gel Engineering Journal, students should write a materials list and a procedure for each of the three gels they will design.
Day 4: Create and Reflect
Part 1: Create
- Today students are going to use their materials and procedures to create their gels. This will be a student-driven process with the teacher providing guidance on behavior and doing the heating of gels for students, as necessary, as elementary students should not be directly working with heat.
- Each separate gel design will go into a separate plastic cup. Remind them to use the correct color for each gel.
- Students should take turns doing the hands-on portion of the activity, and jotting down observations of expected or unexpected things that happened during the process.
Part 2: Reflect
- When the gels have all been created, students should share observations of the physical properties of their gel and get all of their observations in their notes.
Day 5: Test and Improve
Part 1: Test
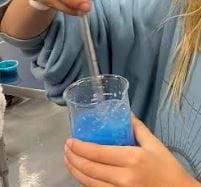
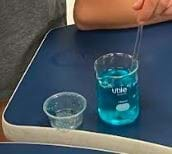
- Students use their gels and the other classroom materials as needed to test the physical properties of their gels. This is another student-driven process, in which the teacher’s main function is to manage behavior and respond to student inquiries. The procedure for testing will depend on which physical property the gel will express. For example, if the students wanted to create a gel that is less dense than water, then they need to put their gel into a container of water and see if it floats. If the students wanted to create a gel firm enough to support a 100-gram weight, then they need to place a 100-gram weight on top of their gel and see if it is supported."
- For each gel test, students should write down their observations of how the gel responded to the test. They should discuss their observations as a group, and also analyze why they think those results occurred.

Part 2: Improve
- Tell students that now they are going to do what real engineers do, and use the results of their hands-on experiments to plan an improvement on what they made.
- Ask student groups to discuss and analyze which gel seems to have the most potential for a real-life application? They should record this in Improve Part 1 of their Gel Engineering Journals on slides 15, 16, and 17, which say "Observations of the Test Results".
- Tell students to explore the possibilities of how they could improve that gel to make it able to fulfill that real-life application.
- Tell students that for this plan for improvement, they are not limited by what materials they have in the classroom.
- Students should collaborate on how to improve their gels to fulfill a real-life application, and record their reflections about this on Improve Part 2 in their Gel Engineering Journals.
- Activity Exit Ticket: Have students take the Making Sense Assessment.
Vocabulary/Definitions
circuit: A complete path through which electricity can flow.
conductor: A material that allows heat and/or electricity to flow.
gel: A type of mixture that has some properties of a liquid and some properties of a solid.
mass: A measurement of how much matter is in something.
mixture: A substance made by mixing two or more substances together; you might be able to tell the substances apart.
physical properties: A characteristic of a substance that can be observed or measured.
relative density: A measure of the density of a material, which compares one object’s density to another.
solution: A mixture of two or more substances that stays evenly mixed and you cannot tell the substances apart.
state of matter: One of the distinct forms in which matter can exist.
Assessment
All assessments are organically embedded within the student Gel Engineering Journal.
Pre-Activity Assessment
The pre-assessment takes the form of student responses in the Ask section of their Gel Engineering Journal. This pre-assessment gauges their existing understanding of physical properties, states of matter, mixtures and solutions.
Activity Embedded (Formative) Assessment
The formative assessment takes the form of student responses in the Research, Imagine, and Create sections of their Gel Engineering Journals. This will allow you to gauge each student’s level of participation and understanding.
Post-Activity (Summative) Assessment
The performance-based summative assessment takes the form of student responses in the Test and Improve sections of their Gel Engineering Journals. These reflective responses will include their understanding of the physical properties of their gels, and require them to utilize the design engineering process.
Making Sense Assessment: Have students complete the Making Sense Assessment.
Investigating Questions
- What are physical properties that most gels seem to share? (Answer: Gels are semi-solid and smooth. Because there are many types of gels, other physical properties such as color, scent, hardness, density and conductivity are going to vary from gel to gel.)
- Is a gel a mixture or a solution? (Answer: A gel is a solution because it has a homogeneous composition, meaning that every part of the gel has the same composition and characteristics.)
- Do gels fit the criteria for one of the three states of matter? Why or why not? (Answer: Gels do not fit the criteria for one of the three states of matter because it combines properties of both a solid and a liquid. It is a hybrid state of matter known as a colloid.)
- How can a gel be designed to exhibit a specific physical property? (Answer: You have decided which physical property you want the gel to exhibit. You look at the materials that are available to work with, and discuss which materials would be best to use to try to create this type of gel. Then you decide what quantities of each material you want to use, and in what order you are going to mix them. Decide how you will know if the physical property was achieved. For example, if you want your gel to be firm enough to support a certain amount of weight, how much weight should it be able to support?)
- How can a gel be designed to fulfill a specific real-life application? (Answer: You have researched current real-life applications of gels. With that information in mind, you can brainstorm and discuss with your group what properties a gel would have to exhibit to fulfill that function. You would then design a gel that would exhibit those properties. Because we are only beginning the engineering process in the classroom, you should only focus on one single property for your gel to express.)
Safety Issues
- Gelatin and sodium polyacrylate are non-toxic. Nevertheless, students should wash their hands after working with them.
- Circuit safety should be reviewed with the class before allowing groups to test the electrical insulation or conduction of their gels using circuit materials. No liquids should be used for circuit testing.
Troubleshooting Tips
Because this is a student inquiry lesson in which students design gels and choose which physical properties to test, not every group will use the exact same materials or procedure to create and test their gels.
Remind students that in real life, engineers are constrained by the materials they have available. Likewise, as student engineers they are constrained by the materials that are available to them at school.
Activity Extensions
Student groups create the new and improved gels that they wrote about in the Improve section of their Gel Engineering Journals. They test those improved gels to see if they actually fulfill the anticipated real-life applications.
Only allow students to design and test for conductivity if they have already learned about circuits and conductivity. For students testing conductivity, they will use a battery, a load (such as a lightbulb) and three wires to test the conductivity of the gels. Clamps can also be used, but are optional. It is ideal for students to figure out for themselves how to test the conductivity of the gel. Here is one procedure for conductivity testing: Students will touch or attach one wire to the positive pole of the battery and one wire to the negative pole of the battery. They will touch or attach the other end of the first wire to a lightbulb, and insert the other end of the second wire into the gel. The third wire should have one end inserted into the gel, and the other end should touch or be attached to the lightbulb. If the gel is a conductor, the lightbulb will light up.
Activity Scaling
Special needs students, who require modifications to be able to participate in this activity, can respond in their Gel Engineering Journals via drawings and photographs rather than in words.
Subscribe
Get the inside scoop on all things Teach Engineering such as new site features, curriculum updates, video releases, and more by signing up for our newsletter!More Curriculum Like This

This lesson plan introduces students to the properties of mixtures and solutions. It includes teacher instructions for a class demonstration that gives students the chance to compare and contrast the physical characteristics of some simple mixtures and solutions.
Copyright
© 2023 by Regents of the University of Colorado; original © 2022 University of Texas at AustinContributors
Elizabeth Schuster; Kathleen Halwachs; Cecilia Osornio; Risa HartmanSupporting Program
Research Experience for Teachers (RET), The Material Science and Engineering Department, University of Texas at AustinAcknowledgements
This curriculum was developed under National Science Foundation RET grant no. DMR-1720595— Center for Dynamics and Control of Materials at the University of Texas at Austin. Any opinions, findings, and conclusions or recommendations expressed in this material are those of the authors and do not necessarily reflect the views of the National Science Foundation.
Last modified: October 26, 2023


User Comments & Tips