Quick Look
Grade Level: 4 (3-5)
Time Required: 8 hours 15 minutes
(ten 50-minute sessions)
Expendable Cost/Group: US $8.00
Group Size: 4
Activity Dependency: None
Subject Areas: Measurement, Number and Operations, Physical Science, Problem Solving, Reasoning and Proof, Science and Technology
NGSS Performance Expectations:

| 3-5-ETS1-1 |
| 3-5-ETS1-2 |
| 3-5-ETS1-3 |
Summary
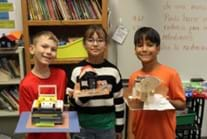
Students become fairy tale engineers as they explore the classic tale of The Three Little Pigs through the lens of design and testing. After reading and comparing The Three Little Pigs and The True Story of the 3 Little Pigs, students work in teams to build three model houses using straws, popsicle sticks, and LEGO bricks. They then test the strength of each house by using a leaf blower to simulate the "huff and puff" of the Big Bad Wolf, while measuring wind speed with an anemometer. Students apply engineering principles to investigate which materials provide the most structural strength and learn how real-world engineers use testing and data to improve designs.Engineering Connection
Civil engineering is the type of engineering that involves designing and building important structures such as roads, bridges, homes, and schools. A specialized field within civil engineering is called structural engineering. Structural engineers make sure that buildings and other structures are strong, safe, and able to stand up to things like wind, rain, and people using them. They carefully choose the right materials and design the best way to build things so they do not break or fall down.
Learning Objectives
After the activity, students should be able to:
- Describe and apply the steps of the engineering design process—including asking questions, researching, imagining, planning, creating, testing, and improving—to solve a real-world problem.
- Investigate and compare the strength and stability of different building materials (straw, popsicle sticks, LEGO bricks) by constructing models and testing them against simulated wind forces.
- Test data, identify weaknesses in their designs, and apply engineering reasoning to improve their prototypes, demonstrating iterative design and critical thinking.
- Work collaboratively in teams to plan, build, test, and improve their structures, and effectively communicate their design process, test results, and reflections through presentations and discussions.
Educational Standards
Each TeachEngineering lesson or activity is correlated to one or more K-12 science,
technology, engineering or math (STEM) educational standards.
All 100,000+ K-12 STEM standards covered in TeachEngineering are collected, maintained and packaged by the Achievement Standards Network (ASN),
a project of D2L (www.achievementstandards.org).
In the ASN, standards are hierarchically structured: first by source; e.g., by state; within source by type; e.g., science or mathematics;
within type by subtype, then by grade, etc.
Each TeachEngineering lesson or activity is correlated to one or more K-12 science, technology, engineering or math (STEM) educational standards.
All 100,000+ K-12 STEM standards covered in TeachEngineering are collected, maintained and packaged by the Achievement Standards Network (ASN), a project of D2L (www.achievementstandards.org).
In the ASN, standards are hierarchically structured: first by source; e.g., by state; within source by type; e.g., science or mathematics; within type by subtype, then by grade, etc.
NGSS: Next Generation Science Standards - Science
| NGSS Performance Expectation | ||
|---|---|---|
|
3-5-ETS1-1. Define a simple design problem reflecting a need or a want that includes specified criteria for success and constraints on materials, time, or cost. (Grades 3 - 5) Do you agree with this alignment? |
||
| Click to view other curriculum aligned to this Performance Expectation | ||
| This activity focuses on the following Three Dimensional Learning aspects of NGSS: | ||
| Science & Engineering Practices | Disciplinary Core Ideas | Crosscutting Concepts |
| Define a simple design problem that can be solved through the development of an object, tool, process, or system and includes several criteria for success and constraints on materials, time, or cost. Alignment agreement: | Possible solutions to a problem are limited by available materials and resources (constraints). The success of a designed solution is determined by considering the desired features of a solution (criteria). Different proposals for solutions can be compared on the basis of how well each one meets the specified criteria for success or how well each takes the constraints into account. Alignment agreement: | People's needs and wants change over time, as do their demands for new and improved technologies. Alignment agreement: |
| NGSS Performance Expectation | ||
|---|---|---|
|
3-5-ETS1-2. Generate and compare multiple possible solutions to a problem based on how well each is likely to meet the criteria and constraints of the problem. (Grades 3 - 5) Do you agree with this alignment? |
||
| Click to view other curriculum aligned to this Performance Expectation | ||
| This activity focuses on the following Three Dimensional Learning aspects of NGSS: | ||
| Science & Engineering Practices | Disciplinary Core Ideas | Crosscutting Concepts |
| Generate and compare multiple solutions to a problem based on how well they meet the criteria and constraints of the design problem. Alignment agreement: | Research on a problem should be carried out before beginning to design a solution. Testing a solution involves investigating how well it performs under a range of likely conditions. Alignment agreement: At whatever stage, communicating with peers about proposed solutions is an important part of the design process, and shared ideas can lead to improved designs.Alignment agreement: | Engineers improve existing technologies or develop new ones to increase their benefits, to decrease known risks, and to meet societal demands. Alignment agreement: |
| NGSS Performance Expectation | ||
|---|---|---|
|
3-5-ETS1-3. Plan and carry out fair tests in which variables are controlled and failure points are considered to identify aspects of a model or prototype that can be improved. (Grades 3 - 5) Do you agree with this alignment? |
||
| Click to view other curriculum aligned to this Performance Expectation | ||
| This activity focuses on the following Three Dimensional Learning aspects of NGSS: | ||
| Science & Engineering Practices | Disciplinary Core Ideas | Crosscutting Concepts |
| Plan and conduct an investigation collaboratively to produce data to serve as the basis for evidence, using fair tests in which variables are controlled and the number of trials considered. Alignment agreement: | Tests are often designed to identify failure points or difficulties, which suggest the elements of the design that need to be improved. Alignment agreement: Different solutions need to be tested in order to determine which of them best solves the problem, given the criteria and the constraints.Alignment agreement: | |
-
SEP.2.3-5.4.
Define a simple design problem that can be solved through the development of an object, tool, process, or system and includes several criteria for success and constraints on materials, time, or cost.
(Grades 3 - 5)
More Details
Do you agree with this alignment?
-
SEP.3.3-5.3.
Use evidence (e.g., measurements, observations, patterns) to construct an explanation.
(Grade 4)
More Details
Do you agree with this alignment?
-
SEP.3.3-5.4.
Apply scientific ideas to solve design problems.
(Grade 4)
More Details
Do you agree with this alignment?
-
SEP.7.3-5.2.
Make observations and/or measurements to produce data to serve as the basis for evidence for an explanation of a phenomenon or test a design solution.
(Grade 3)
More Details
Do you agree with this alignment?
Common Core State Standards - Math
-
Find the area of a rectangle with whole-number side lengths by tiling it, and show that the area is the same as would be found by multiplying the side lengths.
(Grade
3)
More Details
Do you agree with this alignment?
-
Solve real world and mathematical problems involving perimeters of polygons, including finding the perimeter given the side lengths, finding an unknown side length, and exhibiting rectangles with the same perimeter and different areas or with the same area and different perimeters.
(Grade
3)
More Details
Do you agree with this alignment?
-
Draw points, lines, line segments, rays, angles (right, acute, obtuse), and perpendicular and parallel lines. Identify these in two-dimensional figures.
(Grade
4)
More Details
Do you agree with this alignment?
Materials List
Each student needs:
- 1 Engineering Design Packet
- 1 Post Assessment
- 2 sticky notes
- writing utensil
Each group needs:
- 1 Research Activity Worksheet
- 1 plastic cup
- 1 set of counters, pennies, or small weights
- 12-18” of string
- 4 straws
- 4 popsicle sticks
- 1 12x2 LEGO brick
- 1 large piece of cardboard (12” x 24”); this can be recycled cardboard (it is used as the base of the houses)
For the entire class to share:
- 1 computer or laptop and projector with access to the Internet to view YouTube videos
- drinking straws (Each team will need a different quantity, so they will need to document the number in order to determine the budget cost of their project, i.e. 2,000.)
- Popsicle sticks (Each team will need a different quantity, so they will need to document the number in order to determine the budget cost of their project, i.e. 1,000.)
- LEGO blocks
- liquid glue
- glue sticks
- hot glue gun and glue sticks
- construction paper
- painters tape
- scissors
- (optional) measuring tapes or rulers
- 1 leaf blower
- 1 anemometer
- safety glasses and ear plugs
Worksheets and Attachments
Visit [www.teachengineering.org/activities/view/uot-2982-fairy-tale-engineering-three-little-pigs-activity] to print or download.Pre-Req Knowledge
- Students need to be able to add, subtract, and multiply amounts with two decimals.
Introduction/Motivation
What are some of our favorite fairy tales or short stories that we always read and talk about? Think about the ones you really enjoy. (Hand out two sticky notes to each student.) Once you have an idea, write it down on a sticky note and we will add it to our class chart. Let’s see how many different stories we can come up with together! (Have students put their sticky notes on the whiteboard, and have some students organize and group the student answers.)
Now, here is a question to think about: Do you think we can use engineering to test whether the events in fairy tales could really happen? What are some fairy tales that you think could be tested using engineering methods? Write your ideas on a sticky note and we will discuss them as a class. (Have students put their sticky notes on the whiteboard, and have some students organize and group the student answers.)
Let us look at some examples. Do you really think Rapunzel’s hair could hold the weight of a full-grown person climbing it? Could someone really walk in glass slippers without breaking them? Could a turtle actually win a race against a rabbit? What about Pinocchio—if you tell a lie, will your nose really grow longer? What other parts of fairy tales do you think we could test using engineering and design? Let’s talk about your ideas! (Let students offer ideas.)
Here is the exciting part: The answer to our big question is yes—engineers can help us figure out if the things in fairy tales could really happen. We do this by designing tests, building models, collecting data, and improving our designs based on what we learn. That means we can use engineering skills to explore and test the actions in fairy tales!
In this activity, we are going to focus on a story I am sure you are all familiar with: The Three Little Pigs. We are going to test whether a house made of bricks is stronger than a house made of popsicle sticks or one made of straws. We will become engineers and build three houses—one out of straws, one out of popsicle sticks, and one out of LEGO bricks. Then, we will test each one to see which materials are strong and which are weak. We will design our own tests and record our results, just like real engineers do.
And now, for the best part—we get to test our houses using a leaf blower! We will measure how strong the air is with a tool called an anemometer, and then we will blow air at each house from the same distance to see if they can stand up to the wind. Our goal is to figure out which house would be the safest for the three little pigs to live in.
So, are you ready to become fairy tale engineers? Let’s get started!
Procedure
Background
Structural engineering is a branch of civil engineering that focuses on designing and building structures that can safely support loads and resist forces such as gravity, wind, and earthquakes. Engineers think carefully about the materials they use, such as wood, steel, or concrete, and the shapes and connections of different parts of a building. Even something as simple as a house must be strong enough to stand up to weight from the roof, furniture, and people inside, as well as outside forces like wind or snow. To do this, structural engineers often use concepts such as balance, stability, and strength to make sure a building will not fall over or break under pressure.
In this activity, students begin to explore these ideas by testing how different materials (straws, popsicle sticks, and LEGO bricks) hold up under simulated wind pressure. They learn that materials have different properties: Some are flexible, others are stiff, and some are better at staying together under stress. Students also see how design plays a big role; houses with strong shapes, good joints, and extra supports (like braces) are more likely to withstand force. Through this hands-on process, they begin to think like structural engineers, using evidence from their tests to improve their models and understand how engineering decisions affect the strength and safety of buildings.
Before the Activity
- Find copies of The Three Little Pigs and/or The True Story of the 3 Little Pigs by Jon Scieszka to read during class.
- Preview all videos planned for use during the activity to ensure they are appropriate and function properly.
- Test all equipment, including the leaf blower and anemometer, to confirm they work correctly for the testing phase.
- Gather group materials for the research activity.
- Gather building materials for each group and class.
- Gather safety equipment for students and the teacher (e.g., safety glasses and ear plugs).
- Make copies of all worksheets and packets, including:
- Engineering Design Packet (one per student).
- Post Assessment (one per student).
- Research Activity Worksheet (one per group).
- Set up the testing area by marking measurement points clearly with blue painter’s tape spaced at one-foot increments for consistent airflow testing distances.
During the Activity
Day 1 – Introduction
- Introduce the design challenge: “Your challenge is to find out which material is best for building a house that can withstand strong winds. To test this, we will build model houses using different materials—straws, popsicle sticks, and bricks (LEGOs)—and then use a leaf blower to simulate the Big Bad Wolf’s big ‘huff and puff!’”
- Optional: Review your school or school district’s lab safety procedures and/or discuss lab safety rules and the importance of safe engineering practice.
- Give each student an Engineering Design Packet to guide them through the project.
- Allow time for students to answer the Pre-Assessment questions in their packets.
- Read The Three Little Pigs and/or The True Story of the 3 Little Pigs by Jon Scieszka aloud as a class.
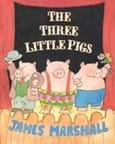
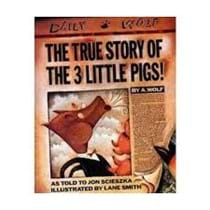
- Show videos to reinforce story comprehension and build connections to the project:
- The Three Little Pigs – English: https://www.youtube.com/watch?v=FNYBQsay_Ek (5:00 minutes)
- Los 3 Cerditos – Spanish: https://www.youtube.com/watch?v=rnt7l4IC_VE&t=288s (17:05 minutes; start at 4:48 minutes)
- The True Story of the 3 Little Pigs – English: https://www.youtube.com/watch?v=dIfBpZOQwls (7:07 minutes)
- La Verdadera Historia De Los Tres Cerditos – Spanish: https://www.youtube.com/watch?v=8R4FTQ1xqec&t=2s (9:06 minutes)
- Guide students to reflect and share their answers to the Pre-Assessment questions.
- Question 1: What do you remember about the story The Three Little Pigs?
- Help students recall the main events, reinforcing the story sequencing and story comprehension.
- Highlight key story details that that connect to the challenge.
- Question 2: What materials did each pig use to build their house?
- Help students clearly name and describe the materials (straw, sticks, bricks).
- Begin conversations about material strength and structure.
- Question 3: Which house do you think was the strongest? Why?
- Start building the idea that materials and design affect strength.
- Introduce terms such as strong, weak, structure, sturdy, materials.
- Question 4: What do you think engineers do?
- Teacher prompts:
- “Has anyone heard the word ‘engineer’ before?”
- “What kinds of things do you think engineers build or design?”
- “Engineers solve problems. What problem do the pigs have in the story?”
- Emphasize that engineers solve problems through creative thinking, not just building.
- Write and discuss the anchor phrase on the board: “Engineers solve problems by imagining, planning, building, testing, and improving.”
- Discuss models and modeling.
- Guide students to understand what models are, and why engineers use them to test ideas.
- Show models of objects around the classroom or home (e.g., Hot Wheels cars, doll houses, miniature animals)
- Have students list benefits and drawbacks of using models, specifically relating models to the three little pigs’ houses.
- Show real-world examples and videos to support imagining solutions.
- How to Use Models: https://www.youtube.com/watch?v=fOODKi8AXtU (3:38 minutes)
- ¿Qué es un Modelo Científico? https://www.youtube.com/watch?v=O-PEBFMC75U (1:09 minutes)
- Remind students that the goal of this project is to discover which building material creates the house that can best withstand strong winds.
Day 2 – Ask and Research
- Show the engineering design process video: https://www.youtube.com/watch?v=b0ISWaNoz-c&t=26s (1:46 minutes).
- Briefly outline the steps of the engineering design process.
- Ask: What is the problem? Engineers start by asking questions.
- Research: What do we know and what do we need to learn? Engineers gather information and test materials.
- Imagine: What are some possible solutions? Engineers brainstorm many ideas and select the best one.
- Plan: What will we build and what materials/tools are needed? Planning keeps engineers organized.
- Create: Build the design based on the plan.
- Test: Does it work as expected? Engineers evaluate their design’s performance.
- Improve: How can it be made better? Engineers refine their designs based on testing.
- Discuss the difference between the scientific method and the engineering design process.
- Explain to students that, unlike the scientific method, which focuses on asking questions and forming a hypothesis, the engineering design process is about solving problems and improving designs.
- Instead of predicting what will happen, engineers focus on creating, testing, and making things better.
- The goal is to think about how something can work more effectively and then build and improve a model or solution using what they learn along the way.
- Ask: Define the Problem
- Remind students that every engineering project starts by asking the right questions.
- Discuss the following with the students to get them thinking:
- What are we building?
- What do we want it to do?
- What are the limits (such as time or materials)?
- Have students write the problem question in the Ask section of their Engineering Design Packet (i.e., find out which material is best for building a house that can withstand strong winds.)
- Research: Gather What We Know and What We Need to Learn
- Discuss as a class what students already know about the three pigs’ houses and their materials.
- As a class, list what they already know about the three pigs’ houses.
- Have students record this information in the Research section of their Engineering Design Packet.
- Introduce the materials to be tested: straws, popsicle sticks, and LEGO bricks.
- Explain how air from the leaf blower will simulate the Big Bad Wolf’s “huff and puff” to test strength.
- Guide students to understand the goal: to find out which material is strongest under wind pressure.
- Hands-On Research Activity
- Divide students into groups of four.
- Distribute the Research Activity Worksheet to each group.
- Hand out materials to each group.
- Give students time to explore and complete the worksheet activities, which includes testing and comparing materials’ strength.
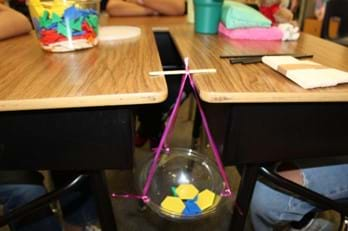
- Discuss the group findings as a class and relate them back to the design challenge.
Day 3 - Imagine and Plan
- Put students into groups of four.
- Remind students: “Your challenge is to use the engineering design process to find out which material is best for building a house that can stand up to strong winds.”
- Review what they already know from their research.
- Briefly recap the materials tested and findings from the research phase.
- Ask students: “What did we learn about straws, popsicle sticks, and LEGO bricks?”
- Imagine: Brainstorming Solutions
- Explain: Engineers brainstorm many ideas and then choose the best one.
- Ask students to think about different ways to build a strong house with each material.
- Have students individually sketch at least four different house design ideas in the Imagine section of their Engineering Design Packet.
- Encourage creativity and diverse ideas—no idea is too silly at this stage!
- Plan: Selecting and Drawing Designs
- Have each team member share their individual ideas with their group.
- Have teams discuss and evaluate each design idea.
- As a team, have each group select ONE solution for each building material (straws, popsicle sticks, LEGOs). Note: This can be one specific solution or a mixture of ideas.
- As a team, have students discuss ways to develop their sketched ideas into three-dimensional structures.
- Have each student draw a detailed diagram of all three house designs in the Plan section of their packet, labeling the materials and key parts of each house.
- Optional: Have students calculate the perimeter, area, length, width, and height of each of their planned houses using a ruler and paper.
- Before allowing groups to move forward, review and approve each group’s house plans to ensure feasibility and safety.
Day 4 – Create
- Have students gather their building materials.
- Have students construct their houses based on their approved designs:
- One from straws
- One from popsicle sticks
- One from LEGO bricks
- Encourage teamwork, collaboration, and safe material handling (e.g., scissors, hot glue).
- Instruct students to follow their measurements and labeled diagrams from their Plan section, then circulate the room and check for consistency between their diagrams and the actual builds.
- Encourage students to problem-solve together if they run into construction challenges.

Day 5 – Test
- If not already set up, prepare the testing space:
- Set up outdoors or in a controlled indoor space for testing.
- Use painter’s tape to mark the ground at 1-foot intervals from 10 feet to 0 feet, creating a clear testing lane.
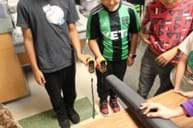
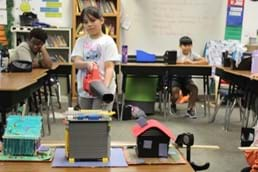
- Using the leaf blower and anemometer, guide each group as they test each of their three model houses (straws, popsicle sticks, LEGO bricks).
- Begin tests at the 10-foot mark, slowly moving one foot closer at a time until damage occurs.
- Have students document air speed using the anemometer and the distance at which each house begins to show signs of damage.
- Have students record their observations and data in their Engineering Design Packet for later analysis.
- After all tests are complete, hold a class discussion to share findings and compare results between materials and designs.
Day 6 – Improve
- Have groups review their data and notes collected during testing.
- Have each group discuss which parts of each house were the weakest, and why they may have failed.
- Have students identify specific problems with the designs or materials that led to damage during the test.
- Prompt students to brainstorm ways to make the structure stronger using the same material (straws, popsicle sticks, or LEGO bricks).
- Give students time to plan improvements, such as adding bracing or cross supports, using tighter joints, layering materials for thickness, or changing the shape.
- Give students time to redesign a new version of the houses on paper before rebuilding.
- Let students rebuild one improved prototype using the same material as before.
Day 7 – Analyze Test Results
- Allow students to retest each improved house using the same testing method of blowing air and recording results.
- Have students measure and record how each house performs.
- Have students compare performance data between their original and improved houses.
- Prompt students to note whether the improvements increased resistance to wind damage and what changes were most effective.
- Facilitate a class conversation around the following questions:
- Which engineering decisions led to better performance?
- Which improvements did not work as expected?
- How would teams continue to refine their designs if given more time or resources?
- Have students answer the Reflection questions in their Engineering Design Packet.
- Highlight the importance of testing and improving as part of the engineering design process.
Day 8 – Prepare Presentations
- Guide students in reviewing all their work, including planning, building, testing, and improving.
- Provide each group with a poster board or digital tool to create a presentation.
- Instruct students to include the following in their presentation:
- What materials did they use, and why?
- What was their original design?
- What failed during testing?
- How did they improve their original design?
- What were their final results and reflections?
- Support students as they write captions and explanations in their own words.
- Remind students to prepare to speak clearly and confidently about their process.
- If time allows:
- Have students do a gallery walk halfway through presentation preparations to provide peer feedback and quick revisions.
- Allow students to practice their team presentations in front of a partner group.
Day 9 – Presentation Day (Part 1)
- Set up the classroom or hallway for team presentations; create stations or display tables.
- Optional: Invite other classes, staff, or parents to visit the student displays.
- Rotate through teams as they take turns presenting their projects and findings.
- Encourage students to speak about their design process, test results, and what they learned.
- Provide time for students to walk around and learn from other groups.
- Record informal assessment notes or student participation reflections.
- Use the Presentation Rubric to assess each group’s presentation.
Day 10 – Presentation Day (Part 2) & Reflection
- Continue team presentations if needed (especially in larger classes).
- Have students complete the Post Assessment.
- Guide students in completing the final reflection questions in the Engineering Design Packet.
- Lead a class discussion about what they enjoyed most and what surprised them.
- Optional: Review the steps of the engineering design process one last time.
- Optional: Ask students to name real-life jobs or situations where people might use this kind of thinking.
- Encourage students to keep solving problems like engineers in everyday life.
Vocabulary/Definitions
air flow: The amount of air during a specific amount of time.
anemometer: A device to measure air flow.
brace: A piece added to make a structure stronger.
breaking point: A point when something breaks.
compare: To see what two or more things have in common.
contrast: To see how two or more things are different.
data: Information collected during tests or observations.
design: A plan or drawing that shows how something will be made.
engineer: A person who designs and builds things to solve problems.
force: A push or pull that can change how things move or hold up.
improve: To make something better.
joint: Where two parts are connected.
material: The stuff used to build things (such as wood, bricks, or straw).
model: A smaller or simpler version of something larger.
plan: A detailed idea of how to build or do something.
prototype: A physical representation.
prototype: A first model or example of something to test ideas.
stability: How well something stays balanced and does not fall.
strong: Able to hold up or resist breaking easily.
structure: Something built, like a house or a bridge.
support: Something that holds up or helps hold weight.
test: To try something out to see how well it works.
weak: Not strong; easy to break or bend.
wind: Moving air that can push against things.
Assessment
Pre Activity Assessment
Pre-assessment questions: Students answer four pre-assessment questions in the Engineering Design Packet, which helps you gauge students’ prior knowledge about the story The Three Little Pigs, their understanding of building materials and structures, and their initial ideas about engineering.
Formative Assessment
Research activity: Students work in groups to explore and document properties of each building material (straws, sticks, bricks) in the Research Activity Worksheet. This activity helps you assess students’ ability to observe, record, and analyze basic material properties.
Observations during construction: Students build their houses following their plans and collaborate with team members. You can observe how well students apply the engineering design process, work together, and handle materials safely to assess their practical skills and teamwork.
Design sketches: Students individually brainstorm and sketch house ideas, then collaborate as a team to finalize and label their house plans. This helps you assess students’ understanding of the design challenge and their ability to apply the Imagine and Plan steps of the engineering process.
Post Assessment
Post-Assessment questions: Students complete the Post Assessment, which helps you measure students’ understanding of the engineering design process, material properties, and what they learned from the activity.
Final group presentation: Students present their findings, and you can use the Presentation Rubric to score the final presentation, evaluating students’ communication skills, teamwork, and ability to reflect on the full design cycle.
Reflection questions: Students complete the Reflection questions in the Engineering Design Packet. This activity helps you assess students’ overall learning and understanding of the engineering design process.
Safety Issues
- Use eye protection and ear plugs when using the leaf blower.
- Only have one student using the hot glue gun at a time.
- Leaf blowers can produce very high noise levels. Therefore, testing should be conducted outdoors in the playground area or in a designated testing area.
Troubleshooting Tips
- Make sure to keep the batteries fully charged for the leaf blower and anemometer.
Activity Extensions
Extension idea: Materials Budget
Each item used must be accounted for as part of the total construction cost. Students calculate the cost of the materials they used and then analyze their design’s efficiency.
Example: $7.66 per 500 straws = 7.66/500 =0.015 x 60 straws used = $0.90
$9.40 per 1,000 popsicle sticks = 9.40/1000 = 0094 x 100 sticks used = $0.94
$0.06 per LEGO brick = 0.06 x 123 used = $7.38
Total cost = $9.22
After construction, students will analyze the cost of their designs to explore ways to build their houses more efficiently. They will look for strategies to reduce expenses while also improving the strength and durability of their structures.
Extension idea: Venn diagrams
- Introduce Venn diagrams to students.
- Read The Three Little Pigs and The True Story of the 3 Little Pigs by Jon Scieszka aloud as a class.
- Watch The Three Little Pigs (English and Spanish versions if needed).
- Have students compare and contrast the two stories and practice completing a Venn diagram.
Possible answers:
| Facts in The Three Little Pigs | Commons facts between the two stories | Facts in The True Story of the 3 Little Pigs |
| The pigs are the victims. | The first two pig houses are destroyed. | The wolf is innocent. |
| The wolf wants to eat the pigs. | The house made of bricks remains. | The wolf wants to borrow some sugar. |
| The wolf destroys the houses by blowing very strongly. | The first two pig houses are destroyed by strong air. | The wolf sneezes by accident and the houses are destroyed. |
| The pigs escape the wolf. | All three pigs move to the brick house. | The wolf is arrested and goes to court to prove that he is innocent. |
Activity Scaling
- For lower grades: Read aloud The Three Little Pigs, and then have each group build ONE house out of given materials. Conduct the testing with the leaf blower as a class. Have students write, draw, or verbalize their conclusions.
- For older/advanced students:
- After building houses out of the three original materials, let students use a combination of the same materials and/or use materials of their choice.
- Students can use the same materials to build different structures and determine different ways to test them. For example, 4th grade students can build different structures such as bridges, catapults, gliders, and tall buildings. Students can then decide how they want to test the strength of their structures.
Subscribe
Get the inside scoop on all things Teach Engineering such as new site features, curriculum updates, video releases, and more by signing up for our newsletter!References
Scieszka, Jon. The True Story of the 3 Little Pigs. Illustrated by Lane Smith, Puffin Books, 1996.
Scieszka, Jon. La Verdadera Historia de los Tres Cerditos. Illustrated by Lane Smith, translated by Maria Megani, Puffin Books, 1996.
Marshall, James. The Three Little Pigs. Scholastic Inc., 1989.
Copyright
© 2025 by Regents of the University of Colorado; original © 2024 University of Texas at AustinContributors
Rolando Anchia, Zach Wilborn, Risa Hartman, Eric M. Taleff, Thomas J. Bennett, Emmanuel Galvan, Ryan NittingerSupporting Program
Research Experience for Teachers (RET), University of Texas AustinAcknowledgements
This curriculum was developed under National Science Foundation through the Center for Dynamics and Control of Materials: an NSF MRSEC under Cooperative Agreement number DMR-2308817. Any opinions, findings, and conclusions or recommendations expressed in this material are those of the authors and do not necessarily reflect the views of the National Science Foundation.
Last modified: July 8, 2025


User Comments & Tips