
Make a Sticky-Note Fan with Arduino
Students control small electric motors with Arduino microcontrollers to make simple sticky-note spinning fans and then explore other variations of basic motor systems. Through this exercise, students work through the steps of the engineering design process as they create circuits that include transistors acting as switches. They alter and experiment with given basic motor code, learning about the Arduino analogWrite command and pulse width modulation (PWM). Students learn the motor system nuances that enable them to create their own motor-controlled projects. They are challenged to make their motor systems respond to temperature or light, to control speed with knob or soft potentiometers, and/or make their motors go in reverse (using a motor driver shield or an H-bridge). Electric motors are used extensively in industrial and consumer products and the fundamental principles that students learn can be applied to motors of all shapes and sizes.
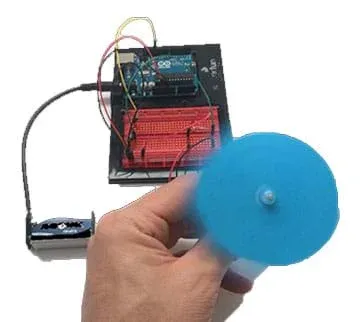 A sticky-note fan controlled by Arduino.
- computer, Windows or Mac
- Arduino software; download from https://www.arduino.cc/en/software
- Arduino Inventor’s Kit (recommended), at SparkFun; includes the following necessary components: Arduino UNO microcontroller and programming cable, NPN transistor, diode, breadboard, jumper wires, electric motor, 330-ohm resistor, and more
- 9V battery
- 9V connector wire
- sticky notes
- push pins
- hot glue gun and hot glue sticks
For advanced challenges:
All sorts of real-world devices—ranging from toys to large industrial tools—use electric motors. What applications can you think of that use electric motors? What is the biggest electric motor application that you can think of? What is the smallest?
A common type of electrical motor is the DC, or direct current, motor. This simple motor consists of an electromagnet, a coil of wire, mounted to a shaft that is surrounded by permanent magnets. When current is applied through the coil, the shaft starts to spin. If the leads are reversed and the current travels in the opposite direction, the motor spins in the opposite direction.
In today’s maker project, we are going to design our own systems using little motors and we are going to learn how to control them using Arduino microcontrollers. Remember that microcontrollers, in this case Arduinos, function as the “brains” of the projects that you can control! Learning how to use microcontrollers correctly to control motors is the first step to using motors in all types of projects!
In this maker challenge, students make miniature sticky-note fans. They learn the correct coding and wiring techniques to control a motor using the Arduino microcontroller. Then they move on to create their own more-complicated motor-controlled projects
Step 1: First a Build a Basic Circuit
Have students start by blinking an LED (use pin 9) on for 1 second and off for 1 second. If they have trouble, refer to the Introduction to Arduino: Getting Connected and Blinking LEDs maker challenge.
Prompt: Why do we start with an LED? Answer: We want to make sure that our code is working before we add on the more complex motor circuit.
Students often ask: Once the code for the LED is working, why can’t we just replace the LED with the motor? Explain: An Arduino Uno can only supply approximately 40mA from its digital input/output pins—hooking up a motor directly to the Arduino digital output pins could break the Arduino!
Step 2: Build a More Complex Circuit
We need to build a circuit that we can control with an Arduino—and get our power from another source. A component that can do this for us is an NPN transistor. A transistor has many uses, but in this case, we are going to use it as a current controlled switch. When the Arduino pin sends a high signal through a resistor to the transistor, current flows and turns the “switch” on and the motor runs. With a low signal from the Arduino, the current stops, the “switch” is off and the motor turns off.
Have students wire up Circuit 12 from the SIK Guide (provided as Circuit 12 Handout (PDF) and Figure 1) and use pin 9 to control the motor. If the circuit is wired correctly, the motor turns on and off.
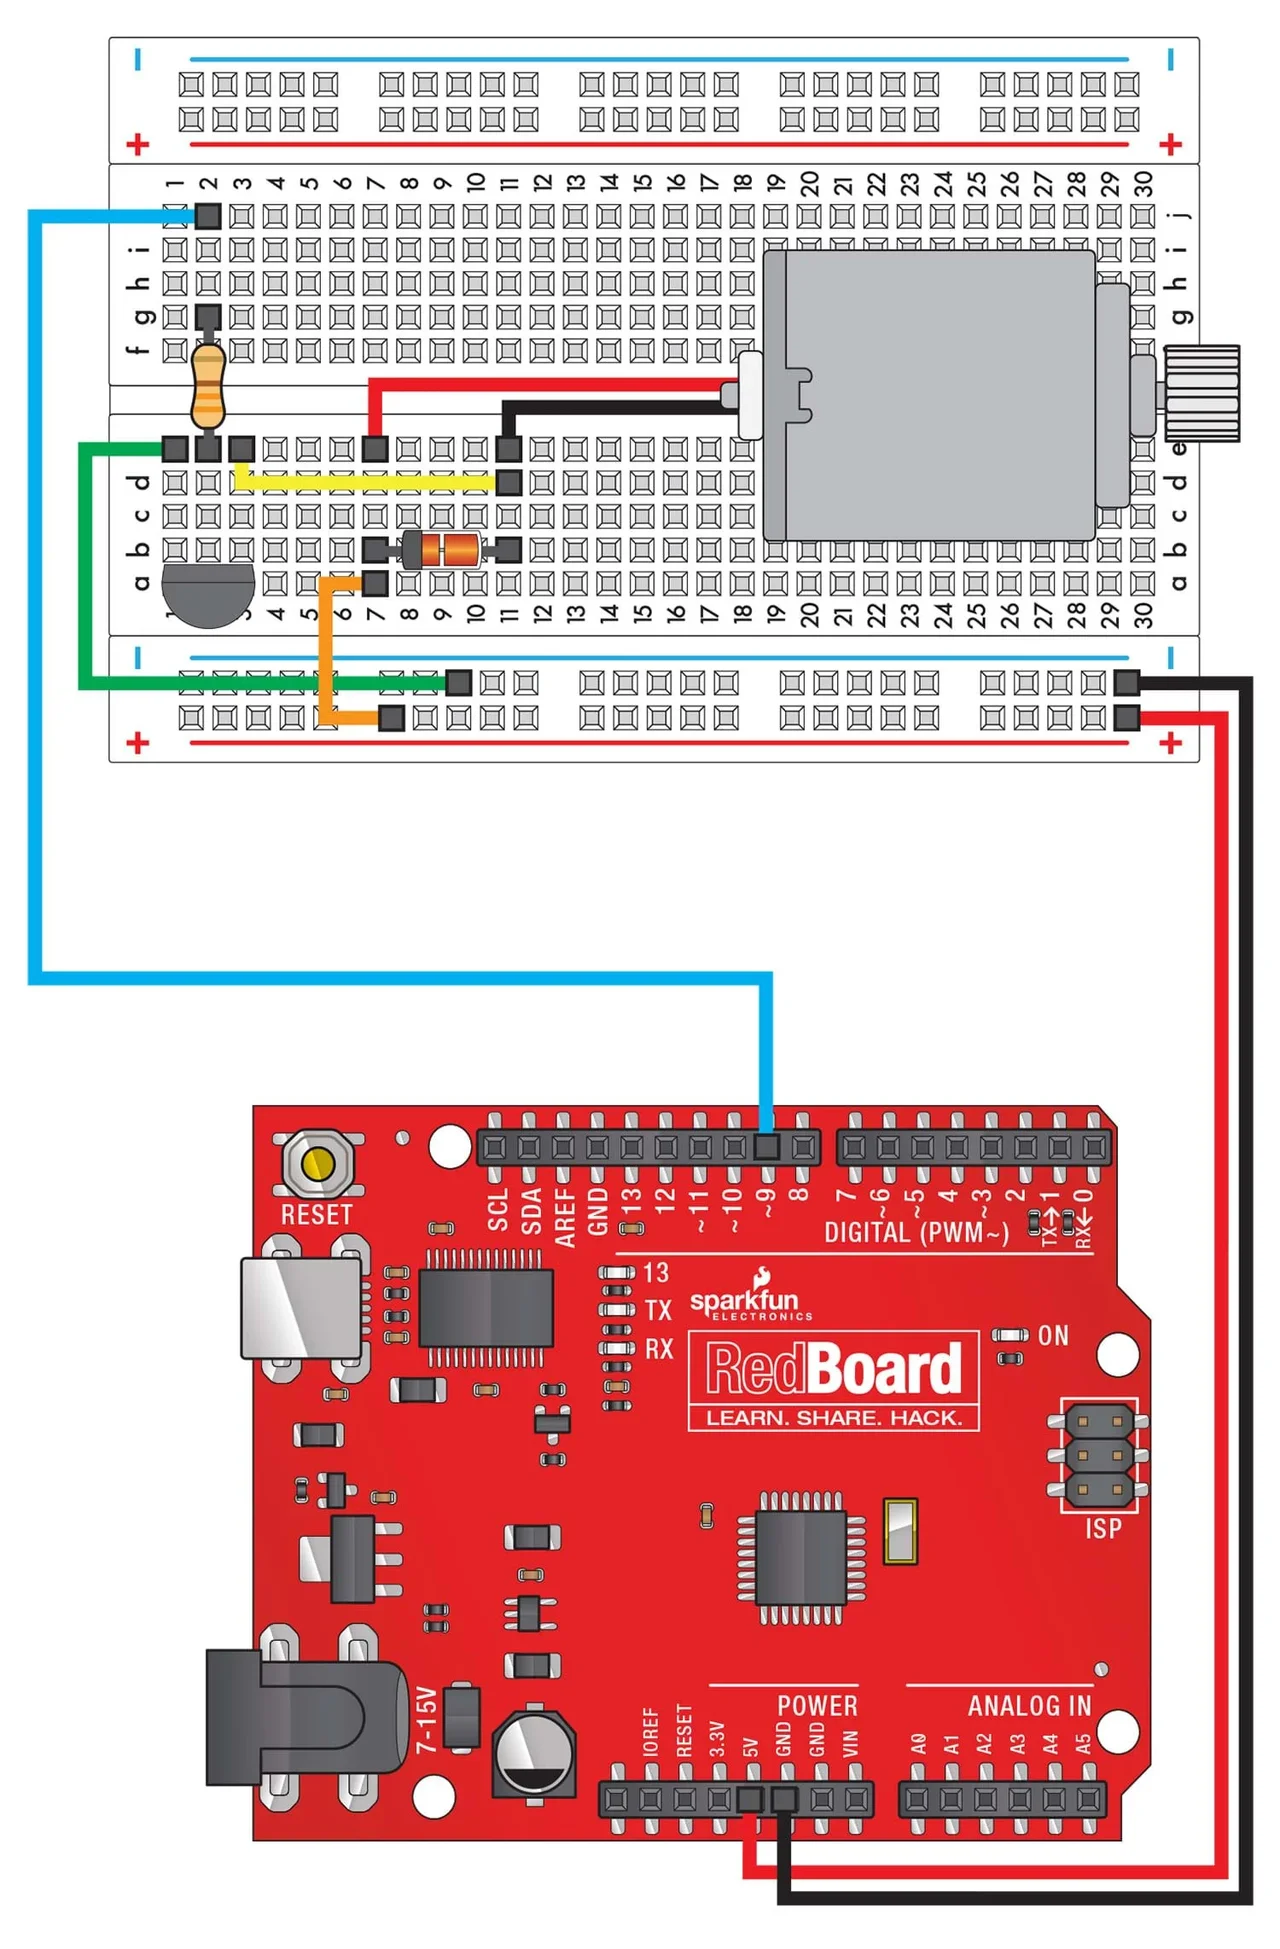 Figure 1. Circuit 12 from the SIK Guide.Copyright 2016 SIK Guide, v. 3.2, page 66, Circuit 12-Spinning a Motor, SparkFun Education CC BY-SA 4.0 https://cdn.sparkfun.com/datasheets/Kits/RedBoard_SIK_3.2.pdf
Ask students: When the motor turns off, does it stop instantaneously? No, the internal shaft of the motor has rotational inertia. Simply put, when the motor is spinning, it keeps spinning until friction slows it down. We are going to use this behavior of real systems to our advantage to control the motor speed.
Step 3: Code Alteration and Experimentation for Motor Control
In your code, reduce the value in the delay commands from 1000 milliseconds to 1 millisecond. What happens? Does the motor sound as if it is running continuously? Is it running as fast as before? Explain: The motor sounds like it is running continuously, because the motor, a real system, cannot respond instantaneously to the electrical changes. We can change the percentage of on-time to off-time to control the speed of the motor with the digitalWrite and delay commands. However, Arduino programmers have developed a command that essentially does this for us:
analogWrite(pin, #)
The “pin” is the pin that you want to control and # is a number from 0-255 and. Be careful! Arduino can only process analogWrite commands on pins with a “~” (tilde symbol). This means that you must use pins 3, 5, 6, 9, 10 or 11!
When we use the Arduino analogWrite command, we are not actually writing an analog (continuous) signal. Instead, we are using pulse width modulation (PWM). This means that we are sending these digitalWrite (On/Off, HIGH/LOW) commands quickly, about 10 times as fast as a movie! When we use higher numbers for the analogWrite command, the percentage of on time, known as the duty cycle, increases, and the speed of the motor increases. (See Resources for an in depth discussion on pulse width modulation or PWM.)
Try it: Erase your digitalWrite and delay commands and add a single analogWrite command. Make sure to use a pin with a ~. Upload different values for the speed.
Does the motor always run? What value do you need to enter in order for the motor to get started? Is this the same as your neighbor’s experience? Explain: Each motor will be different. If students have a hard time getting the motor started, use values greater than 128.
Once students have their motors running well, see if they can develop a program that turns a motor:
- on at half-speed for 5 seconds,
- on at quarter-speed for 8 seconds,
- on at ¾-speed for 10 seconds,
- off for 3 seconds, and
- restart this sequence.
Step 4: Make a Spinning Fan
To make the motor do useful work, attach sticky notes to the motor shaft. The easiest way to do this is to poke a hole in the middle of the note, put hot glue on the hole, and while the glue is still hot, push this onto the motor shaft. Have students experiment with bending the paper sticky notes to see what shapes maximize airflow.
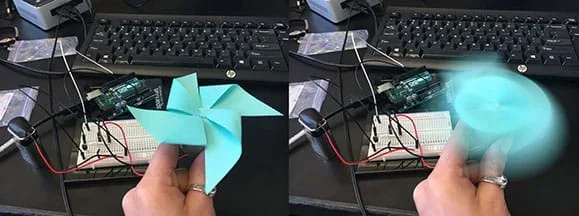 A pinwheel-shaped sticky-note fan.Copyright 2017 Sabina Schill, ITL Program, College of Engineering and Applied Science, University of Colorado Boulder
Step 5: More Advanced Motor Challenges
- Can you make a motor system that responds to temperature? (See Circuit 7 in the SIK Guide.) How might this be used in the real world?
- Can you create a motor system that that turns on when it is exposed to light? (See the Build Your Own Night-Light with Arduino maker challenge.) How might this be useful?
- Can you control the speed of a motor using a knob or soft potentiometer as a touch sensor? (See Circuits 2 and 10 in the SIK Guide, and the Create and Control a Popsicle Stick Finger Robot maker challenge.) A knob potentiometer acts as a voltage divider and gives integer values from 0 (0 V) to 1023 (5V). The potentiometer reading is similar to a flex sensor reading; try using the map and constrain commands from the just-mentioned maker challenge.)
- Can you make your motor go in reverse? If your project needs to change speeds and go in reverse, the motor driver shield and H-bridge Resources will come in handy!
As a class, have students share, compare and reflect on what worked and what was challenging about the activity. Did the motor circuit work right away? What were the challenges with the motor circuit? If you did this maker project again, what would you change?
Motors come in all sizes. If you had a smaller motor, what other projects can you think of? What about a larger motor?
If the motor is not running:
- make sure that the motor works by placing it directly on a 9V battery (since the motor leads are fragile and often break)
- make sure that the resistor between the Arduino and the transistor is a 330-ohm resistor
- when using analogWrite with speeds less than ~50, give the motor shaft a push to overcome static friction and start the motor spinning
Double-check all of the breadboard connections.
If the motor is not running and the transistor is getting warm:
- make sure that it the transistor is facing the correct direction
- make sure you are not using a temperature sensor by mistake—these look nearly identical, but the temperature sensor has TMP written on it
- Refer to the Engineering Design Process hub on Teach Engineering to guide your students through the challenge. If documentation of the design process is desired, utilize the Engineering Design Process Notebook (PDF).
- In the SparkFun SIK Guide, see Circuit 12 for the spinning the motor (also provided as the Circuit 12 Handout (PDF) and Figure 1)
- To get connected with Arduino: Introduction to Arduino: Getting Connected and Blinking LEDs maker challenge
- Pulse Width Modulation (PWM) tutorial
- Motors and Selecting the Right One tutorial
- Learn about using a motor driver shield in the Ardumoto Kit Hookup Guide tutorial
- H-bridges for motor control reference: https://en.wikipedia.org/wiki/H_bridge
Contributors
Daniel Godrick
Supporting Program
ITL Program, College of Engineering and Applied Science, University of Colorado Boulder
Acknowledgements
This activity was developed by the Integrated Teaching and Learning Program in the College of Engineering and Applied Science at the University of Colorado Boulder. Special thanks to SparkFun Education.
Copyright
2017 by Regents of the University of Colorado