Quick Look
Grade Level: High school; also scalable for middle school
Time Required: 2 hours (wild guess!)
Subject Areas: Measurement, Physical Science, Problem Solving, Science and Technology

Maker Challenge Recap
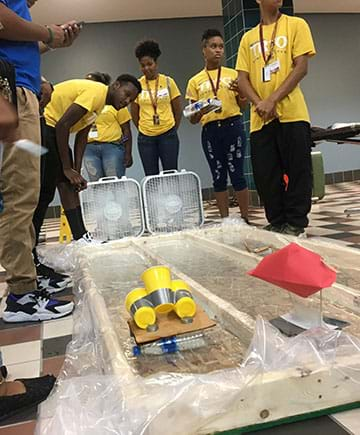
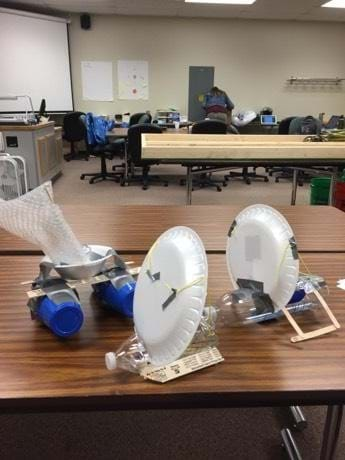
For this challenge, students use a variety of common office and household supplies to design a boat. Their goal: to not only have the fastest boat, but to also take into account how much mass (or “cargo”) the boat can carry, the stability of the boat in the water, the total mass of the boat, boat aesthetics, and how much it “costs” to construct. A fan supplies wind and propels each boat down the lane of a small pool. Students work through the engineering design process as they brainstorm ideas with their teams, design and test their boats, redesign, and then retest to make the boats as efficient as possible.
Maker Materials & Supplies
- assortment of building supplies such Styrofoam bowls and plates, aluminum foil, paper, saran wrap, plastic bottles, cardboard, construction paper, straws, bubble wrap, rubber bands, string, paper/binder clips, notecards, tacks, pipe cleaners, clothes/safety pin, popsicle sticks, skewers, plastic silverware, plastic cups, paper plates, paint sticks, cardboard tubes, toothpicks and yard sticks (see the Materials and Pricing List for more ideas)
- assortment of adhesives and tools such as staplers, duct tape, packing tape, white glue, cement glue, hot glue, tape, box cutters, scissors, markers and colored pencils, rulers, and protractors
- pool to hold water; consider using a kiddie pool, an indoor pool, or building one out of PVC pipes or wood and tarps)
- electric fans to provide “wind” for boats; supply two fans if students race their boats in two lanes
- digital scale to weigh boats and the cargo
- metal washers, coins, or something with mass to use as cargo
- Materials and Pricing List

Worksheets and Attachments
Visit [www.teachengineering.org/makerchallenges/view/cmu-2452-boat-design-constraints-engineering-challenge] to print or download.Subscribe
Get the inside scoop on all things Teach Engineering such as new site features, curriculum updates, video releases, and more by signing up for our newsletter!More Curriculum Like This

Students use modeling clay, a material that is denser than water and thus ordinarily sinks in water, to discover the principle of buoyancy. They begin by designing and building boats out of clay that will float in water, and then refine their designs so that their boats will carry as great a load (m...
Kickoff
[Prepare pools and fans, gather and display building materials, and determine the rubric and team designations before Kickoff]
Today’s activity is a competition—and there are some bragging rights at stake! [Pass out the Data Collection Rubric, Materials and Pricing List, and team designations.] Your goal for this challenge is to design a small boat out of a select number of materials and compete with each other for the best design!
When you design something, there are certain limitations or restrictions that you may have to follow. We call these constraints. The constraints for this project include the mass of the boat, building costs, and the mass of the cargo your boat can carry. When engineers design a product, they always have certain constraints to keep in mind in order to satisfy the needs of their customers. These constraints may affect the speed, performance, or even aesthetic value of the product.
[Introduce the engineering design process using the attached Maker Challenge PowerPoint or use a similar presentation. Explain the steps the students will take during the activity: brainstorm, sketch, collect materials, build, test, reflect and redesign, retest, etc. Utilize the Engineering Design Process Notebook for design process documentation for the students.]
Remember, there are six categories and there will be a winning team for each! Okay, you know your teams, now start brainstorming and get to work!”
Constraints
Aesthetics constraint can be predetermined or voted on by the class; it may be helpful to define aesthetics and provide examples of what it means if students are unfamiliar with the term.
Stability can be determined on a 10-point scale for convenience, but can be modified based on the size of the testing pool. A rule of thumb for pool size is to have a lane width of about 36 cm with a length of 1.8 to 2 m.
The Materials and Pricing List contains the cost constraints. Prices are scaled on usefulness, but can be modified.
Tape together three metal washers and use those as a standard single weight. For example, if a student could carry two “packs” (6 washers), but not three “packs” (9 washers) then they mark two. This may result in ties in the cargo mass category, but it also saves times during the challenge.
Resources
Refer to the Engineering Design Process hub on TeachEngineering to guide your students through the challenge.
Utilize the Engineering Design Process Notebook for design process documentation.
Maker Time
- Form teams, preferably of three to four students.
- Review the engineering challenge, the constraints, available materials, and steps of the engineering design process. Emphasize the retesting and redesign phases, as this is a main component of the engineering design process. One of the goals of this project is for students to become comfortable with failure and see it as an important step in the design process.
- Give the teams 15 minutes to discuss and plan their boats. Have students sketch out their plans and include dimensions and which materials they plan to use.
- Once the teams decide on one design, make sure to assess and approve it. If approved, students may go on to select their materials.
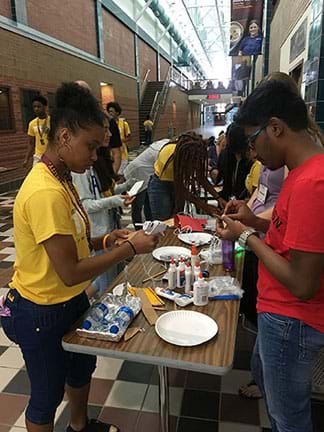
- Give the teams 15 to 30 minutes to build their prototypes. Walk around and observe each team. Offer only limited assistance; creativity and trial and error are what drive the design process. This is also a good time for a qualitative teamwork skills assessment.
- Allow students to test their designs in the pool. Allow students three trials in the pool before the final trial so they have the opportunity to redesign and retest after each test trial. Testing encourages them to think critically about their redesign each time. (Note: students will have to be careful with designs made with paper; if it gets wet during their tests, it may compromise the design).
- Give students 10 to 15 minutes to iterate.
- Allow students to retest their design.
- When a team completes their final prototype, they should weigh their boat and estimate the final cost of the materials.
- Each team should then present their design to the class.

Wrap Up
After every team collects data from their final test trial, choose to reveal the winners of each category.
Consider rewarding the winning teams with small prizes; the winning results are what the students have been waiting for! After the winners are revealed there can be a class discussion about what designs worked, what did not work, and why. This is where the in-depth physics discussion can come into play. Student observations during testing as well as their reflection on the engineering design process can also serve as a written post-assessment method.
Tips
Activity Length
A time of 120 minutes or two class periods allows one day for the introduction and initial construction and one day for testing and concluding discussion or presentations.
Using Math/Data Modelling
After students collect the final data, identify certain features that were used in each design (for example, a pontoon base, rudder, paper sail, etc.,) and see if there are any correlations between those features and high scores in any of the categories.
Students could also graph all of their test trials for each score category and see how they improved over time.
Activity Scaling
For lower grades, remove or adjust constraints to match skill levels. Offer more help or examples, or tell them to think about how real boats are designed using (rudders, pontoons, sails, shape) or to think about how to best capture wind using real-world examples (parachutes, windmills, sails, kites).
For higher grades, elaborate on the physics behind student designs. Tell students to think about alternative modes of propulsion or introduce additional constraints. For example, students must use a certain material; the boat must be under a certain mass; the boat must hold a certain type of bulky cargo, etc.
Copyright
© 2019 by Regents of the University of Colorado; original © 2018 Central Michigan UniversityContributors
Zachary Bates; Natalie BowenSupporting Program
Research Experience for Teachers Program, Central Michigan UniversityAcknowledgements
This curriculum was based upon work supported by the National Science Foundation under RET grant no. EEC 1542368— Research Experience for Teachers through Central Michigan University. Any opinions, findings, and conclusions or recommendations expressed in this material are those of the authors and do not necessarily reflect the views of the National Science Foundation.
Last modified: July 27, 2020


User Comments & Tips