
Quick Look
Grade Level: Middle school
Time Required: 1 hours 45 minutes
Expendable Cost: US $2.00
Group Size: 2
Subject Areas: Physical Science
Quick Look

- Grade Level:
- Middle school
- Time Required:
- 1 hours 45 minutes
- Expendable Cost:
- US $2.00
- Group Size:
- 2
- Source
Source indicates the origin of this Informal Learning Activity. Most Informal Learning Activities in TE are based off of a 60-minute-or-less activity and usually have no prerequisites or identified aligned academic standards.:
- Subject Areas:
-
Physical Science
Introduction
Bolded words are vocabulary and concepts to highlight with students during the activity.
When civil engineers design a building, they must calculate the total compressive load that will be at work in the structure: this tells engineers how much weight the bottom of the building must be able to hold up. Compression is a squeezing force: the bottom of the building is compressed from the upward force exerted on it by the ground below and the downward force of the weight above. To do this, they take into account the anticipated load (weight) resulting from how people will use the building and the weight of the structure itself. Based on these (and other) calculations, materials with appropriate properties for carrying the weight are chosen, and structural components (such as columns and beams) are designed to provide adequate support and weight distribution. These calculations are important so that engineers can build safe, stable buildings.
Supplies
Each group needs:
- 10 3" x 5" (7.6 cm x 12.7 cm) index cards
- 1 sheet of paper
- 1 transparency sheet
- 12" (30.5 cm) masking tape
- 15 toothpicks
- 2 straws
- ruler
- scissors
For the class to share:
- 5 hard-covered text books to use as weight
- 1 wooden board, ~12" x 8" (30.5 cm x 20.3 cm)
Subscribe
Get the inside scoop on all things Teach Engineering such as new site features, curriculum updates, video releases, and more by signing up for our newsletter!Procedure
Procedures Overview
Students work in teams of two. Their goal is to support the designated weight (5 textbooks) at a height of at least five inches above the ground for 15 seconds with only a limited amount of materials. They first brainstorm and sketch out their design ideas, then they build their structures. Once completed, they place the weight (books) on their structures to see how much they can hold before collapsing.
Brainstorming and Design
- Organize students into groups of two and hand out one sheet of paper to each team. Inform them that this paper is for sketching their design ideas only and that they cannot use it in the construction of their structures.
- Show students the available supplies; inform them that they do not get any replacement or additional supplies.
- Tell students that their goal is to support weight (books) at least five inches above the ground for 15 seconds. Show them the books their structures must support.
- Give students 10 minutes to brainstorm their ideas in their groups. Tell them to include measurements in their sketches. Circulate around the room and talk to each group about its design.

Examples of student constructions.
Construction and Testing
- Hand out supplies to the teams. Remind them that they do not get any replacement supplies and that they cannot use their sketch paper in their constructions.
- Inform students that they have 20 minutes to build their structures.
- When students have completed construction, it is time for testing. One at a time, have teams come to the front of the room, and explain their designs to the class. Then, have them set up the design on the floor, place the wooden board across the structure(s), and add weights (books) one at a time—wait 15 seconds between each addition of weight.
- If time permits, allow students to redesign their structures: encourage them to think creatively about their designs and what they might change to make improvements. They may wish to try a double decker structure. You may give out additional supplies for improved designs; however, they are only allowed to use five index cards per level.
Wrap Up - Thought Questions
- Which designs worked the best? Why?
- Which designs were not successful? Why not?
- Which shapes are effective supporters of weight?
- How would you change your design if you were to do this activity again?
More Curriculum Like This

Learn the basics of the analysis of forces engineers perform at the truss joints to calculate the strength of a truss bridge known as the “method of joints.” Find the tensions and compressions to solve systems of linear equations where the size depends on the number of elements and nodes in the trus...
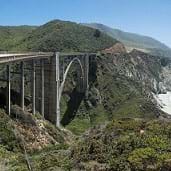
Students are presented with a brief history of bridges as they learn about the three main bridge types: beam, arch and suspension. They are introduced to two natural forces — tension and compression — common to all bridges and structures.

Students learn about the types of possible loads, how to calculate ultimate load combinations, and investigate the different sizes for the beams (girders) and columns (piers) of simple bridge design. Additionally, they learn the steps that engineers use to design bridges.

To introduce the two types of stress that materials undergo — compression and tension — students examine compressive and tensile forces and learn about bridges and skyscrapers. They construct their own building structure using marshmallows and spaghetti to see which structure can hold the most weigh...

Copyright
© 2013 by Regents of the University of ColoradoLast modified: May 12, 2022
User Comments & Tips