
Quick Look
Grade Level: Middle school
Time Required: 1 hour
Expendable Cost: US $1.00
Group Size: 3
Quick Look

- Grade Level:
- Middle school
- Time Required:
- 1 hour
- Expendable Cost:
- US $1.00
- Group Size:
- 3
- Source
Source indicates the origin of this Informal Learning Activity. Most Informal Learning Activities in TE are based off of a 60-minute-or-less activity and usually have no prerequisites or identified aligned academic standards.:
Introduction
Bolded words are vocabulary and concepts to highlight with students during the activity.
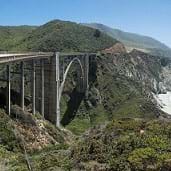
The most common type of bridge is a beam bridge—a structure made of horizontal, rigid beams whose ends rest on two columns. The load of the bridge is supported by the columns. Load refers to the bridge’s own weight that needs to be supported, as well as any weight that is added to the bridge such as cars, trucks and people. A truss bridge is a type of beam bridge that has triangular units to distribute the load and support the bridge.
, deck truss design (middle) and Warren truss design (bottom).")
Supplies
Each group needs:
- 20 plastic drinking straws
- masking tape
- scissors
- 1 sheet of paper
- pencil or marker
For the class to share:
- measuring stick or ruler
- various hardcover and softcover books to use as weights
- 2 desks or tables of equal height from the floor, to serve as the testing station
- scale, one that can weigh a minimum of 3 lbs. (~1.4 kg)
Subscribe
Get the inside scoop on all things Teach Engineering such as new site features, curriculum updates, video releases, and more by signing up for our newsletter!Procedure
Overview
Your engineering challenge is to design and build a bridge that can span a gap while holding as much weight as possible. Your materials are straws and tape, and your bridge must meet the design constraints.
Bridge Design and Construction
- Organize the students into groups of three.
- Hand out paper and a writing utensil to each group.
- Show students some images of truss bridges (or show the images provided in this write-up).
- Inform students of the following design constraints:
- bridge must be at least 10 inches (25 cm) in length and able to span an 8-inch (20-cm) gap
- bridge must be able to securely hold gradually added weight placed in its center until it fails (begins to bend)
- bridge must incorporate a truss design
- bridge must be made of 20 (or fewer) straws
- groups may not receive any replacement straws
- bridge may not be taped to the desk
- Direct groups to brainstorm design ideas for their bridges and record and sketch their ideas on the paper (5-7 minutes). Advise students to carefully plan out their bridges before cutting the straws since they will not receive any replacement materials.
- After every group member has presented his/her ideas, have groups each decide on one bridge to build.
- Give teams 30 minutes to create their bridges.
- Tip: It may be difficult for small hands to figure out the taping of straws that are at add odd angles to each other. Circulate the room to assist students with any construction challenges they encounter.
Bridge Testing
- Make a testing station by placing two desks (or tables) approximately 8 inches (20 cm) apart.
- One-by-one, help each group test its bridge:
- Place the bridge across the gap between the two desks, positioning it with equal lengths of bridge ends resting on each desk (see Figure 1).
- Slowly place one book on top of the bridge.
- Continue to add books until the bridge fails or noticeably begins to bend (do not add so much weight that the bridges are ruined).
 made of plastic drinking straws and clear tape spanning the gap between two wooden blocks, ready for testing.")
- Direct students to weigh the books that were successfully supported before the bridge collapsed. This means removing from the stack of books the last book, the one that caused the bridge to collapse.
- Write the group’s total weight on the classroom board.
- If time permits, have students make improvements to their bridges and retest.
- As a class, examine the class data, and ask and discuss the Thought Questions.
Wrap Up - Thought Questions
- Which bridge design held the most weight?
- Which part of your bridge gave out first? Why?
- How would you improve your bridge design?
- How would you change your design if you had to span a 20-inch (51-cm) gap using the same materials?
More Curriculum Like This

Working as engineering teams, students design and create model beam bridges using plastic drinking straws and tape as their construction materials. Their goal is to build the strongest bridge with a truss pattern of their own design, while meeting the design criteria and constraints.

Learn the basics of the analysis of forces engineers perform at the truss joints to calculate the strength of a truss bridge known as the “method of joints.” Find the tensions and compressions to solve systems of linear equations where the size depends on the number of elements and nodes in the trus...
Students are presented with a brief history of bridges as they learn about the three main bridge types: beam, arch and suspension. They are introduced to two natural forces — tension and compression — common to all bridges and structures.

Students take a close look at truss structures, the geometric shapes that compose them, and the many variations seen in bridge designs in use every day. Through a guided worksheet, students draw assorted 2D and 3D polygon shapes and think through their forms and interior angles (mental “testing”) be...

Copyright
© 2016 by Regents of the University of ColoradoLast modified: May 12, 2022
User Comments & Tips