Quick Look
Grade Level: 6 (5-8)
Time Required: 1 hours 30 minutes
(two 45-minute sessions; see Timing Note)
Expendable Cost/Group: US $2.00
Group Size: 2
Activity Dependency: None
Subject Areas: Physical Science, Physics
NGSS Performance Expectations:

| 5-PS1-3 |
Summary
In an activity that integrates science and art, students see, experience and harness the phenomenon of surface tension as they create beautiful works of art. Students conduct two experiments related to surface tension—floating objects on the surface of water and creating original artwork using floating inks. They also learn historical and cultural information through an introduction to the ancient Japanese art form of suminagashi. They take the topic a step further by discussing how an understanding of surface tension can be applied to solve real-world engineering problems and create useful inventions.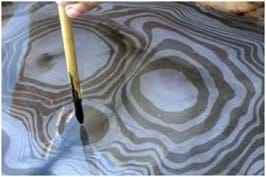
Engineering Connection
The importance of water tension in engineering design cannot be underestimated. Its use in ink-jet printers is well known, and water tension is also a key factor in the study of biofilms and monolayers, which are harnessed for constructive purposes in sewage treatment plants, oil spill habitat cleanup and biomedical products. In-depth study of surface tension has also led to an entirely new research specialty called surface science or surface chemistry. In this activity, students see how inks float on the surface of water and apply that tangible understanding to discussions about how engineers might deal with oil spills or other situations involving the surfaces of lakes and oceans. Students also make the connection between science and aesthetics as they see the role of surface tension in the creation of stunning works of art.
Learning Objectives
After this activity, students should be able to:
- Define water surface tension.
- Explain how surface tension can affect objects such as paperclips and ink.
- Describe why ink forms circular shapes when applied to the surface of water.
- Relate how a process used to make art prints could be applied in a similar manner to clean up oil spills.
Educational Standards
Each TeachEngineering lesson or activity is correlated to one or more K-12 science,
technology, engineering or math (STEM) educational standards.
All 100,000+ K-12 STEM standards covered in TeachEngineering are collected, maintained and packaged by the Achievement Standards Network (ASN),
a project of D2L (www.achievementstandards.org).
In the ASN, standards are hierarchically structured: first by source; e.g., by state; within source by type; e.g., science or mathematics;
within type by subtype, then by grade, etc.
Each TeachEngineering lesson or activity is correlated to one or more K-12 science, technology, engineering or math (STEM) educational standards.
All 100,000+ K-12 STEM standards covered in TeachEngineering are collected, maintained and packaged by the Achievement Standards Network (ASN), a project of D2L (www.achievementstandards.org).
In the ASN, standards are hierarchically structured: first by source; e.g., by state; within source by type; e.g., science or mathematics; within type by subtype, then by grade, etc.
NGSS: Next Generation Science Standards - Science
-
Science explanations describe the mechanisms for natural events.
(Grade 5)
More Details
Do you agree with this alignment?
-
Constructing explanations and designing solutions in 6–8 builds on K–5 experiences and progresses to include constructing explanations and designing solutions supported by multiple sources of evidence consistent with scientific ideas, principles, and theories.
(Grades 6 - 8)
More Details
Do you agree with this alignment?
-
Substances are made from different types of atoms, which combine with one another in various ways. Atoms form molecules that range in size from two to thousands of atoms.
(Grades 6 - 8)
More Details
Do you agree with this alignment?
| NGSS Performance Expectation | ||
|---|---|---|
|
5-PS1-3. Make observations and measurements to identify materials based on their properties. (Grade 5) Do you agree with this alignment? |
||
| Click to view other curriculum aligned to this Performance Expectation | ||
| This activity focuses on the following Three Dimensional Learning aspects of NGSS: | ||
| Science & Engineering Practices | Disciplinary Core Ideas | Crosscutting Concepts |
| Make observations and measurements to produce data to serve as the basis for evidence for an explanation of a phenomenon. Alignment agreement: | Measurements of a variety of properties can be used to identify materials. (Boundary: At this grade level, mass and weight are not distinguished, and no attempt is made to define the unseen particles or explain the atomic-scale mechanism of evaporation and condensation.) Alignment agreement: | Standard units are used to measure and describe physical quantities such as weight, time, temperature, and volume. Alignment agreement: |
International Technology and Engineering Educators Association - Technology
-
Explain how technology and engineering are closely linked to creativity, which can result in both intended and unintended innovations.
(Grades
6 -
8)
More Details
Do you agree with this alignment?
-
Explain how knowledge gained from other content areas affects the development of technological products and systems.
(Grades
6 -
8)
More Details
Do you agree with this alignment?
State Standards
Georgia - Science
-
Distinguish between atoms and molecules.
(Grade
8)
More Details
Do you agree with this alignment?
Materials List
Each group needs:
- 1 plastic container large enough to hold a 9 x 12-inch piece of construction paper; a clear or frosted container is ideal because the ink colors are easier to see; a smaller container can be used if you cut the construction paper to a smaller size
- inexpensive construction paper; lighter colors such as yellow, pink, light blue and white work best
- 1 divided container to hold various colors of ink; half an ice tray works great
- 1 dropper-full of 4 different colored inks, such as Dr. Ph. Martin's Bombay India Inks; a set of 12 colors for $30 (see Figure 1)
- small paintbrushes or Q-tips to apply ink to the water surface
- protective aprons (the ink stains clothing)
- water
- paper towels for blotting prints (get several rolls for the entire class)
- 3 metal paperclips
- 2 forks; metal works best, but plastic will do
- Post-Activity Quiz, one per student
To share with the entire class:
- a student workstation setup as described above, to use as a teacher demonstration station
- Water Bug Visual Aid, one per teacher; to hold up in class or display via projector or transparency
- capability to show students a few online videos, such as via laptop, projector and/or smartboard
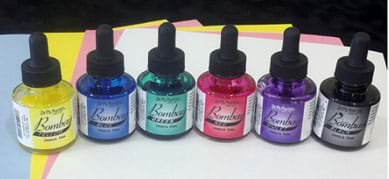
Figure 1. Recommended inks and paper for this activity.
Worksheets and Attachments
Visit [www.teachengineering.org/activities/view/gat_surface_tension_activity1] to print or download.Pre-Req Knowledge
Familiarity with the concepts of atoms and molecules. Atoms are the building blocks of matter and atoms join together to form molecules.
Introduction/Motivation
A few years ago, a group of scientists and engineers got together and began a research project to find out exactly how walking on water could be done. They discovered that the key to walking on water is understanding how to take advantage of surface tension. Surface tension is a phenomenon that occurs wherever water and air meet (also known as the liquid-air interface). Because water molecules are very adhesive (they like to stick together), the surface of the water forms a thin, invisible membrane that acts like a stretched elastic cover holding the water together. Surface tension enables the water to support the weight of some objects that are denser than water, items such as paperclips and water bugs.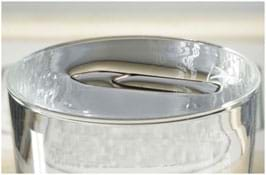
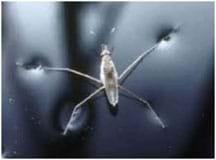
Engineers often look to nature for inspiration in solving human challenges. In this situation, the researchers wanted to learn how to walk on water so they studied the water strider, a bug that not only walks on water but runs! Investigators discovered that water striders have hairy, water-repellant legs that are perfectly adapted to float on water and push off the water's surface to propel themselves quickly in any direction. Unfortunately, the researchers were not able to find a way for humans to walk on water, but because of this research, engineers have been able to design and build small water-walking robots that may have helpful real-world applications such as cleaning up oil spills.
As part of the water tension research, scientists added color to the water so they could better see how the water bugs propelled themselves. Doing this also showed the researchers something unexpected and beautiful. By adding color to the water and letting the bugs stride across the surface, gorgeous images were created. (Show students the Water Bug Visual Aid, which is the same as Figures 2 and 3).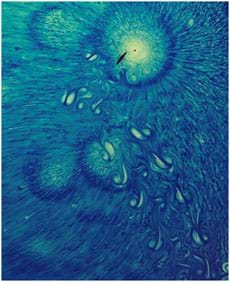
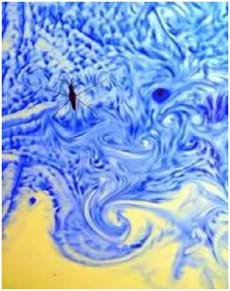
These photographs show a powerful connection between art and science and are the inspiration for this activity. The researchers that created these images were focused on water tension and how things moved around on the surface of water.
Related to this is an ancient Japanese art form called suminagashi (sue-me-NAH-gah-she), which literally means, "ink floating." Suminagashi is only made possible because of the scientific phenomenon of water surface tension. Suminagashi is the precursor to "marbling," which is an art technique in which a surface is covered with beautiful designs that imitate the patterns seen in polished marble.
Today, you will experiment with this technique to create beautiful works of art by floating inks on the surface of water. Instead of photographing the results, like the researchers did in their experiments, you will transfer your ink creations directly from the water surface onto pieces of paper so you can quickly produce unique works of art—called monoprints. Using this hands-on technique, you will gain a greater understanding of the science of surface tension and the ancient art of suminagashi. Once you understand the science of surface tension, you are better ready to think about ways it could be applied to engineering purposes and inventions.
Procedure
Background
This project is beautiful in its simplicity and directness. It is a project that is greater than the sum of its parts. As soon as students place the first drop of ink on the water's surface, they witness the magic of the suminagashi process. Expect students of all ages to become mesmerized with how the water and ink interact. This project is appropriate for all age groups, elementary through college. Suminagashi can be used as a way to teach scientific topics such as diffusion, buoyancy, fluid mechanics, capillary action, surfactants, propulsion, surface films and biofilms. Students explore several scientific topics through this activity and they capture their experiences by creating beautiful works of art.
Timing Note
Conducting this activity during two 45-minute sessions is ideal. You can end the activity after 45 minutes (at the end of Session 1), but spending an additional 45 minutes (for Session 2) enables students to slow down and be more thoughtful about the printmaking, thus attaining a greater understanding of suminagashi and surface tension. Alternatively, the activity can be completed during one 60-minute class by having students make two or three prints as part of Session 1 and then quickly completing the content of Session 2 without students making more prints.
Before the Activity
- Review a 10-minute video overview about suminagashi before doing the project with students: https://www.youtube.com/watch?v=J410yQ7PI1E. Also review the Suminagashi Printmaking Steps Overview provided below.
- Gather materials and set up enough workstations for each group to conduct the activity. The setup shown in Figure 4 is ideal for one or two students per group. Place about 2 cm (1 inch) of water in each container.
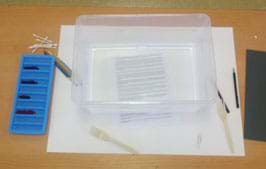
Figure 4. Workstation setup. - If 10 or more stations, dispense four colors of ink (black and three other colors) into ice tray containers at each workstation. Alternatively, or if fewer groups, let students choose their own colors before beginning the experiment. Figure 5 shows how you might set up a classroom with several workstations:
- Also set up a teacher workstation (like the group setup) to perform a class demonstration. Have handy a few paperclips and a fork.
- Practice floating a paperclip on the water's surface using a fork. It's harder than you think!
- Print out the Water Bug Visual Aid, to hold up and show the class or display the images via projector or overhead.
- For Session 2, get ready to show the class a few short online YouTube videos as prompted in the Procedure instructions below.
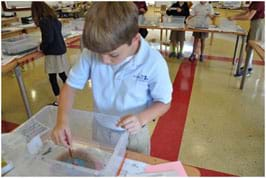
Figure 5. Several workstations set up around a classroom.
With the Students—Session 1
- Gather students around the demonstration area and begin a conversation. Ask: What do we call the smallest building blocks of matter? (Answer: Atoms.) What do you call it when atoms join together through chemical bonds? (Answer: Molecules.) What do you get when you combine two hydrogen atoms and one oxygen atom?" (Answer: Water.) Then direct students' attention to the container of water on the table.
- To get students' attention, tell them that that you want to show them a science trick—not a magic trick, but a science trick. First, prove to them that a paperclip is denser than water by dropping it into the water. (If you simply drop the paperclip into the water, the weight of the paperclip tears through the surface of the water and the paperclip sinks.) Next, gently place a dry paperclip on the surface of the water using a fork to impress them with a paperclip floating on the water surface!
- Ask: Can you explain why the metal object floats? After exploring possible explanations with students, explain the concept of surface tension: Atoms make up molecules and molecules like to stick together. Water molecules are made of two hydrogen atoms and one oxygen atom (H20). Because the water molecules want to stick together, they make an invisible layer or skin on the surface of the water. This skin (aka membrane, stretchy covering) is very thin and can be broken or torn easily, as witnessed when the paperclip was dropped into the water. But surface tension has enough strength to support some weight when the weight is gently applied to the surface of the water. Present the students with the following analogy: Imagine an old, cheap, thin trampoline. If you dropped a bowling ball from 50 feet in the air onto the trampoline, what would happen? (Listen to student ideas.) The bowling ball would rip through the stretchy top of the trampoline. Now, what if we took that same bowling ball and ever so gently rolled it onto the trampoline from the side? (Listen to student ideas about what would happen in this case.) The bowling ball would roll onto the surface without tearing through. In this analogy, the paperclip is the bowling ball and the old trampoline is the thin covering on the water called surface tension.
- If time allows, give each student a paperclip and a fork and let them try to get the paperclip to float in the water containers at their workstations; it is not as easy as it looks! After a few minutes, gather students around the demonstration table again. Tell them about water strider bugs that are so light that they can stand on the water's surface. Because the bugs make their own natural water repellant and because they have super hairy legs and feet, they can run on the water without breaking through the surface.
- Tie in some art history by explaining to students that 2,000 years ago an artist/scientist in Asia discovered something that floats on water—ink! The artist discovered many beautiful, exciting, curious and mysterious things that happened when ink was placed on water. Japanese Shinto priests perfected this art form and called it suminagashi (sue-me-NAH-gah-she), which translates to "ink floating."
- Show the class a bottle of black India ink. Ask: What do you think will happen if we put a drop of this ink on the surface of the water? Will the ink dissolve into the water? Will it sink or will it float?
- Next, ask students to closely observe as you gently add a drop of India ink to the surface of the water. Remember to gently touch the Q-tip or paintbrush of ink to the water surface rather than drop it in from above. If you drop it, the ink will probably break the water's surface tension and sink to the bottom, just like a dropped paperclip. Then have students share their observations: What specific shape did the ink drop form when it met the surface of the water? Expect the ink to form a circle or an organic, smooth edged "blob" because the ink also has surface tension and seeks to stay together, and a circle shape is the most efficient way to do this.
- Explain to students that while the ink has its own surface tension and is made of molecules that want to stay together, a small battle is going on because the ink also wants to spread out as much as possible. Because of the ink's surface tension, the ink molecules want to stay together rather than mix with the water molecules. The result of these two forces—the ink attempting to spread out and simultaneously wanting to adhere together—results in the forming a circular shape. To reinforce the logic of this, have the students do a quick exercise: Have all students hold hands. Then ask everyone to slowly spread out (like the ink did on the water) as far as they can while still staying together. The result is that the students form a circle or blob shape just like the ink!
- Share with students that what they are seeing is called a monolayer. The ink has spread out as far as it can on the surface to the point at which the ink is only one molecule thick! Ben Franklin began studying this in 1760 when he noticed that ocean water was flatter and calmer behind ships that had just dumped their cooking oil into the sea. In one experiment, he took a teaspoon of oil, gently poured it onto a pond and calculated that it spread out to cover more than half an acre! Today an entire branch of science called surface science (or surface chemistry) is devoted to studying this type of phenomenon.
- Continue the demonstration by adding a few more drops of ink to the surface of the water. As simple as this sounds, it is mesmerizing for children and adults. After you have created a beautiful image on the water, hold a piece of inexpensive construction paper (lighter colors such as yellow, pink, light blue and white work best) a few centimeters above the water and gently drop it. Do not submerge the paper! The paper floats on the surface of the water and an amazing and unexpected thing happens. If the paper is thin enough, it sits on the water surface for about two seconds, and then the paper darkens as the ink is absorbed and the image is transferred directly onto the paper! Gently lift the floating paper from the container, take a look at the just-created monoprint and blot your work of art with paper towels to help it dry. Do not worry about the paper towels taking away the ink. The ink is locked into the paper and cannot be wiped away.
- Briefly discuss capillary action and monoprints, keeping in mind that the students are probably wanting to get back to their own workstations to create their own prints. Capillary action is the ability of a liquid to flow in narrow spaces without the assistance of, and in opposition to, external forces like gravity. It is due to capillary action that the construction paper is able to absorb and lift the ink off the surface of the water.
- Direct students to return to their workstations to make a few prints. Make sure students sign their names on their pieces of paper before dropping them onto the water. Wet paper is hard to write on and students' prints can easily get mixed if they are not identified.
- Have students spend the remainder of the class making prints and using paper towels to blot them dry. To save counter space, have students place their blotted prints in one pile, with a towel between each print. The paper towels absorbs excess water and helps the prints dry faster.
- This concludes Session 1 and the activity can end at this point if desired.
With the Students—Session 2
The main goal of Session 2 is to get students to slow down and be more thoughtful about the prints they are making.
- Gather students around the demonstration area and review what was covered in the last session. Ask students to:
- Define surface tension. (Answer: A property of liquids such that an invisible membrane forms where air and water meet; it is caused by molecules wanting to stick together when exposed to air.)
- Explain how surface tension can affect objects such as paperclips and ink. (Answer: It can make things float that usually sink.)
- Describe why ink forms circular shapes when applied to the surface of water. (Answer: The ink attempts to spread out and stay together all at the same time; a circle is the best way to do this.)
- Explain what suminagashi is and what scientific principle makes it possible. (Answer: It is an ancient art form that uses floating inks to decorate paper. Surface tension makes it possible.)
- Imagine you are engineers working for a company that specialized in cleaning up environmental messes. How might you apply what you have learned while making suminagashi prints to a pollution emergency such as an oil spill? (Answer: Students used absorbent materials [construction paper] to lift a liquid [ink] that was floating on the water surface. Likewise, using similarly absorbent materials on a larger scale might be a way to absorb oil [or other unwanted liquids] from the surface of water.)
- Explain to students that what they have been creating when they place the paper on the ink is called a monoprint. The image they created can only be produced one time, which is unlike most printing processes that make multiple copies of the same image.
- Tell students that while their prints have been really good so far, it is time to take their prints to the next level. The secret to making an awesome suminagashi print is to SLOW DOWN! The ancient Japanese masters were not in a hurry. Making a suminagashi print was a combination of art and meditation. To prove your point and provide inspiration, show students a one-minute online video at: https://www.youtube.com/watch?v=4fAudTjK6E0.
- Direct students to return to their workstations to experiment with the concentric ring technique they just saw in the video. Tell them to slow down and that they are only allowed to create three more prints—or any limited number you choose, depending on how much time you have, so students have at least five minutes on each print they make. The intent is for students to become more thoughtful about the designs they create on the water. As with most things, additional time and effort generates better results. Look for evidence that students are taking more time with their prints by watching for ink patterns that contain several concentric rings rather than solid circles of color. As before, remind students to sign their papers BEFORE making prints. Again, have students place their blotted prints in one pile, with a towel between each print.
- As students are working, visit each workstation to observe and talk with them about surface tension and the creative process involved in the making of suminagashi prints. Also ask them if they have any ideas for how engineers might take advantage of surface tension to design inventions and useful products. See some suggested questions in the Assessment section.
- If time allows, show students some photographs and videos of additional artistic possibilities for this art form to inspire them to push themselves to create even more complex prints. Many beautiful examples of suminagashi prints can be found via a Google image search for "suminagashi." A wonderful two-minute video shows a suminagashi master creating a print at http://suminagashi.com/videos/.
- This concludes the suminagashi/surface tension activity.
Suminagashi Printmaking Steps Overview
- Use a paintbrush or Q-tip, gently place ink on the surface of the water, as shown in Figure 6.
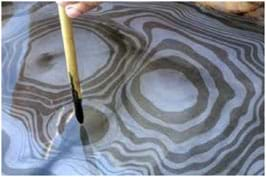
Figure 6. A paintbrush with ink placed gently on the water surface. - The ink floats and creates beautiful patterns. See Figure 7 as an example.
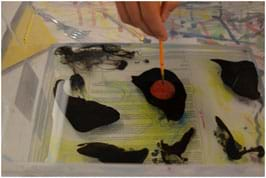
Figure 7. Ink floating and creating patterns. - Expect the students to become totally engaged in the process:
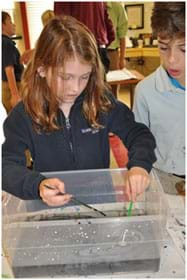
Students become engaged and focused in the process. - After experimenting, gently place a piece of construction paper on the water surface to absorb the ink, as shown in Figure 8.
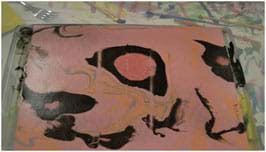
Figure 8. A (pink) piece of paper placed on the water surface absorbs the ink patterns. - Gently lift the paper from the water's surface and blot it with a paper towel (or hang from a drying rack over a sink). The ink is locked into the absorbent paper and cannot be wiped away. Place blotted prints in one pile to dry, with a towel between each print.
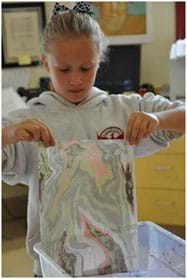
Gently removing the monoprint from the water shows that the ink has been absorbed into the paper. - Enjoy the resulting print, knowing that you have conducted an experiment about water tension and continued an ancient tradition.
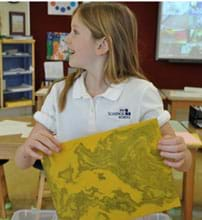
Every print is unique and astounding.
Vocabulary/Definitions
atom: The smallest unit of mass; often called the "building block of matter."
capillary action: The natural tendency of liquids to rise into tubes of small diameter.
molecule: A group of two or more atoms held together by chemical bonds.
monolayer: A layer that is one molecule in thickness.
monoprint: A print that can only be made one time.
suminagashi: An ancient art form that uses floating ink to decorate paper.
water surface tension: A property of water such that its surface, where air and water meet, behaves like a thin, elastic film. The effect is caused by water molecules wanting to stick together when exposed to air. Because of surface tension, the water surface can support light objects, such as water beetles on the surface of a pond.
Assessment
Pre-Activity Assessment
Questions: Ask students the questions provided in the first three steps of the Procedure section (also listed below) to assess their pre-requisite knowledge and prepare for the activity:
- What do we call the smallest building blocks of matter? (Answer: Atoms.)
- What is created when atoms join together by chemical bonds? (Answer: Molecules.)
- What do you get when you combine two hydrogen atoms and one oxygen atom? (Answer: Water, H2O.)
- If you dropped a bowling ball from 50 feet in the air onto an old, thin trampoline, what would happen? (Answer: The bowling ball would rip through the stretchy, elastic trampoline material.)
- Now what if we took that same bowling ball and ever-so-gently rolled it onto the trampoline from the side? (Answer: The bowling ball would roll onto the surface without tearing through.) In this analogy, the paperclip is the bowling ball and the old trampoline is the thin layer on the water—its surface tension.
Activity Embedded Assessment
Observations and Questions: During the activity, visit each workgroup to observe and ask questions to assess students' understanding of surface tension, suminagashi, engineering applications and the creative process. Alternatively, gather the students for a group discussion. Example questions:
- Now that you have experienced it first hand, what is surface tension? (Example answer: A thin, invisible membrane that forms on the surface of water.)
- How does surface tension affect the paperclips and ink you are using? (Answer: It can make things float that usually sink.)
- Why does the ink form circular shapes when applied to the water surface? (Answer: The ink attempts to spread out and stay together at the same time; a circle is the best way to do this.)
- What is suminagashi? How does it work? (Answer: It is an ancient Japanese art form that uses floating inks to decorate paper; the scientific phenomenon of surface tension makes it possible.)
- How might you use the concept of using an absorbent material like paper to lift floating ink off a surface of water to the task of removing unwanted liquids from a body of water—such as cleaning up an oil spill? (Answer: Engineers might use super absorbent material to lift spilled oil off the ocean just like students lift ink off the water using absorbent paper.)
- What other inventions or useful products might we create that take advantage of the phenomenon of surface tension? (Possible answers: Besides the pollution clean-up idea just mentioned, engineers use their understanding of surface tension to design ink jet printers, which rely on the precise control of tiny droplets of ink. They also design car cleaning and wax products that change the properties of your car's paint and window surfaces to better take advantage of surface tension so rain adheres weakly to the wax and strongly to itself, making water beads that smoothly slide away for clear vision and clean cars. Similar ideas are found in fabric and clothing that repel water and stains. For more ideas, see below.)
Additional information to support a more in-depth discussion about real-world engineering applications of surface tension:
- Surface tension prevents some liquids from mixing, such as oil and water, which is necessary for the design of air and water pollution clean-up technologies and engines with fuel and lubricating oil that stay separated so they can perform their roles (combustion for energy and lubrication of parts).
- Engineers have designed products like ink jet printers, which also includes designing the ink's surface tension so it turns a jet of liquid into droplets that can be deployed on paper with no smearing or bleeding. The same ink jet concept is used for industrial applications such as automotive coatings, decoration of non-flat surfaces, printing conductive patterns with metallic particles, printing on ceramics and textiles, and creating 3D prototypes.
- Surface tension affects the wetting ability of liquids on solids, which factors into the design of surface treatments of cars, aircraft and windshields. Similarly, the surface tension of paints and other surface coatings is carefully designed so the coatings spread easily while maintaining a desired film thickness. Another consequence of surface tension—the beading of a liquid on a surface—is important in the design of coatings to improve visibility through vehicle windows by helping water to shed quickly.
- Surface tension forces give rise to capillarity action, which is incorporated into the design of how liquids of all types are manipulated and moved in all sorts of machinery and medical equipment.
- Integrating the scientific understanding of capillarity and wetting, chemical engineers have created modern materials and coatings so that clothing and other surfaces repel water and are self-cleaning.
Post-Activity Assessment
Quiz: Administer the 10-question Post-Activity Quiz. Review students' answers to assess their mastery of the activity topics.
Safety Issues
The inks used in this project stain clothing so aprons are recommended.
Activity Extensions
After this activity, each student has several suminagashi prints, which are beautiful works of art on their own, but the pages can also be used to make beautiful suminagashi books. To do this, stack up the prints, folding them in half and place four staples along the spine at the fold.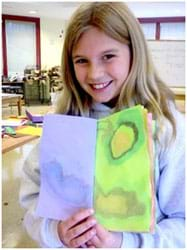
Activity Scaling
- For higher grades, pursue more in-depth conversations about capillary action and engineering applications.
- For college students, use this activity to demonstrate examples of vortex street, which is a repeating pattern of swirling vortices caused when air or water flows around an object (studied in fluid dynamics).
Additional Multimedia Support
This Simple Suminagashi - Lesson Plan video (9:48 minutes) is helpful for the instructor to view before doing the project with students. The presenter uses different inks and paper than recommended in this activity, but she gives a great overview of the suminagashi process: https://www.youtube.com/watch?v=J410yQ7PI1E
During the Procedure section, show students the inspirational "ink, water, breath – suminagishi" video that shows a concentric-ring technique (1:09 minutes) at https://www.youtube.com/watch?v=4fAudTjK6E0
During the Procedure section, show students a wonderful two-minute video of a suminagashi master creating a print (2:24 minutes) at http://suminagashi.com/videos/.
A good video about surface tension by TutorVista (4:04 minutes): https://www.youtube.com/watch?v=1Z_JqcHjJss
A great resource to learn more about suminagashi: The Ancient Art of Japanese Marbling at: http://suminagashi.com/
Another great resource about suminagashi and some example artwork at Mohawk's page, "Andrea Peterson gently enlightens us about suminagashi, drop by drop," at http://www.mohawkconnects.com/feltandwire/2012/01/09/andrea-peterson-gently-enlightens-us-about-suminagashi-drop-by-drop/
Another good video about surface tension, Intermolecular Forces-Surface Tension by pegneck (5:55 minutes): https://www.youtube.com/watch?v=WCd80xsukRI&feature=em-share_video_user
More about Ben Franklin's experiments with surface tension and biofilms at: http://www.research.vt.edu/resmag/sciencecol/surface_chem.html
More about surface science and surface chemistry at: http://en.wikipedia.org/wiki/Surface_science
More about capillary action at: http://en.wikipedia.org/wiki/Capillary_action
Subscribe
Get the inside scoop on all things Teach Engineering such as new site features, curriculum updates, video releases, and more by signing up for our newsletter!More Curriculum Like This

Students are presented with the question: "Why does a liquid jet break up into droplets?" and introduced to its importance in inkjet printers. A discussion of cohesive forces and surface tension is included, as well as surface acting agents (surfactants) and their ability to weaken the surface tensi...

Students learn about the basics of molecules and how they interact with each other. They learn about the idea of polar and non-polar molecules and how they act with other fluids and surfaces. Students acquire a conceptual understanding of surfactant molecules and how they work on a molecular level. ...
Copyright
© 2015 by Regents of the University of Colorado; original © 2014 Georgia Institute of TechnologyContributors
Steve Shaw, David HuSupporting Program
Partnerships for Research, Innovation and Multi-Scale Engineering (PRIME) RET, Georgia TechAcknowledgements
This activity was developed by the Partnerships for Research, Innovation and Multi-Scale Engineering (PRIME) Research Experience for Teachers (RET) Program at Georgia Institute of Technology, funded by National Science Foundation RET grant no. EEC 140718. However, these contents do not necessarily represent the policies of the NSF, and you should not assume endorsement by the federal government.
Last modified: January 22, 2019


User Comments & Tips