Quick Look
Grade Level: High school; also scalable for middle school
Time Required: 1 hours 30 minutes (wild guess!)
Subject Areas: Biology, Life Science, Physical Science

Maker Challenge Recap
This biomimetic engineering challenge utilizes the engineering design process as it introduces students to the fields of nanotechnology and biomimicry. Students explore how to modify surfaces such as wood or cotton fabric at the nanoscale. They create specialized materials with features such as waterproofing and stain resistance. The challenge starts with student teams identifying an intended user and developing scenarios for using their developed material. Students then design and create their specialized material using everyday materials. Each students test each design under specific testing constraints to determine the hydrophobicity of the material. After testing, teams iterate ways to improve their self-cleaning superhydrophobic modification technique for their design. After iterating and testing their designs, students present their final product and results to the class.
Maker Materials & Supplies
For investigating hydrophobicity:
Waterproofing materials:
- beeswax
- aloe vera gel
- cocoa butter
- wax
- crayons
- flaxseed oil
- lanolin
- clay
- glue
- spoons or sticks for smoothing materials onto surface
Tools to modify surface roughness:
- sandpaper
- wax paper
Surfaces to modify: (Depending on their target user, students will choose appropriate material)
- 10 cm x 10 cm piece of flat wood or 10 cm x 10 cm cotton fabric
Materials to simulate dirt:
- glitter
- pepper
Materials to observe drop profile/contact angle:
- hand lens
- camera or camera phone
Materials to test roll off angle:
- plastic clipboard
- protractor
- masking tape or duct tape
- small container of water
- pipette or eyedroppers
- paper towels
- sink
- buckets or small bins to catch water during testing
Materials to test self-cleaning ability:
- scale
- 50 ml graduated cylinder
Materials for posters:
- large poster board or butcher paper
- markers
Worksheets and Attachments
Visit [www.teachengineering.org/makerchallenges/view/rice-2389-hydrophobic-surfaces-engineering-challenge] to print or download.Subscribe
Get the inside scoop on all things Teach Engineering such as new site features, curriculum updates, video releases, and more by signing up for our newsletter!More Curriculum Like This

Students are introduced to superhydrophobic surfaces and the "lotus effect." Students learn how plants create and use superhydrophobic surfaces in nature and how engineers have created human-made products that mimic the properties of these natural surfaces.

Students learn about the basics of molecules and how they interact with each other. They learn about the idea of polar and non-polar molecules and how they act with other fluids and surfaces. Students acquire a conceptual understanding of surfactant molecules and how they work on a molecular level. ...
Kickoff
(Have the Engineering Self-Cleaning Hydrophobic Surfaces PowerPoint Presentation available.)
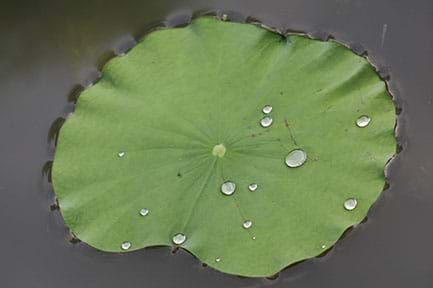
Have you ever noticed how water rolls off a leaf, or how a blade of grass or a lily pad floats on water? We call these plants parts “superhydrophobic,” which means that they repel water and they never get dirty. Why is this? First, let us define hydrophobic: “hydro” means water and “phobic” means fear. Think about oil and water. Do they ever mix? No, because oil is “hydrophobic” – the oil appears to avoid the water!
Engineered hydrophobic surfaces are in high demand for many products and industries. For example, hydrophobic surfaces are optimal for sweat-proof and dirt-proof clothing, rust prevention, anti-icing, solar panels and even sanitation.
[Show students a video (3:19) summarizing of how NASA is proposing the use of super hydrophobic surfaces on the International Space Station (ISS). Have students understand hydrophobic and hydrophilic materials by testing and observing what happens when a drop of water is dropped on (a) paper, (b) paper with a layer of glue, (c) paper with hydrophobic sand glued to paper, and (d) paper with instant snow glued to it. (Instructions provided in the PowerPoint.)]
Your challenge is to create a product that can make a surface both dirt and stain resistant using your knowledge of hydrophobicity. Working with your team of engineers you will first decide who needs your product: construction industries, car companies, city planners, clothing companies or homeowners. Based on your user, your team will choose a starting material of wood or cotton fabric. Your team will then choose methods for modifying your surface. After modifying your surface, you will test it to determine its hydrophobicity and its ability to keep dirt and water off.
To begin you need to do some research and gain background knowledge. Examine the materials that have been provided; your group must choose one type of material with which to work. You will be provided with two pieces of your chosen material. You will design and test the first prototype and then make modifications for your second and final prototype. You may use only two different waterproofing materials on each prototype to determine which combination works best for your task. You may test the water proofing materials to determine hydrophobicity and decide how you will use them to modify your surface.
After testing and redesigning, your team will evaluate your designs and propose improvements for next time. You will communicate these results with a poster. Let’s get started!
Resources
- Refer to the Engineering Design Process hub on TeachEngineering to guide your students through the challenge. And utilize the Engineering Design Process Notebook, as needed.
- Show students how they will test for hydrophobicity by testing three waterproofing materials provided.
- Provide students with Engineering Self-Cleaning Hydrophobic Surfaces Student Sheet to help them organize their ideas, record drop profile, tilt angle, their definition of hydrophobic and future improvements.
- Consider showing students the following videos for inspiration and brainstorming:
- What happens to water drops on the Colocasia esculenta leaf: “Colocasia esculenta” by SciFri.
- What a scientist has designed based on the hydrophobic surface of plants: “Superhydrophobic surfaces don’t get wet” by ISTscience via ABC News.
- Model what the microscopic surface looks like with egg crates or use cut Styrofoam balls to model drop profile and contact angle of surfaces: “The science of superhydrophobic surfaces” by ISTscience via WTOL 11 News.
Maker Time
- As a class, review the concepts behind hydrophobicity via the Engineering Self-Cleaning Hydrophobic Surfaces PowerPoint Presentation and the steps of the engineering design process. Next, review the materials available, the testing constraints, and the procedure.
- Divide the students into groups of 3-4 and give students 15 minutes to brainstorm what target audience would benefit from the surfaces provided and potential waterproofing materials.
- During the brainstorming session, allow students to test the waterproofing materials on their Engineering Self-Cleaning Hydrophobic Surfaces Student Sheet.
- After each student team devises two ways to waterproof their chosen material, students must develop a written plan for both pieces of material. Students must modify and label the two approaches Material 1 and Material 2.
- Students modify their two surfaces based on their written plan.
- Teams will then observe and diagram the drop profile and contact angle of a drop of water on their modified surface.
- Place a drop of water on the surface.
- Look at the drop from the side and sketch the drops profile on your worksheet.
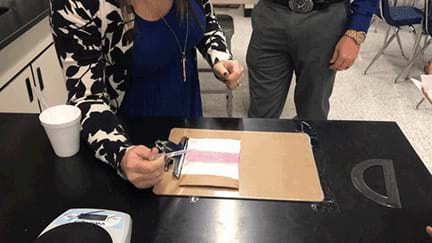
- Teams will then test tilt and roll off angle (see Figure 1).
- Tape the bottom edge of clipboard to lab table.
- Clip your material onto the clipboard.
- Place a drop of water on the material.
- Person 1: Begin to raise the clipboard slowly, Person 2: make sure to observe at eye level when the drop of water begins to roll.
- Using the protractor record the angle when the water drop begins to slide. If it did not slide, record no roll off angle.
- Test self-cleaning properties.
- Students will be provided with a set amount of “dirt” (pepper or glitter).
- After sprinkling “dirt” on the surface, they will take the mass of the material and “dirt”.
- They will then pour 30 ml of water on surface to clean surface.
- Students will then take the mass of the initial material with “dirt” and then the final after rinsing with 30 ml of water. They will then calculate the percent change in mass to determine how “clean” surface is.

Wrap Up
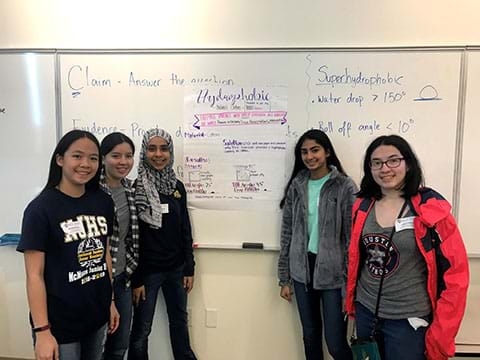
Students will reflect upon their designs and test results. They may create a poster to include their specific problem, chosen material, proposed solutions, results (surface observations, tilt angle, and drop profile), and conclusion that includes future work.
They will choose a spokesperson to communicate their results and future improvements to the class.

Tips
- Break the challenge into two class periods. Complete the kickoff, show videos, provide background information and background research on Day 1. Students may also think of other materials to bring in to waterproof material. On Day 2, students should create, test, and create posters and present posters.
- Allow students to use only two materials to modify.
- Pre-measure materials for students to use in small bathroom cups to limit waste.
Copyright
© 2019 by Regents of the University of Colorado; original © 2019 Rice UniversityContributors
Krystle Dunn; Qilin Li; Seth PedersenSupporting Program
Engineering Research Center for Nanotechnology Enabled Water Treatment Systems (NEWT) RET, Rice UniversityAcknowledgements
This material was developed in collaboration with the Rice University Office of STEM Engagement, based upon work supported by the National Science Foundation under grant no. EEC 1449500—Engineering Research Center for Nanotechnology Enabled Water Treatment Systems (NEWT) RET, Rice University in Houston, TX. Any opinions, findings and conclusions or recommendations expressed in this material are those of the authors and do not necessarily reflect the views of the National Science Foundation or Rice University.
Last modified: July 28, 2020


User Comments & Tips