
Quick Look

- Grade Level:
- 11 (11 – 12)
- Time Required:
- 3 hours
(four 45-minute sessions)
- Group Size:
- 3
- Subject Areas:
-
Biology Science and Technology -
NGSS Performance Expectations:

HS-ETS1-3 HS-LS1-1 HS-LS3-1

Summary
This activity introduces students to synthetic biology by having them explore how DNA, RNA, and proteins are connected, and how scientists engineer new biological materials. Students begin by reverse-engineering the genetic code of a protein and then constructing a physical model of a silk-amyloid-mussel foot protein using amino acid models. They test the protein's cohesive strength using a Vernier force probe to measure the forces required to break the bonds holding the protein together. Using the engineering design process, students then redesign the protein by changing the amino acid sequence while working within realistic biological constraints. Finally, students build, test, and refine their novel protein designs to determine whether they can create a stronger and more cohesive synthetic biomaterial.Engineering Connection
Synthetic biologists redesign genetic information to modify biological systems and address societal challenges. At its core, synthetic biology involves engineering DNA sequences that produce novel proteins with useful properties. These engineered proteins (polypeptides) can be applied across medicine, materials science, energy, and other fields.
Learning Objectives
After this activity, students should be able to:
- Describe the processes of transcription and translation.
- Explain how a change in a DNA base pair can alter the amino acid sequence of a polypeptide, potentially changing its 3D structure and function.
- Construct a novel polypeptide and determine the corresponding mRNA and DNA sequences that would code for that protein.
Educational Standards
Each Teach Engineering lesson or activity is correlated to one or more K-12 science,
technology, engineering or math (STEM) educational standards.
All 100,000+ K-12 STEM standards covered in Teach Engineering are collected, maintained and packaged by the Achievement Standards Network (ASN),
a project of D2L (www.achievementstandards.org).
In the ASN, standards are hierarchically structured: first by source; e.g., by state; within source by type; e.g., science or mathematics;
within type by subtype, then by grade, etc.
Each Teach Engineering lesson or activity is correlated to one or more K-12 science, technology, engineering or math (STEM) educational standards.
All 100,000+ K-12 STEM standards covered in Teach Engineering are collected, maintained and packaged by the Achievement Standards Network (ASN), a project of D2L (www.achievementstandards.org).
In the ASN, standards are hierarchically structured: first by source; e.g., by state; within source by type; e.g., science or mathematics; within type by subtype, then by grade, etc.
NGSS: Next Generation Science Standards - Science
| NGSS Performance Expectation | ||
|---|---|---|
|
HS-ETS1-3. Evaluate a solution to a complex real-world problem based on prioritized criteria and trade-offs that account for a range of constraints, including cost, safety, reliability, and aesthetics, as well as possible social, cultural, and environmental impacts. (Grades 9 - 12) Do you agree with this alignment? |
||
| Click to view other curriculum aligned to this Performance Expectation | ||
| This activity focuses on the following Three Dimensional Learning aspects of NGSS: | ||
| Science & Engineering Practices | Disciplinary Core Ideas | Crosscutting Concepts |
| Evaluate a solution to a complex real-world problem, based on scientific knowledge, student-generated sources of evidence, prioritized criteria, and tradeoff considerations. Alignment agreement: | When evaluating solutions it is important to take into account a range of constraints including cost, safety, reliability and aesthetics and to consider social, cultural and environmental impacts. Alignment agreement: | New technologies can have deep impacts on society and the environment, including some that were not anticipated. Analysis of costs and benefits is a critical aspect of decisions about technology. Alignment agreement: |
| NGSS Performance Expectation | ||
|---|---|---|
|
HS-LS1-1. Construct an explanation based on evidence for how the structure of DNA determines the structure of proteins which carry out the essential functions of life through systems of specialized cells. (Grades 9 - 12) Do you agree with this alignment? |
||
| Click to view other curriculum aligned to this Performance Expectation | ||
| This activity focuses on the following Three Dimensional Learning aspects of NGSS: | ||
| Science & Engineering Practices | Disciplinary Core Ideas | Crosscutting Concepts |
| Construct an explanation based on valid and reliable evidence obtained from a variety of sources (including students' own investigations, models, theories, simulations, peer review) and the assumption that theories and laws that describe the natural world operate today as they did in the past and will continue to do so in the future. Alignment agreement: | Systems of specialized cells within organisms help them perform the essential functions of life. Alignment agreement: All cells contain genetic information in the form of DNA molecules. Genes are regions in the DNA that contain the instructions that code for the formation of proteins, which carry out most of the work of cells.Alignment agreement: | Investigating or designing new systems or structures requires a detailed examination of the properties of different materials, the structures of different components, and connections of components to reveal its function and/or solve a problem. Alignment agreement: |
| NGSS Performance Expectation | ||
|---|---|---|
|
HS-LS3-1. Ask questions to clarify relationships about the role of DNA and chromosomes in coding the instructions for characteristic traits passed from parents to offspring. (Grades 9 - 12) Do you agree with this alignment? |
||
| Click to view other curriculum aligned to this Performance Expectation | ||
| This activity focuses on the following Three Dimensional Learning aspects of NGSS: | ||
| Science & Engineering Practices | Disciplinary Core Ideas | Crosscutting Concepts |
| Ask questions that arise from examining models or a theory to clarify relationships. Alignment agreement: | All cells contain genetic information in the form of DNA molecules. Genes are regions in the DNA that contain the instructions that code for the formation of proteins. Alignment agreement: Each chromosome consists of a single very long DNA molecule, and each gene on the chromosome is a particular segment of that DNA. The instructions for forming species' characteristics are carried in DNA. All cells in an organism have the same genetic content, but the genes used (expressed) by the cell may be regulated in different ways. Not all DNA codes for a protein; some segments of DNA are involved in regulatory or structural functions, and some have no as-yet known function.Alignment agreement: | Empirical evidence is required to differentiate between cause and correlation and make claims about specific causes and effects. Alignment agreement: |
Common Core State Standards - Math
-
Interpret the slope (rate of change) and the intercept (constant term) of a linear model in the context of the data.
(Grades
9 -
12)
More Details
Do you agree with this alignment?
-
For a function that models a relationship between two quantities, interpret key features of graphs and tables in terms of the quantities, and sketch graphs showing key features given a verbal description of the relationship.
(Grades
9 -
12)
More Details
Do you agree with this alignment?
International Technology and Engineering Educators Association - Technology
-
Use various approaches to communicate processes and procedures for using, maintaining, and assessing technological products and systems.
(Grades
9 -
12)
More Details
Do you agree with this alignment?
-
Synthesize data and analyze trends to make decisions about technological products, systems, or processes.
(Grades
9 -
12)
More Details
Do you agree with this alignment?
Materials List
For each group needs:
- 1 laptop or computer
- 1 Vernier Force Probe: https://www.vernier.com/product/dual-range-force-sensor
- 1 Vernier LabQuest or compatible interface*
- Possible Vernier interfaces:
- LabQuest 2: https://www.vernier.com/product/labquest-2
- LabQuest 3: https://www.vernier.com/product/labquest-3
- LabQuest Go Link: https://www.vernier.com/product/golink
- Note: The authors have not tested the Go Link or the Vernier Mini, but here is a link to those products: https://www.vernier.com/products/labquest
- 1 amino acid model set (See instructions in “Before the Activity” and/or How to Make Your Own Amino Acid Models With a 3D Printer or How to Make Your Own Amino Acid Models Without a 3D Printer)
- 15 ft (~4.6 m) green paracord with a diameter of 5/32 in. (~4 mm), unmarked
- 15 ft (~4.6 m) blue paracord with a diameter of 5/32 in. (~4 mm), marked at the following locations: 5 in., 6.5 in., 14.5 in., 22 in., 31.5 in., 38 in., 43 in., 50 in., 56.5 in. 61.5 in., 71 in., 77 in., 83.5 in., 91.5 in., 96.75 in., 104.5 in., 111.5 in., 118.5 in., 128 in., 133.5 in., 138 in., 143 in.
- 1 Amino Acid Placemat
- 1 Developing New Surgical Materials article per student
- 1 New Genes, New Proteins Worksheet per student
- 1 Pre-Lab Worksheet per student
- At least 1 codon wheel (located in the Appendix of the New Genes, New Proteins Worksheet)
- Access to the following either digitally or as a hard copy:
*Teaching Tip: Comparable force probes may be substituted for the Vernier force sensor. If a force probe is unavailable, a spring scale may be used. Alternatively, cups and fishing weights can be used to apply force. If using this method, suspend the model vertically and attach the cups to the bottom of the model.
Worksheets and Attachments
Visit [www.teachengineering.org/activities/view/wst-3033-synthetic-biology-new-genes-proteins-activity] to print or download.Pre-Req Knowledge
Before beginning this activity, students should be introduced to the processes of transcription and translation. This introduction may be provided through a brief lecture, worksheet, video, or other instructional resources of your choosing.
It is helpful for students to:
- Have a basic understanding of the central dogma of molecular biology (DNA → RNA → protein).
- Be familiar with the levels of protein structure and how protein conformation influences function.
- Understand the purpose and application of a t-test for comparing data sets.
- Have experience using Vernier probes or similar data-collection equipment.
Introduction/Motivation
What is synthetic biology? (Answer: Synthetic biology is the engineering of living organisms by designing and modifying DNA to create new biological functions or solve real-world problems.)
Can you name some products that have been developed through synthetic biology? (Possible answers: surgical glues, the Impossible Burger, vaccines, insulin, and bioplastics.)
When developing new products, a team of professionals must work together to address the needs of society. What are some types of scientists and engineers that play a role in developing these new products? (Possible answers: molecular biologists, microbiologists, biochemists, synthetic biologists, bioinformaticians, engineers, medical researchers, environmental scientists, neuroscientists, genetic engineers, and flavor scientists.)
What exactly is a synthetic biologist? (Possible answers: A scientist or engineer who applies engineering principles to biological systems, aiming to design, build, and redesign new biological parts, devices, and systems or to modify existing ones for useful purposes.)
In fact, synthetic biologists today are using nature as inspiration and developing novel strands of DNA to make proteins that are similar to ones found in nature. The strands of DNA are generated in a lab and code for proteins that have never been seen before and have properties that enable them to be used in tackling a variety of problems. Synthetic biology is partially responsible for the development of the Impossible Burger, but it is also making advances in medicine and manufacturing.
Today, you will model the work of a synthetic biologist as you work to improve a surgical glue. Let’s get started!
Procedure
Background
Prior to the activity, it’s important that you understand what synthetic biology is and how it is different from genetic engineering. You should also be able to explain and demonstrate what transcription and translation are, and to model how to use the codon wheel to decode a strand of DNA/mRNA and generate the subsequent strand of amino acids. You should also be able to use the codon wheel to work backwards from an amino acid to a specific codon.
This activity is designed to be flexible based on your schedule. You can choose one of the following formats:
Option 1: Four-Day Format (preferred)
- Day 1: Introduction to Synthetic Biology (45 minutes)
- Day 2: Introduction to the Activity (45 minutes)
- Day 3: Phases 1–3 (45 minutes)
- Day 4: Phase 4 (45 minutes)
Option 2: Pre-Activity Introductions and One-Day Format
- Assign the case studies in the Introduction to Synthetic Biology section as homework or do before the activity
- Assign the Introduction to the Activity section as homework.
- Complete all four phases in a single 90-minute block.
Synthetic Biology and Genetic Engineering
Synthetic biology has its roots in genetic engineering, but involves designing and constructing new biological parts, devices, and systems that do not exist in the natural world. A synthetic biologist might use a naturally occurring DNA strand as a base but then alter it by generating a novel genetic code to maximize particular aspects of the new bacterial cell or properties of proteins that the new cellular machine will produce. Genetic engineering modifies specific genes or genetic elements within organisms. A genetic engineer may alter specific traits or functions of organisms for practical applications. Synthetic biology takes a broader systems-level approach to design and construct entire biological systems or devices. It aims to engineer entirely new biological systems or redesign existing ones to perform desired functions. Genetic engineering and synthetic biology require a firm grasp of the central dogma of molecular biology.
Hydrogels
Hydrogels are complex polymers that are useful biomaterials. They are soft, flexible, and can mimic natural tissue, which makes them useful in a wide range of applications. The silk-amyloid-mussel foot protein is a specific hydrogel developed by synthetic biologists. It contains proteins found in spider silk, as well as proteins that mussels use to adhere to surfaces. This specific hydrogel has the potential to be used as a surgical glue. Adhesion refers to its ability to stick to other things. Cohesion is the protein’s ability to stick to itself; cohesion matters in glue because it determines how well the glue holds itself together. High cohesion helps glue resist stretching, pulling, or bending over time.

The Central Dogma of Molecular Biology
The central dogma of molecular biology is a fundamental concept that explains how genes “direct” the production of proteins. The central dogma (DNA → RNA → Protein) explains how genes are transcribed into messenger RNA and then translated into proteins, which perform nearly all of the functions in a cell. First, transcription occurs. Transcription is when a segment of DNA is copied into messenger RNA (mRNA). This mRNA strand carries the genetic instructions from the nucleus to the ribosome, where translation occurs. In translation, the ribosome reads the sequence of the mRNA and assembles a chain of amino acids in the correct order to form a protein.

Transcription
Transcription is the process by which a segment of DNA is copied into mRNA, allowing genetic information to be carried from the nucleus to the cytoplasm for protein synthesis. The process begins when the enzyme RNA polymerase binds to a specific region of DNA called the promoter, located upstream of the gene to be transcribed. In eukaryotic cells, transcription factors are also required to help RNA polymerase recognize and bind to the promoter. Once bound, RNA polymerase unwinds the DNA and begins synthesizing a single-stranded RNA molecule by adding RNA nucleotides that are complementary to the DNA template strand (e.g., A pairs with U instead of T). As the enzyme moves along the DNA, the RNA strand elongates until RNA polymerase reaches a termination sequence, signaling the end of transcription. In eukaryotes, the newly formed pre-mRNA undergoes several modifications: A 5' cap is added, a poly-A tail is attached to the 3' end, and introns (non-coding regions) are removed through RNA splicing by a complex called the spliceosome. The final product is mature mRNA, which exits the nucleus and enters the cytoplasm, where it will be translated into a protein.
Translation
Translation is the process by which the sequence of nucleotides in mRNA is used to build a specific sequence of amino acids, forming a protein. It occurs in the cytoplasm at the ribosome, which is composed of ribosomal RNA (rRNA) and proteins. The process begins when the small ribosomal subunit binds to the mRNA and scans for the start codon (AUG), which codes for the amino acid methionine. Once the start codon is found, the large ribosomal subunit joins to form a complete ribosome. Transfer RNA (tRNA) molecules, each carrying a specific amino acid, recognize codons on the mRNA through their complementary anticodons. As the ribosome moves along the mRNA, tRNAs bring amino acids in the correct order, and the ribosome links them together. Enzymes play a crucial role in forming the peptide bonds between the amino acids. New tRNAs bring in and attach their amino acids to produce a polypeptide chain. Translation continues until a stop codon (UAA, UAG, or UGA) is reached. When the stop codon is reached, the completed protein is released from the ribosome.
Codon and Anticodon
A codon is a sequence of three nucleotides on mRNA that corresponds to a specific amino acid or a stop signal during protein synthesis. For example, the codon AUG codes for the amino acid methionine and also serves as the start codon.
An anticodon is a sequence of three nucleotides on a tRNA molecule that is complementary to an mRNA codon. The anticodon allows the tRNA to recognize and bind to the correct codon on the mRNA, ensuring that the appropriate amino acid is delivered to the ribosome. For example, the anticodon UAC pairs with the codon AUG on the mRNA.
Transcribing DNA into RNA
To transcribe a strand of DNA into RNA, you follow a process where the DNA sequence is used as a template to build a complementary RNA strand.
Steps to Transcribe DNA to RNA
- Identify the template strand of DNA. Transcription reads the 3' to 5' DNA strand, and RNA is built in the 5' to 3' direction. The RNA strand will be complementary to this template.
- Match the RNA nucleotides to the DNA template, using base-pairing rules:
- DNA A (adenine) pairs with RNA U (uracil)
- DNA T (thymine) pairs with RNA A
- DNA C (cytosine) pairs with RNA G
- DNA G (guanine) pairs with RNA C
- Write the RNA sequence by replacing each DNA base with its RNA complement, moving from the 3' end to the 5' end of the DNA template.
Example:
If the DNA template strand is: 3'-TAC GGA TCT GAA-5', Then the mRNA strand would be: 5'-AUG CCU AGA CUU-3'.
This RNA strand can now be used during translation to make a protein.
Using the Codon Wheel as it Relates to Translation and the Central Dogma
A codon wheel (also called a codon chart or genetic code wheel) is a chart that allows you to determine which amino acid is associated with each codon in a strand of mRNA.
Steps in using a codon wheel:
- Start at the center of the wheel with the first base of the mRNA codon (5' → 3' direction). For example, if your codon is AUG, begin at A in the center.
- Move to the second ring, using the second base of the codon. From A, move outward to U (for AUG).
- Then, move to the third ring, selecting the third base. From AU, go to G.
- The outermost ring shows the amino acid that corresponds to the full codon. In this case, AUG codes for methionine (Met), which also serves as the start codon for translation.
For example, if the strand of mRNA is: 5'-AUG CCU AGA CUU-3':
AUG → Methionine (Met) – also the start codon
CCU → Proline (Pro)
AGA → Arginine (Arg)
CUU → Leucine (Leu)
The polypeptide chain would then be Met–Pro–Arg–Leu.

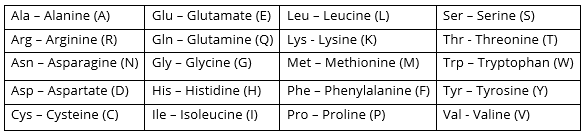
Amino Acid Abbreviations, Names, and Symbols
Before the Activity
- Create one amino acid model set for each student group. Note: Making the amino acid models and gluing the magnets in place is time consuming. Make sure that you have allowed yourself plenty of time to complete the construction of the amino acid models before you begin setting up for the activity.
- 3D printer access: How to Make Your Own Amino Acid Models With a 3D Printer
- No 3D printer access: How to Make Your Own Amino Acid Models Without a 3D Printer
- Gather supplies and place the following at group workstations: one laptop/computer, one amino acid model set, green and blue paracords, one Vernier force probe and interface, and one Amino Acid Placemat.
- Make copies of:
- Amino Acid Placemat (1 per group)
- Developing New Surgical Materials (1 per student)
- New Genes, New Proteins Worksheet (1 per student)
- Pre-Lab Worksheet (1 per student)
- Ensure students/groups have access to the following either digitally or as a hard copy:
During the Activity
Introduction to Synthetic Biology (45 min; can be assigned as homework or completed prior to the activity if time is limited)
- Divide the class into groups of 2-4 students.
- Have each group read one (or more) of the following case studies:
- Have each group answer the questions at the end of their assigned case study.
- Bring the class back together.
- Have each group share a summary of their case study.
- Lead a class discussion about synthetic biology and products developed through synthetic biology, emphasizing that:
- Synthetic biology combines biology and engineering to design (or redesign) living systems to solve real-world problems, such as medicines, foods, fuels, and new materials.
- DNA is like a set of instructions that scientists can modify to change how cells function and what they produce.
- Nature is a source of inspiration for innovation, with engineers and scientists often copying or adapting strategies from organisms like yeast, spiders, and mussels.
- Synthetic biology can improve or replace traditional processes, making them more efficient, sustainable, and environmentally friendly.
- Collaboration across disciplines is essential, involving biologists, engineers, chemists, and data scientists working together.
Introduction to the activity (45 minutes)
- Divide the class into groups of 2-4 students.
- Distribute one Developing New Surgical Materials to each student.
- Give each group 15 minutes to read the materials and watch the associated video.
- Bring the class back together.
- Distribute one New Genes, New Proteins Worksheet to each student.
- Review the procedure described in the worksheet as a class.
- Provide one Pre-Lab Worksheet to each student.
- Give students 15 minutes to complete the Pre-Lab Worksheet.
- Have students discuss their answers with their groups.
- Remind students that they should all have a shared understanding of objectives for each phase of the activity.
- Make sure each group discusses any concerns regarding the activity.
- Remind groups to be mindful about how they can work as a team to reduce or eliminate any hiccups in procedures and outcomes.
- Introduce the design challenge:
“As you know from our readings, scientists have synthesized a new adhesive using the DNA that codes for spider silk and the glue that mussels use to stick to rocks. It is called a silk-amyloid-mussel foot protein. It is actually composed of 16 repeating β-sheet-forming blocks with alternating amyloid and silk peptides. The order of amino acids in the protein is lysine, leucine, valine, phenylalanine, phenylalanine, alanine, glutamic acid, glutamine, glycine, threonine, serine, glycine, arginine, glycine, glycine, leucine, glycine, glycine, glutamine, glycine, alanine, glycine.
The glue is relatively strong, but it may be possible for you to develop an even stronger adhesive. Today, you will have the same amino acids, but you will be able to reorder them and engineer a new protein that may be even stronger. You will be able to not only construct a novel protein, but you will also be able to work backwards and provide the genetic code that codes for your new protein.
Remember, when you change the order of amino acids, you also change the shape and function of the protein. You will need to know not only the order of amino acids for your new synthetic protein but also the genetic code that can be inserted into a bacterium so that more of your glue can be produced.
Once your new polypeptide chain is created, you will construct a model of the polypeptide and measure how cohesive it is using a force probe.”
Phase 1: Reverse Engineering
- Explain to the class that they will first be completing Phase 1 of a multi-step activity.
- Explain that Phase 1 requires students to reverse-engineer a strand of mRNA and DNA from a chain of amino acids and their New Genes, New Proteins Worksheet contains the information needed to complete phase of the activity.
- Provide each group with one set of amino acid models, one Vernier force probe and interface, and access to the Amino Acid Placemat.
- Remind students that the order of amino acids in the protein is: methionine (start), lysine, leucine, valine, phenylalanine, phenylalanine, alanine, glutamic acid, glutamine, glycine, threonine, serine, glycine, arginine, glycine, glycine, leucine, glycine, glycine, glutamine, glycine, alanine, glycine.
- Point out that the codon wheel is located on the last page of their New Genes, New Proteins Worksheet.
- Optional: Show students how to use the codon wheel.
- Start at the center of the wheel with the first base of the mRNA codon (5' → 3' direction). For example, if your codon is AUG, begin at A in the center.
- Move to the second ring, using the second base of the codon. From A, move outward to U (for AUG).
- Then, move to the third ring, selecting the third base. From AU, go to G.
- The outermost ring shows the amino acid that corresponds to the full codon. In this case, AUG codes for methionine (Met), which also serves as the start codon for translation.
- Give students time to complete Phase 1 and answer the associated analysis questions.
- Summarize the key takeaways of Phase 1:
- You can work backward from a protein’s amino acid sequence to determine possible mRNA sequences using the codon wheel and the genetic code.
- DNA is transcribed into mRNA, and mRNA is translated into proteins, following the central idea that genetic information flows from nucleic acids to proteins.
- A known amino acid sequence can be used to infer possible mRNA codons, working backward using the genetic code.
- A codon wheel helps match mRNA codons to amino acids, showing how sequences of three RNA bases correspond to specific amino acids.
- Codons are read in groups of three bases (5’ → 3’ direction) to determine the correct amino acid order.
- Each codon specifies one amino acid, and together they form a polypeptide chain.
- The order of codons determines the order of amino acids, which determines the resulting protein structure.
- After Phase 1 has been successfully completed, have students move to Phase 2.

Phase 2: Protein Construction
- Introduce Phase 2: Using the supplied amino acid models, each group will construct the amino acid chain for the silk-amyloid-mussel foot protein.
- Direct students to follow the directions in the Phase 2 section of their New Genes, New Proteins Worksheet.
- Give students time to construct their model.
- Students should place the amino acids on the blue paracord.
- They then fold the model so that hydrogen bonds can form between the amino acids (i.e., the magnets embedded in the amino acids model set represent the hydrogen bonds).
- The marks on the blue cord indicate the approximate locations of where to place the amino acids.
- Teaching point of emphasis: As students bend the cord to connect the amino acids together, they are completing the process of translation! One student is playing the role of the ribosome and rRNA as they place the amino acids in the correct order. When their lab partner(s) is handing them an amino acid, they are acting as tRNA.
- Emphasize to the groups that the primary structure of the polypeptide is determined by the sequence of amino acids, and the overall 3D structure of the protein is beginning to take shape.
- Below is a reference table for the amino acids used in the protein and the shape and color of the 3D printed models used in this activity.
Amino Acid and Shape Legend

- Once each group has successfully constructed their amino acid chain, mark this section of their worksheet as complete. Student protein models should look similar to Image 5.

Phase 3: Strength of Cohesion
- Explain to students that the protein they created has both adhesive and cohesive properties.
- Adhesion is the ability of a material to stick to other surfaces or materials.
- Cohesion is the ability of a material to stick to itself. In adhesives, cohesion is important because it determines how well the material holds together when stretched, pulled, or bent. Materials with high cohesion are less likely to break apart under stress.
- Tell students that they will evaluate the protein's structure and strength by measuring its cohesive strength using a Vernier force probe.
- Specifically, they will measure the strength of the bonds that hold the protein structure together.
- In real proteins, cohesive strength is influenced by interactions such as hydrogen bonds between amino acids.
- In the protein model, the magnets represent these hydrogen bonds.
- Students will use a Vernier force probe to measure the force required to break the magnetic bonds between amino acids.
 and the hydrogen bonds between water molecules.")

- Following the instructions in the Phase 3 section of the New Genes, New Proteins Worksheet, have each group set up their Vernier force probe and LabQuest.


- Demonstrate how students will test the cohesiveness of their protein by:
- Forming a loop at each end of the cord, as shown in Images 8 and 9.
- Attaching the Vernier force probe to one of the loops on the protein model.
- Having one lab partner hold the loop at the opposite end of the protein model while another student pulls on the force probe to apply tension to the cord.
- Preparing the LabQuest to collect data.


- To collect data, instruct students to press “Start” on the LabQuest and gradually pull on the force probe until the protein model completely separates. As individual bonds between amino acids break, the force probe will record changes in force (newtons). (Note: Students should pull the model across the tabletop rather than lifting it, to minimize the effects of gravity on the measurements.)
- Students should record the number of newtons they are able to apply before the protein loses all structural integrity.
- This process should be completed in 10-15 seconds. Note: The LabQuest will automatically stop collecting data in 15 seconds.
- After data collection is complete, the LabQuest will display a graph similar to Image 15, where each peak on the graph represents the force required to break a specific bond between amino acids.

- To analyze the data:
- Direct students to use the LabQuest stylus to identify and record the force values (in newtons) for at least 15 of the highest peaks.
- Have students then add these values together to calculate the total force required to completely separate the protein model.
- Ensure students know to record this value in the data table provided in the New Genes, New Proteins Worksheet.
- Have students collect data a total of three times and then calculate an average force needed to separate their model protein, which can be placed into the data table like the one below located in the New Genes, New Proteins Worksheet.
- Once students have determined the cohesive strength of their original protein model, have them proceed to Phase 4.
Phase 4: Synthetic Biology - Meeting the Challenge
- Optional: Review the steps of the engineering design process.
- Ask: Describe the design challenge for the class.
- Say: “You all are synthetic biologists developing a new protein (using only the amino acids provided) that is more cohesive than the current amyloid hydrogel.”
- Describe the materials available: “Your kit contains a green paracord and excess amino acids to accomplish this challenge.”
- Outline the constraints: There are limitations as to which amino acids can pair with each other. Just like in the real world, students must work under specific constraints. Students must follow the following protein building rules when constructing their novel protein.
- Give students the following protein building rules:
- They only have two chances to design a more cohesive protein. (If time permits, the number of test designs can be increased.)
- They cannot increase the number of amino acids in the protein to more than 22. (Long strands of genetic code are more difficult to be successfully inserted and be translated into proteins by bacteria.)
- They cannot place glutamine next to valine. The combination of some amino acids together causes proteins to form helices. In this scenario, assume placing a glutamine and a valine near each other will result in a spiral instead of a sheet.
- They cannot place more than two glycines or serines in a row. Repetitive sequences of some amino acids mimic the genetic code of a virus. Cells have evolved a defense mechanism (RNAi) to stop the translation of viral mRNA. In this model, having multiple glycine or serine amino acids in a row would result in no translation.
- Note: All models have limitations. One limitation of this model is that just because a team’s protein is more cohesive does not necessarily mean that it will be stable. Protein conformation has four layers of folding. This model is really only investing in the first two levels of protein conformation. In reality, there is a chance the protein a team designs could be unstable and break apart at room temperature.
- Note: Class time is a factor/constraint. During this design phase, students may want to test a few different configurations. Be aware of class time, as you may have to limit students on the number of variations they wish to develop prior to their final test of protein strength.

- Imagine: Instruct students to discuss with their research team which amino acids to use and the sequence that they should be placed on the cord. (Note: Students should examine the various amino acids and their ability to form hydrogen bonds prior to constructing their novel protein.)
- Plan: Once the teams have determined the order of amino acids, they should complete the table in their worksheet indicating the sequence of amino acids in their new protein and supply the DNA and mRNA sequences that would code for such a protein.
- Create: Once the teams have determined the order of amino acids, have them construct their new protein model.
- Test: Have students test the cohesiveness by repeating the steps used in Phase 3 and place their results in the table. Then, have them calculate an average for their three trials.
- Improve: Have students then construct the new protein models and evaluate the cohesiveness by repeating the steps used in Phase 3. They should place their data into the data table like the one located in the New Genes, New Proteins Worksheet. Then, have them calculate an average for the three trials.
- Analysis/Reflection: Have students answer the analysis questions in their New Genes, New Proteins Worksheet.
Assessment
Pre-Activity Assessment
Case study analysis: Students read, answer analysis questions, and then discuss the supplied case studies with their classmates.
Pre-Lab Worksheet: After reviewing the overall procedure of the entire activity (e.g., all four phases), students individually reflect on the purpose of each phase and their expectations using the Pre-Lab Worksheet.
Activity Embedded (Formative) Assessment
Teacher prompts: While groups work on their activities, verbally check for understanding, ensuring each group can correctly transcribe and translate the DNA to RNA to a protein. Also ask students what type of bond the magnets represent (peptide bond). Asking various group members the levels of protein conformation (primary, secondary, tertiary, quaternary levels) is also beneficial during Phase 1 and Phase 2 of the activity. Students should also complete the analysis questions that are posed in the activity.
Worksheet - Phase 1: Using a codon wheel, students determine the possible codons for each of the amino acids. After filling out a table with the codon that corresponds to each amino acid, students then visit with at least two neighboring lab groups to discuss their results.
Amino Acid Model: Student groups use the supplied amino acid model set to construct the amino acid chain for the silk-amyloid-mussel foot protein. Initial their work when they finish.
Post-Activity (Summative) Assessment
Reflection Questions: Students answer reflection questions at the end of Phase 4 in their New Genes, New Proteins Worksheet.
Safety Issues
This activity does not require any special safety equipment. All materials are reusable and can be used for multiple class periods. Students should, however, handle the Vernier LabQuest and force probes with care to prevent damage.
Troubleshooting Tips
Using a 3D printer to produce the amino acid models is recommended. Although assembling the model kits requires some initial preparation time, the models can be reused for many years. When installing the magnets, pay close attention to their orientation. Amino acid models containing two magnets must be assembled so that the magnetic poles align correctly with the rest of the set. Marking one side of the magnets while they are attached to a metal surface can help maintain consistent orientation during assembly. While constructing the model kits is time-intensive, preparation time for future implementations of the activity is minimal.
Students may need practice using the Vernier force probes and LabQuest interfaces before collecting data. Consider allowing groups to perform one or two practice trials to become familiar with the equipment and testing procedure. Depending on student proficiency and the speed at which they perform the test, you may need to increase the LabQuest data collection period from 15 seconds to 30 seconds.
When testing protein cohesiveness, remind students that one group member should hold one loop of the protein model while a second student pulls on the force probe attached to the opposite loop. To minimize the influence of gravity on the measurements, students should pull the model horizontally across the tabletop rather than lifting it. If sufficient space is available, some students may find it easier to conduct the test while working on the floor or in a hallway.
Several free online resources are available for conducting statistical analyses such as a t-test. If the resource provided with the activity does not meet your needs, alternative tools may be used. Google Sheets can also calculate t-test values. However, teaching statistical analysis is not a primary learning objective of this activity and may be omitted based on student experience and available class time.
Alternative Testing Method: Spring Scale
If Vernier force probes are not available, students can measure protein cohesiveness using a spring scale. In this case, students should record the maximum force (in newtons) displayed on the scale immediately before the protein model separates. Because the peak reading can be difficult to observe in real time, one option is to have a student record the spring scale using a smartphone and then review the video in slow motion to identify the maximum force reading.
Materials needed:
- spring scale (0 -10 N or 0 - 20 N)
- protein model (constructed in previous phase)
Procedure: Measuring Cohesive Strength with a Spring Scale
- Form a loop at each end of the paracord, as shown in Images 8 and 9.
- Attach the spring scale to one looped end of the protein model.
- Have one lab partner hold the opposite loop firmly to keep the model steady.
- Gradually apply force by:
- Pulling slowly and steadily on the spring scale.
- Monitoring the force reading as tension increases.
- Continuing to pull until the protein model loses structural integrity and the magnetic bonds separate.
- Record the maximum force reading (in newtons) displayed on the spring scale immediately before the model comes apart.
- Record this value as the cohesive strength of the protein model in the data table.
- Repeat the procedure for a total of three trials.
- Calculate and record the average cohesive strength across the three trials.
Subscribe
Get the inside scoop on all things Teach Engineering such as new site features, curriculum updates, video releases, and more by signing up for our newsletter!More Curriculum Like This

Students are introduced to the latest imaging methods used to visualize molecular structures and the method of electrophoresis that is used to identify and compare genetic code (DNA).

As a class, students work through an example showing how DNA provides the "recipe" for making human body proteins. They see how the pattern of nucleotide bases (adenine, thymine, guanine, cytosine) forms the double helix ladder shape of DNA, and serves as the code for the steps required to make gene...

Students learn how engineers apply their understanding of DNA to manipulate specific genes to produce desired traits, and how engineers have used this practice to address current problems facing humanity. Students fill out a flow chart to list the methods to modify genes to create GMOs and example a...

Students learn about mutations to both DNA and chromosomes, and uncontrolled changes to the genetic code. They are introduced to small-scale mutations (substitutions, deletions and insertions) and large-scale mutations (deletion duplications, inversions, insertions, translocations and nondisjunction...

References
Anthony, W.E., Carr, R.R., DeLorenzo, D.M. et al. Development of Rhodococcus opacus as a chassis for lignin valorization and bioproduction of high-value compounds. Biotechnol Biofuels 12, 192 (2019). https://doi.org/10.1186/s13068-019-1535-3
Eugene Kim, Juya Jeon, Yaguang Zhu, Ethan D. Hoppe, Young-Shin Jun, Guy M. Genin, and Fuzhong Zhang (2021). A Biosynthetic Hybrid Spidroin-Amyloid-Mussel Foot Protein for Underwater Adhesion on Diverse Surfaces. ACS Applied Materials & Interfaces 2021 13 (41), 48457-48468 DOI: 10.1021/acsami.1c14182
Le Feuvre, Rosalind A. and Nigel S. Scrutton. (2018). A living foundry for Synthetic Biological Materials: A synthetic biology roadmap to new advanced materials. Synthetic and Systems Biotechnology 3:105 - 112.
Li, Jingyao, Yaguang Zhu, Han Yu, Bin Dai, Young-Shin Jun, and Fuzhong Zhang* (2021). Microbially Synthesized Polymeric Amyloid Fiber Promotes β‐Nanocrystal Formation and Displays Gigapascal Tensile Strength, ACS Nano 15, 11843−11853.
Qian, Zhi-Gang, Fang Pan, and Xiao-Xia Xia. (2020) Synthetic biology for protein-based materials, Biotechnology, 65:197–204.
Copyright
© 2026 by Regents of the University of Colorado; original © 2025 Washington University in St. LouisContributors
David Ganey; Alex Forgerson; Marcus Foston; Jerry WangSupporting Program
Washington University Synthetic Biology Manufacturing of Advanced materials Research Center (SMARC) Research Experience for Teachers (RET), University of HoustonAcknowledgements
This curriculum was developed under National Science Foundation RET grant number OIA-2219142. Any opinions, findings, and conclusions or recommendations expressed in this material are those of the authors and do not necessarily reflect the views of the National Science Foundation.
Last modified: June 17, 2026
User Comments & Tips