
Quick Look
Grade Level: 4 (3-5)
Time Required: 45 minutes
Expendable Cost/Group: US $1.00
Group Size: 1
Activity Dependency:
Subject Areas: Science and Technology
Quick Look

- Grade Level:
- 4 (3 – 5)
- Time Required:
- 45 minutes
- Group Size:
- 1
- Subject Areas:
-
Science and Technology
Summary
Students are introduced to the concept of the image of music. After listening to a song, they draw images of it by deciding where different musical instruments were placed during recording. They further investigate audio engineering by modeling the position of microphones over a drum set to create a desired musical image.
Engineering Connection
Audio engineering has a long history involved with the creation of pop culture. Audio engineers can be found in recording studios around the world. They enhance and create sounds and special effects for music and films. Audio engineers make better and clearer the sounds we hear through televisions, radios, MP3 players, speakers and even the public announcement intercoms at sports games. Music and film are the most common industries in which audio engineers specialize.
Learning Objectives
After this activity, students should be able to:
- Explain the musical image of a song.
- Model the placement of microphones to create a specific musical image.
- Describe the impacts of audio engineering on the music they hear.
Educational Standards
Each Teach Engineering lesson or activity is correlated to one or more K-12 science,
technology, engineering or math (STEM) educational standards.
All 100,000+ K-12 STEM standards covered in Teach Engineering are collected, maintained and packaged by the Achievement Standards Network (ASN),
a project of D2L (www.achievementstandards.org).
In the ASN, standards are hierarchically structured: first by source; e.g., by state; within source by type; e.g., science or mathematics;
within type by subtype, then by grade, etc.
Each Teach Engineering lesson or activity is correlated to one or more K-12 science, technology, engineering or math (STEM) educational standards.
All 100,000+ K-12 STEM standards covered in Teach Engineering are collected, maintained and packaged by the Achievement Standards Network (ASN), a project of D2L (www.achievementstandards.org).
In the ASN, standards are hierarchically structured: first by source; e.g., by state; within source by type; e.g., science or mathematics; within type by subtype, then by grade, etc.
International Technology and Engineering Educators Association - Technology
-
Explain how various relationships can exist between technology and engineering and other content areas.
(Grades
3 -
5)
More Details
Do you agree with this alignment?
State Standards
Colorado - Math
-
Represent and interpret data.
(Grade
5)
More Details
Do you agree with this alignment?
Colorado - Science
-
Identify and describe the variety of energy sources
(Grade
4)
More Details
Do you agree with this alignment?
Materials List
For the classroom:
- stereo with capability to adjust balance from side to side
- set of speakers
- recording of a song you can play repeatedly, one with easily-discernable instrumentation, for example, Dave Brubeck Quartet's "Take Five
Each student needs:
- Audio Engineering Worksheet
- assortment of colored pencils
Each group needs:
- assortment of colored construction paper
- yardstick
Worksheets and Attachments
Visit [www.teachengineering.org/activities/view/cub_sound_lesson01_activity1] to print or download.Pre-Req Knowledge
Students should understand that sound travels in waves and has a direction of travel. This activity works well accompanying a science unit on sound or waves.
Introduction/Motivation
Audio engineers sometimes refer to the image of a song. They are talking about the fact that a recorded song can be split into a left side, a right side and a center. Have you ever adjusted the balance on your radio?
Imagine a four-piece jazz band on a stage in your living room instead of the regular CD player and speakers. The sounds from the saxophone would come from a different place than, say, the drums, since players usually stand apart from one another on stage. What would the band's position on the stage look like if their sounds all came from the same place, like they do from one speaker? (Answer: They would all be stacked on top of one another or somehow clumped together — a very strange picture!)

Audio engineers record songs with a spread-out image to be displayed by two or more speakers. This means that different sounds come from different speakers to create the effect of a band in your living room. Also, they have advanced how we can hear other sounds. Audio engineers create interesting effects such as a sound that moves from side to side or even up and down. Have you ever heard such an effect, perhaps at a movie?
Today, we are going to train our ears to see images of songs. First, we will listen to a song and draw its musical image. Then, we are going to step into the shoes of an audio engineer, pick up some microphones (or, in our case, colored pencils and construction paper to model microphones) and position them over a drum set (also called a trap set) for a desired musical image that we are given. (These are also called the specifications.) Audio engineers often have to try several different arrangements of microphones and instruments to get the desired sound. We will also get a chance to try several different arrangements of our microphones to find the best fit for the musical image.
Procedure
Before the Activity
- Make copies of the Audio Engineering Worksheet.
- Obtain an appropriate stereo and speakers.
- Choose a song for which students will determine the musical image.
Tip: For this activity, choose a song with easily-discernable instrumentation. Also be sure to first create a musical image of the song yourself to be further assured that the song is a good choice. Dave Brubeck Quartet's "Take Five" works well, but many good choices exist outside of the jazz genre, too.
With the Students
Part 1: Make a Musical Image
- Hand out the worksheets. Instruct students to take out regular and colored pencils and look at the first page of the worksheet.
- Write the names of instruments in the chosen song on the white/chalk board.
- Turn stereo balance completely to the left. Play song for 30-45 seconds (or shorter/longer depending on class time).
- Ask students to pencil-in instruments in the appropriate columns.
- Turn stereo balance completely to the right. Play song for 30-45 seconds (or shorter/longer depending on class time).
- Again, have students pencil-in instruments in the columns. Note: Students may change their minds about the instrument locations.
- Tell students they will hear the song once more. Turn the balance part-way to either the left or right.
- Direct students to decide which side of the song needs more volume and write their answers in the appropriate space on the worksheets.
- Gauge student responses on: How are their ears for finding the balance?
- Ask students to draw the placement of the instruments (including vocalist, if present) to create an image of the song in the appropriate space of the worksheet.
Part 2: Mic a Trap Set
- Tell students they are going to position microphones above a picture of a drum set (also known as "Mic a Trap Set").
- Do a quick demonstration of measurement to introduce this activity.
- Draw two points on the board, as shown in Figure 1.

- Show that for any two points a line exists that represents all the places where the two points are equidistant from each other.
- We will use this line of equidistance to mic the trap set.
- Instruct students to look at the image of a trap set on their worksheet, also shown in Figure 2.

- Tell students to imagine two microphones above the trap set and the line of equidistance between them.
- The microphone picking up the left side of the recording will include the sounds on the left side of the line, and vice versa. Note: The microphones pick up sound from both sides, but the sounds coming from each respective side are most prominent.
- Have students answer the worksheet questions.
Part 3: More Mic a Trap Set
- Have students make the trap set image out of construction paper. In groups of three, have them cut out circles for the toms and snare, circles for the cymbals, and a big rectangle for the kick drum.
- Then have them arrange the shapes on the floor to create the trap set images on the worksheet, as shown in Figure 3.

- Next have them make microphones from construction paper.
- Have them use a yardstick to represent the line of equidistance.
- Have them arrange the microphones to create the musical images as called for on the worksheet. Remind them that audio engineers often try several different placements of microphones to get the right sound.
(Note: Several correct answers are possible since the microphones just have to be equidistant from the line.)
- Have students draw on their worksheets the microphones and line of equidistance that their team chose.
Part 4: Audio Engineering Discussion
- Ask students to think about the impacts of audio engineering on their own lives. Does audio engineering affect the songs they hear? Does it affect anything else they have heard? How has audio engineering changed how people can hear recorded sounds?
- Have students answer the worksheet questions.
- Discuss the worksheet answers as a class.
Assessment
Pre-Activity Assessment
Poll: Before the lesson, ask students the same YES/NO question. Tally the yes/no answers and write them on the board.
- When you listen to a song on your stereo or MP3 player, do the same sounds come out of both speakers? (Answer: The answer should be no, but exceptions may exist. Encourage students to listen for themselves the next time.)
Activity Embedded Assessment
Voting: Ask students to imagine a person in a recording studio listening to a drummer play. Another person is listening with headphones to what the microphones are picking up.
- Does rearranging the microphones affect both people's hearing? Have students vote thumbs up for yes, or thumbs down for no. (Answer: No, rearranging the microphones only affects the person with the headphones.)
Post-Activity Assessment
Group Evaluation: Ask students to leave their answers for the Mic a Trap Set on the floor. Have student groups rotate through the different possible microphone combinations for the desired musical image (the microphones can be anywhere on either side of the line as long as they are equidistant from the line). If time permits, have groups volunteer to explain why they chose the placement that they did. Direct other groups to ask questions of each other's designs. How many groups had similar designs?
Activity Extensions
Have students bring in their favorite songs to play for the class. Have students complete Part 1 for the various songs, listing the instruments, and investigating the many different types of musical images that exist.
For students that have been to a concert (or a school concert), have them discuss the sound differences between what the concert sounded like live compared to a recording of musicians.
Subscribe
Get the inside scoop on all things Teach Engineering such as new site features, curriculum updates, video releases, and more by signing up for our newsletter!More Curriculum Like This

Students are introduced to audio engineers, discovering the type of environment in which they work and exactly what they do on a day-to-day basis. Students come to realize that audio engineers help produce their favorite music and movies.

Students learn how different materials reflect and absorb sound.

Students learn that sound is energy and has the ability to do work. Students discover that sound is produced by a vibration and they observe soundwaves and how they travel through mediums. They understand that sound can be absorbed, reflected or transmitted.
Filtering is the process of removing or separating the unwanted part of a mixture. In signal processing, filtering is specifically used to remove or extract part of a signal, and this can be accomplished using an analog circuit or a digital device (such as a computer). In this lesson, students learn...

References
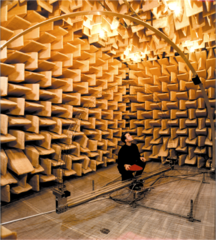
Dunbar, Brian. National Aeronautics and Space Administration (NASA), Glenn Research Center's Acoustical Testing Laboratory (ATL), "Cleveland Institute of Music Student in Acoustical Testing Laboratory," May 2, 2008, accessed July 3, 2008. http://www.nasa.gov/centers/glenn/multimedia/imagegallery/image_feature_004_C2003-399_prt.htm
National Communications System, National Security Telecommunications Advisory Committee (NCSTA), NCSTA Meeting – June 2001, "Images from the Reception/Dinner - June 2001," December 7, 2006, accessed July 3, 2008. http://www.ncs.gov/nstac/june2001/nstac_meetings.html
State of New South Wales through the Department of Education and Training, 2008, http://www.curriculumsupport.education.nsw.gov.au/
Copyright
© 2008 by Regents of the University of Colorado.Contributors
Michael Bendewald; Malinda Schaefer Zarske; Janet YowellSupporting Program
Integrated Teaching and Learning Program, College of Engineering, University of Colorado BoulderAcknowledgements
The contents of this digital library curriculum were developed under a grant from the Fund for the Improvement of Postsecondary Education (FIPSE), U.S. Department of Education, and National Science Foundation GK-12 grant no 0338326. However, these contents do not necessarily represent the policies of the Department of Education or National Science Foundation, and you should not assume endorsement by the federal government.
Last modified: February 15, 2023
User Comments & Tips