Quick Look
Grade Level: 7 (6-8)
Time Required: 1 hours 45 minutes
Two class periods
Expendable Cost/Group: US $2.00
Group Size: 2
Activity Dependency: None
Subject Areas: Biology, Life Science, Science and Technology
NGSS Performance Expectations:

| MS-ETS1-3 |
Summary
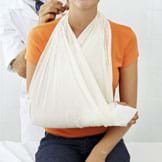
Students learn about the strength of bones and methods of helping to mend fractured bones. During a class demonstration, a chicken bone is broken by applying a load until it reaches a point of failure (fracture). Then, working as biomedical engineers, students teams design their own splint or cast to help repair a fractured bone, learning about the strength of materials used.Engineering Connection
Some engineers study bones, the skeletal system and the human body as they create methods and types of medical devices to help the body with many types of bone-related injuries, diseases and disorders. Modern splints and casts are products that protect, support or immobilize fractures during the healing process, as well as components to custom make them. Example devices include: finger splints, wrist/thumb supports, arthritis supports, cervical collars, knee/back supports, ankle/foot supports, shoulder supports/slings, casts, and compression and taping products, as well as x-ray and MRI equipment for diagnosis. Modern splints, slings and casts are durable, light-weight, comfortable, waterproof and/or removable.
Learning Objectives
After this activity, students should be able to:
- Use a model to describe how a load might affect a bone.
- Explain that biomedical engineers design medical devices to help in the healing of fractured bones.
Educational Standards
Each TeachEngineering lesson or activity is correlated to one or more K-12 science,
technology, engineering or math (STEM) educational standards.
All 100,000+ K-12 STEM standards covered in TeachEngineering are collected, maintained and packaged by the Achievement Standards Network (ASN),
a project of D2L (www.achievementstandards.org).
In the ASN, standards are hierarchically structured: first by source; e.g., by state; within source by type; e.g., science or mathematics;
within type by subtype, then by grade, etc.
Each TeachEngineering lesson or activity is correlated to one or more K-12 science, technology, engineering or math (STEM) educational standards.
All 100,000+ K-12 STEM standards covered in TeachEngineering are collected, maintained and packaged by the Achievement Standards Network (ASN), a project of D2L (www.achievementstandards.org).
In the ASN, standards are hierarchically structured: first by source; e.g., by state; within source by type; e.g., science or mathematics; within type by subtype, then by grade, etc.
NGSS: Next Generation Science Standards - Science
| NGSS Performance Expectation | ||
|---|---|---|
|
MS-ETS1-3. Analyze data from tests to determine similarities and differences among several design solutions to identify the best characteristics of each that can be combined into a new solution to better meet the criteria for success. (Grades 6 - 8) Do you agree with this alignment? |
||
| Click to view other curriculum aligned to this Performance Expectation | ||
| This activity focuses on the following Three Dimensional Learning aspects of NGSS: | ||
| Science & Engineering Practices | Disciplinary Core Ideas | Crosscutting Concepts |
| Analyze and interpret data to determine similarities and differences in findings. Alignment agreement: | There are systematic processes for evaluating solutions with respect to how well they meet the criteria and constraints of a problem. Alignment agreement: Sometimes parts of different solutions can be combined to create a solution that is better than any of its predecessors.Alignment agreement: Although one design may not perform the best across all tests, identifying the characteristics of the design that performed the best in each test can provide useful information for the redesign process—that is, some of the characteristics may be incorporated into the new design.Alignment agreement: | |
Common Core State Standards - Math
-
Fluently add, subtract, multiply, and divide multi-digit decimals using the standard algorithm for each operation.
(Grade
6)
More Details
Do you agree with this alignment?
-
Summarize numerical data sets in relation to their context, such as by:
(Grade
6)
More Details
Do you agree with this alignment?
-
Reporting the number of observations.
(Grade
6)
More Details
Do you agree with this alignment?
-
Describing the nature of the attribute under investigation, including how it was measured and its units of measurement.
(Grade
6)
More Details
Do you agree with this alignment?
-
Display numerical data in plots on a number line, including dot plots, histograms, and box plots.
(Grade
6)
More Details
Do you agree with this alignment?
-
Construct and interpret scatter plots for bivariate measurement data to investigate patterns of association between two quantities. Describe patterns such as clustering, outliers, positive or negative association, linear association, and nonlinear association.
(Grade
8)
More Details
Do you agree with this alignment?
International Technology and Engineering Educators Association - Technology
-
Advances and innovations in medical technologies are used to improve healthcare.
(Grades
6 -
8)
More Details
Do you agree with this alignment?
-
Refine design solutions to address criteria and constraints.
(Grades
6 -
8)
More Details
Do you agree with this alignment?
State Standards
Colorado - Math
-
Direct and indirect measurement can be used to describe and make comparisons.
(Grade
8)
More Details
Do you agree with this alignment?
Colorado - Science
-
Develop and design a scientific investigation about human body systems
(Grade
7)
More Details
Do you agree with this alignment?
-
Gather, analyze, and interpret data and models on the functions and interactions of the human body
(Grade
7)
More Details
Do you agree with this alignment?
Materials List
For Part 1, the teacher's class demonstration, and Part 3, the load testing station:
- 2 S-hooks (or strong hooks)
- 1ft (30 cm) chain link (or strong rope)
- large water or paint bucket
- weights, 5 lbs (2.3 kg) each, for a total of 50 lbs (22.7 kg); if no weights are available, use equivalent weight of bricks, rocks, sand, heavy books, or other material.
- 1 chicken bone (a thoroughly-cleaned chicken wing is ideal)
- 2 strips of duct tape (~6-in [10cm] each)
- clear plastic bin or container, for protection from splintering bone
For Parts 2 and 3, each group needs:
- 1 chicken bone, thoroughly-cleaned and fractured
- scissors
- Bone Breaking Design Worksheet
- Bone Breaking Group Testing Table
For the entire class to share:
- flathead screwdriver and hammer, to create small crack in each team's chicken bone
- white glue (such as Elmer's)
- masking tape
- a variety of materials with which to make a cast or splint, such as toothpicks, popsicle sticks, paint stirrers, gauze or bandage wrap, tissue, cotton balls, cotton batting, plastic wrap, etc.
- (optional) plaster (paper-mâché) cast materials: 2-inch (5-cm) newspaper strips (made from about 4-5 full-length newspaper pages per cast), warm water, white glue and flour (mix ratio: 3 parts warm water with 1 part flour and 1 part glue)
- (optional) Monopoly play money (or from another game)
Worksheets and Attachments
Visit [www.teachengineering.org/activities/view/cub_biomed_lesson01_activity2] to print or download.Pre-Req Knowledge
A good understanding of the bones of the skeletal system.
Introduction/Motivation
Do you know anyone who has broken a bone in his or her body? Have you? Bone fractures are common in our society, and some are more serious than others. Bone fractures can range from a very small crack in the bone to a complete break and separation of the bone. On average, people break a bone twice in their life. The occurrence is much higher among young children; bone fractures are among the most common types of injuries for children younger than 15. Children often are treated in the emergency room for a simple closed fracture, the most basic type of fracture.
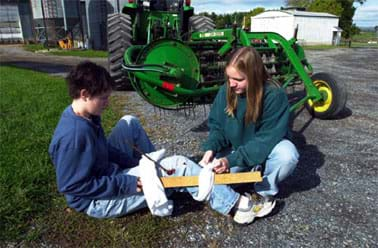
Today, we will be talking about the strength of bones and medical devices used to help repair a fractured bone. Let me read you a story:
Juan Skeleton is a healthy fourth-grader who loves to play soccer. One day he is outside at recess playing soccer with his friends when something happens to him.
As Juan slides to take the ball away from his friend Julia, his foot gets stuck in a hole in the ground and he hears something crack. This crack is in his lower right leg and it is very painful. Juan does not realize what just happened to him but he knows something is wrong. Bravely, he tries to stand up and walk off the field, but he cannot because the pain is too much to bear. Juan cries for help and his friends call the teacher who sees that Juan's leg is starting to swell.
The teacher, Mrs. Maria, carries Juan into the nurse's office. He explains what happened on the field, and both the teacher and the nurse realize that Juan just fractured the bone in his leg. Juan's parents are called and he goes to the hospital.
At the hospital, Dr. Arenas helps treat Juan's fractured leg. X-rays are taken to determine exactly where the fracture is located and how severe it is. After the tests and x-rays, Dr. Arenas tells Juan's parents that the fracture is not too severe. Juan has a simple closed fracture. Phew!! Good news for Juan (no surgery required to re-set the broken bones). The doctor tells his parents that Juan needs to have his leg wrapped in a cast to help heal the fractured bone.
The next day, Juan goes to school with a comfortable, light-weight and cool-looking cast on his leg. Since Juan cannot put any load on his leg or move it, he must use crutches to help him move. Juan is sad because for the next six weeks he cannot play soccer at recess, but he knows that the cast will protect his bone so it can heal and get better.
Many weeks after Juan hurt his leg, the cast is removed. After his leg regains its strength, he will be able to play soccer again! Yay for Juan!!
Did Juan's leg magically get fixed? What is the cast he had to wear? How did his bone fracture if he is a strong, healthy person? What is a fracture and is it different from a break? Why did Juan use crutches and was not able to apply any load/weight to his leg? You might be thinking about these questions and more!
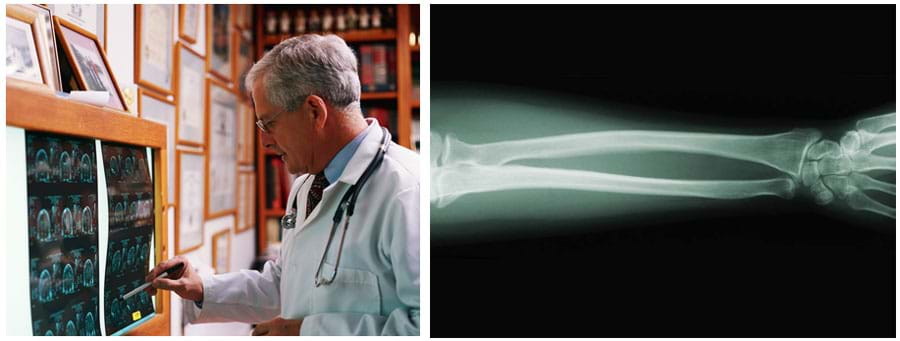
In our activity today, we are going to see that even though Juan's bones are strong, too much load or force causes bones to fracture. A fracture is the same as a broken bone; the word "fracture" is the term that doctors use. As for the cast, it is a medical device designed by biomedical engineers to help repair broken bones. Its purpose is to maintain the bone in a fixed position so that it does not move (get re-injured) and can heal. Today, we are going to measure the load that a bone can hold before it breaks and then you can design your own casts, just like biomedical engineers. Are you ready for some fun with bones and casts and splints?
Procedure
Background
By using chicken bones to simulate human bones (which are many times stronger) students see the amazing strength of bones. In the class demonstration, a point load is applied to a bone with a gradual increase in load (weight) until the bone can no longer support it and fails (fractures). In the hands-on student activity, student teams work as biomedical engineers to create and design casts or splints that immobilize body parts to help the body heal. They also explore the strength of materials as they test the strength of their casts/splints.

Before the Activity
- Gather materials, and make copies of the Bone Breaking Design Worksheet and Bone Breaking Group Testing Table, one each per team.
- Thoroughly clean the chicken bones. Make a small fracture in each bone by taking a flathead screwdriver and carefully tapping it with a hammer until the bone cracks, being careful not to completely break the bone. Set aside one bone for the demonstration.
- Place cast- and splint-making materials on a separate table to serve as the "class store."
- (optional) If making plaster of Paris casts, cut newspaper into 2-inch (4-cm) strips. Make the paper-mâché mix in advance or have another adult make it during class.
Part 1: Observing Bones and Class Demonstration – Bone Breaking (Day 1)
Using two classroom tables or desks, follow the next steps to set-up the load testing area for the class demonstration.
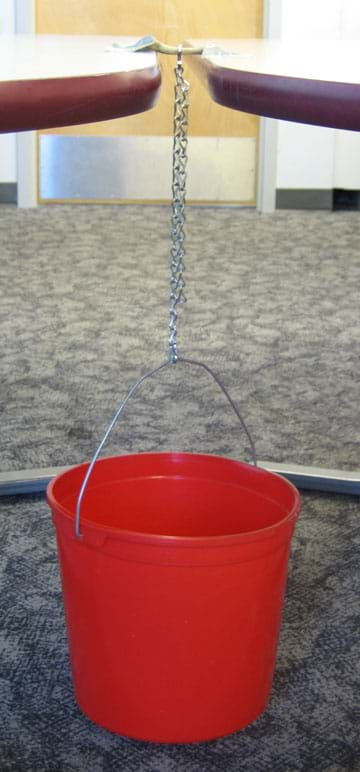
- Move tables or desks to create an open 1.5-inch (~4-cm) span between them (see Figure 1).
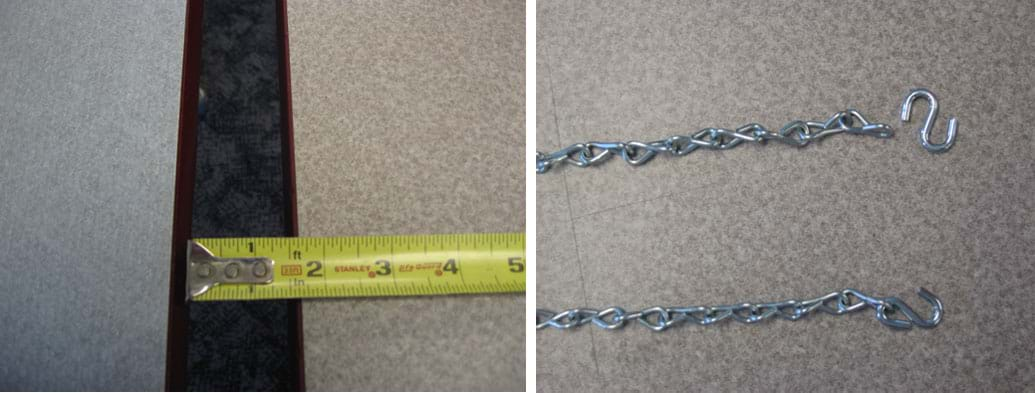
- Using the S-hooks, connect a hook to each end of the link chain (see Figure 1).
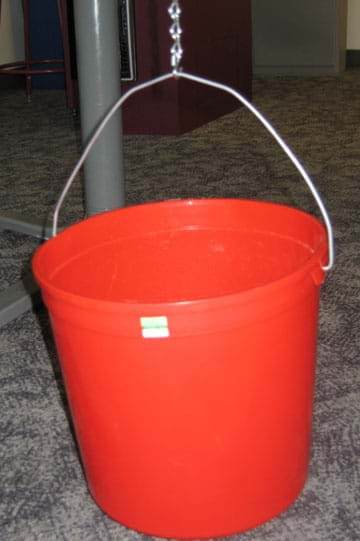
- Hook an end of the chain, using the S-hook to the bucket handle (see Figure 2).
- Divide the class into teams of two or three students each.
- While at their desks, give each team a fractured chicken bone to observe. It should be similar to the one you are using for the demonstration, or pass around the bone that you are using for the demonstration to each group. Review pertinent concepts and functions of bones and the skeletal system.
- Have each group study their bones for characteristics, such as size, color, shape, strength, etc. Encourage students to examine the bone by sight, touch and smell. Tell them not to taste the bone or break it.
- Using Part 1: Gathering Information on the activity worksheet, have students draw the bone, write down any observations about it (size, color, strength, etc.), as well as a prediction of the total amount of load (weight) that the bone will be able to carry before failure (fracture).
- Once students have finished Part 1 of their worksheets, have all groups gather around the testing station.
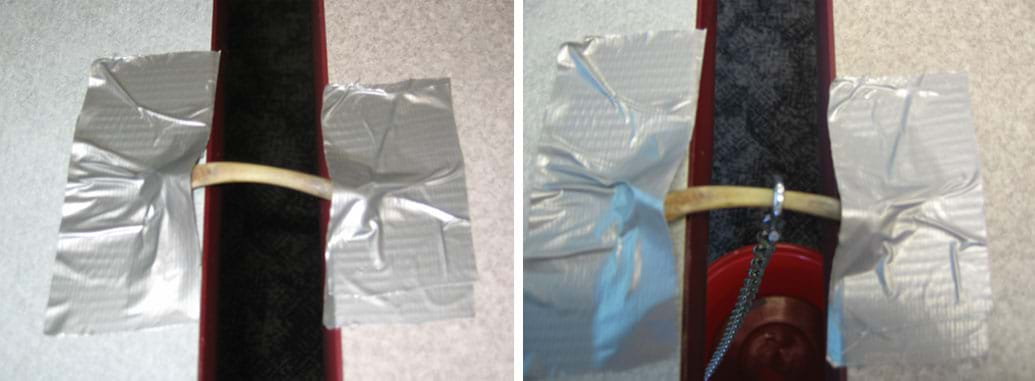
- Using duct tape, take the demonstration bone and tape it across the open span of the tables/desks making sure the bone is fastened tightly to each side (see Figure 3).
- Use an S-hook to attach the loose end of the chain to the middle of the bone (see Figure 3). The chain and bucket should hang in the middle of the opening (see Figure 4). Make sure the bucket is suspended above the floor.
- For safety, keep bone pieces, marrow and other fragments from flying, by placing a clear plastic bin or container over the bone while you are adding weight to the bucket.
- In 5-lb (2.3-kg) increments, carefully add weight into the bucket, pausing for 5-10 seconds to allow the additional weight to settle. Do not drop weights into bucket; place them gently into the bucket. (Note: Most chicken bones are capable of holding 40-50 lbs [18-23 kg].).
- Continue to add weight until the bone cracks.
- Have students record on their worksheets the amount of weight that caused the demonstration bone to fail (fracture).
Part 2: Engineering Design and Cast-Making (Day 1)
- After the class demonstration, discuss with students their observations during the load testing: What did you notice as more weight was added? How strong is a chicken bone? Were you surprised to see the chicken bone carry that much weight? Do you think a human bone could withstand more or less weight?
- Review the healing process for fractured bones and the various biomedical devices (casts and splints) used to help heal bones, clarifying the differences between each.
- Have student teams return to their desks and complete worksheet Part 2, Analyzing the Information.
- Once students have finished Part 2, review the engineering design process with them and explain that they will be acting as biomedical engineers, designing their own type of cast or splint as a team. Explain to students that when engineers design a new or improved product, they work in groups and follow the steps of the engineering design process: 1) understand the problem or need, 2) come up with creative ideas, 3) select the most promising idea, 4) communicate and make a plan to describe the idea, 5) create a prototype or model of the design, and 6) evaluate what you have made, thinking of possible improvements.
- Introduce the design concepts and constraints for the activity. Either provide students with already-specified constraints that serve to limit and guide the design challenge, or brainstorm with the class to come up with additional constraints/design goals. Consider the following (or some combination) as suggestions for design goals/constraints: strength of the cast or splint, weight of the cast or splint, cost to make the cast or splint, most realistic cast or splint for usability.
- (optional step; follow if using cost as a design constraint) Reveal to students the types of "store" materials available for the construction of casts and splints, and the "cost" of each material (for purposes of this activity). Explain that one of their design constraints is cost; they may spend up to a certain amount of money (such as $200 in play money), but no more, to make their device. Hand out the play money to each team.
- Have students pick a specific type of cast (splint or plaster cast) to design. Give them 5-10 minutes to complete their design on their worksheets, including Part 3.
- Once students have completed their design and obtained teacher approval, direct one team at a time to obtain (or use their play money to buy) from the "store" (teacher) the necessary materials for their medical device.
- After teams have supplies, have them create their model casts, building around their broken chicken bones.
- For teams that want to make a plaster cast, follow the paper-mâché-making steps (next section). Note: Making a plaster cast requires an extra 15-20 minutes plus overnight drying time, so allow enough time for this option.
- Once all groups have completed their splint or cast, have students pick up and clean their work areas.
"Plaster"-Making (Paper-Mâché) Steps (requires overnight drying time)
- Mix three parts warm water with one part flour and one part white glue. Stir until a smooth, creamy mixture is obtained.
- Cut newspaper into 2-inch (5-cm) strips.
- Dip each strip into the mixture and squeegee any excess material with fingers.
- Wrap the wet paper strips around the bone or bone covered with gauze, to make the cast. Help students, as necessary.
- Continue to dip and wrap the strips until the cast is finished. Let the groups decide how thick or thin they want their casts.
- Once all groups have completed their casts, have students pick up and clean their work areas.
Part 3: Cast Load Testing (Day 2)
- Recap with students their activity from the previous day(s). Briefly review the strength of bones, the types of bone disorders (such as fractures, osteoporosis, etc.), the methods and types of medical devices used to assist in these conditions, and the activity itself thus far (design goals, materials, etc.)
- Give teams time to make any final adjustments or alterations to their designs, or finish their casts/splints if they have not already done so.
- Once all groups have completed their casts/splints, gather around the testing station.
- Have teams number off to decide the order to test their casts. Or, provide a pre-selected list for the order.
- Guide each team to test the strength of their casts and how well they protect the fractured bones. For each team's cast/splint, use the testing station with bucket and weights, and repeat steps 9 through 14 from the bone-breaking demonstration.
- To keep all students engaged during the load testing, have students fill out the testing table to track the weight that each group's design was able to hold.
- Conclude by engaging students in the post-activity described in the Assessment section. Ask them to think about the materials in the different cast/splints, what worked and what did not, and what they might do to improve their designs.
Vocabulary/Definitions
cast: A rigid bandage made of gauze and plaster of Paris to immobilize a fractured or dislocated bone or body part while it heals, or to maintain any part of the body in a fixed position.
failure: A decline in strength or effectiveness.
fracture: A partial or complete break in a bone.
load: The weight (force) supported by a structure or part.
model: (noun) A representation of something for imitation, comparison or analysis, sometimes on a different scale. (verb) To make something to help learn about something else that cannot be directly observed or experimented upon.
sling: A bandage used to suspend or support an injured part of the body, commonly a bandage suspended from the neck to support an injured arm or hand.
splint: A thin piece of wood or other rigid material used to immobilize a fractured or dislocated bone, or to maintain any part of the body in a fixed position.
Assessment
Pre-Activity Assessment
Exploratory Discussion: As a class, discuss the following topics:
- What is a bone fracture? (Answer: A medical condition in which a bone is cracked or broken.)
- Review the human skeletal system and the importance of bone strength.
- Have you ever had a broken bone? If so, what was done to help heal the bone?
True/False Trivia: As a discussion extension, ask the following true/false questions and have students respond with thumbs up for true or thumbs down for false. Tally the votes on the board. Then, ask the same questions at the end of the activity and compare results.
- True/False: Engineers create devices that help heal broken bones. (Answer: True)
- True/False: Engineers do not need to know about the strength of bones in designing devices to help heal broken bones. (Answer: False. Engineers must study the strength of bones to determine what types of materials might help protect and support the bones.)
- True/False: Engineers improve our lives by inventing things that can help repair our bodies. (Answer: True. Biomedical engineers study the body and are interested in designing devices to help make our lives better.)
Activity Embedded Assessment
Worksheet: Have students record observations, record results, design their casts and answer questions on their worksheets. Review their worksheets to gauge their understanding of the subject matter.
Engineering Design: Before and during the design and construction portion of the activity, remind students of the engineering design process steps: Define the problem (Ask), brainstorm ideas (Imagine), design (Plan), build and test (Create), and re-design (Improve).
Post-Activity Assessment
Graphing the Results: Using the data from the Group Testing Table, graph the maximum weight held from each team and the type of device used. Based from the graph, discuss which form of medical device proved stronger. Additionally, have students calculate the average weight held by both the cast and splint.
Closing Discussion: As a class, review the activity results and use the following questions to lead a concluding discussion:
- What happened to the chicken bone as more weight was added to the bucket?
- Which casts/splints worked best? Why? What were they made of? Which materials worked best? What construction techniques worked best?
- Based on the testing results from your and other groups, what could you do to improve your design?
- Do you think human bones would be able to support more or less weight? Why? Would you make any changes to your cast/splint for a human bone? How?
- What is a bone fracture? What types of medical devices are used to heal or repair a bone fracture? Would you change your design for fractures on an arm compared to a leg?
- What is biomedical engineering? How are biomedical engineers and the human body related?
Safety Issues
- Remind students not to taste, eat or bite the bone.
- Remind students to be careful with scissors.
- Keep students a safe distance from the testing station when conducting the demonstration or load-testing the casts/splints.
- During load testing, have one person hold a clear bin over the bone and cast/splint, in case any pieces fly off.
Troubleshooting Tips
Make sure the load testing station works well. As necessary, make adjustments so the bone does not slip when weight is added to the bucket, the bone is covered with a clear bin to catch any scattering fragments, the spacing between the tables is not too wide or too narrow, etc.
Do not impose more than one or two specific design constraints in addition to the cost.
Making a plaster cast takes more time than the other options (+15-20 minutes plus overnight drying time), so allow enough time for this option. It also helps to have an adult assist students who choose to make a paper-mâché cast.
Cooked bones are probably easier to work with (and less messy!) than raw bones, but either can be used.
Activity Extensions
What happens if your bone injury is not a "simple closed fracture"? An "open, multi-fragmentary fracture" usually breaks the skin, exposing the bone to contamination, and involves the bone splitting into multiple pieces, which usually requires surgical repair to restore the bones to their natural positions. Have students research the engineering devices and techniques designed to treat these more complicated fractures. Devices might include surgical nails, screws, plates, pins and wires to hold the fractured bone together. Materials might include titanium, cobalt-chromium alloy, stainless steel and/or plastics.
Activity Scaling
- For lower grades, remove some of the design requirements for the cast building and limit it to one achievable goal, such as cost, cast strength, or a waterproof cast, etc.
- For lower grades, instead of having students "buy" the materials for cast building, give each team a certain and limited amount of materials with which to work.
- For lower grades, the design and construction of the casts may take a while to complete. To reduce the overall required time, eliminate the worksheet or eliminate the paper-mâché as a cast-building option.
- For higher grades, add two or three additional design constraints and/or goals in addition to cost and strength.
Additional Multimedia Support
For ideas of the types of modern casts, braces, slings and splints, search for orthopedics, splinting and casting products in various online medical product catalogs, such as http://www.allegromedical.com or http://www.sammonspreston.com.
Subscribe
Get the inside scoop on all things Teach Engineering such as new site features, curriculum updates, video releases, and more by signing up for our newsletter!More Curriculum Like This

Students learn how forces affect the human skeletal system through fractures and why certain bones are more likely to break than others depending on their design and use in the body. They learn how engineers and doctors collaborate to design effective treatments with consideration for the location, ...

Students learn about the role engineers and engineering play in repairing severe bone fractures. They acquire knowledge about the design and development of implant rods, pins, plates, screws and bone grafts.

Students design a new device for a client with a broken ankle as they engineer a better cast. This activity mimics what a biomedical or materials engineer needs to consider when they must meet medical “must-haves” and addresses client needs.

Students learn about how biomedical engineers aid doctors in repairing severely broken bones. They learn about using pins, plates, rods and screws to repair fractures. They do this by using the engineering design process to design, create and test their own prototype devices to repair broken turkey ...
References
Cluett, Jonathan. Fracture Information: What is a Fracture? Last updated October 1, 2004. About.com: Orthopedics. Accessed October 13, 2008. http://orthopedics.about.com/cs/otherfractures/a/fracture.htm
Dictionary.com. Lexico Publishing Group, LLC. Accessed October 13, 2008. (Source of some vocabulary definitions, with some adaptation) http://www.dictionary.com
Copyright
© 2008 by Regents of the University of Colorado.Contributors
Jaime Morales; Malinda Schaefer Zarske; Denise W. CarlsonSupporting Program
Integrated Teaching and Learning Program, College of Engineering, University of Colorado BoulderAcknowledgements
The contents of this digital library curriculum were developed under a grant from the Fund for the Improvement of Postsecondary Education (FIPSE), U.S. Department of Education and National Science Foundation GK-12 grant no. 0338326. However, these contents do not necessarily represent the policies of the Department of Education or National Science Foundation, and you should not assume endorsement by the federal government.
Last modified: May 25, 2017



User Comments & Tips