Quick Look
Grade Level: 5 (3-5)
Time Required: 45 minutes
Expendable Cost/Group: US $0.00
Group Size: 1
Activity Dependency: None
Subject Areas: Earth and Space
NGSS Performance Expectations:

| 4-ESS3-2 |
Summary
Students learn about various natural hazards and specific methods engineers use to prevent these hazards from becoming natural disasters. They study a hypothetical map of an area covered with natural hazards and decide where to place natural disaster prevention devices by applying their critical thinking skills and an understanding of the causes of natural disasters.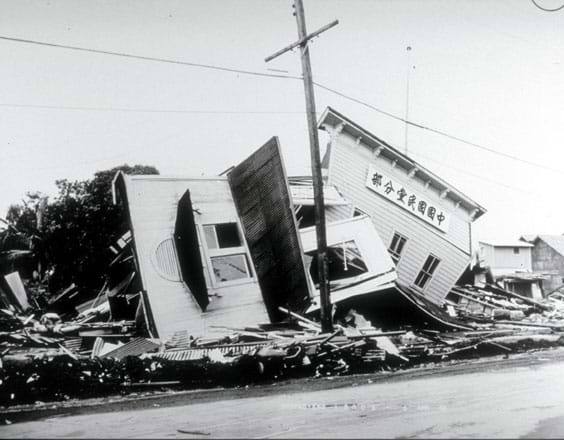
Engineering Connection
Engineers must understand the causes and behavior of our planet's natural forces so they can help people survive natural disasters. They design devices that help us minimize, eliminate or predict the effects of natural hazards. Detecting, predicting and warning about hazards help populations evacuate and/or seek shelter. They design mountain, ocean, earth and atmospheric monitoring devices. They design weather instruments, radar and satellites to collect data and make predictions. Sometimes engineers make devices that trigger smaller hazards in order to prevent larger ones.
Learning Objectives
After this activity, students should be able to:
- Describe several methods that engineers use to predict, minimize or eliminate the effects of natural hazards.
- Explain that the placement of these devices is important to their effectiveness.
Educational Standards
Each TeachEngineering lesson or activity is correlated to one or more K-12 science,
technology, engineering or math (STEM) educational standards.
All 100,000+ K-12 STEM standards covered in TeachEngineering are collected, maintained and packaged by the Achievement Standards Network (ASN),
a project of D2L (www.achievementstandards.org).
In the ASN, standards are hierarchically structured: first by source; e.g., by state; within source by type; e.g., science or mathematics;
within type by subtype, then by grade, etc.
Each TeachEngineering lesson or activity is correlated to one or more K-12 science, technology, engineering or math (STEM) educational standards.
All 100,000+ K-12 STEM standards covered in TeachEngineering are collected, maintained and packaged by the Achievement Standards Network (ASN), a project of D2L (www.achievementstandards.org).
In the ASN, standards are hierarchically structured: first by source; e.g., by state; within source by type; e.g., science or mathematics; within type by subtype, then by grade, etc.
NGSS: Next Generation Science Standards - Science
| NGSS Performance Expectation | ||
|---|---|---|
|
4-ESS3-2. Generate and compare multiple solutions to reduce the impacts of natural Earth processes on humans. (Grade 4) Do you agree with this alignment? |
||
| Click to view other curriculum aligned to this Performance Expectation | ||
| This activity focuses on the following Three Dimensional Learning aspects of NGSS: | ||
| Science & Engineering Practices | Disciplinary Core Ideas | Crosscutting Concepts |
| Generate and compare multiple solutions to a problem based on how well they meet the criteria and constraints of the design solution. Alignment agreement: | A variety of hazards result from natural processes (e.g., earthquakes, tsunamis, volcanic eruptions). Humans cannot eliminate the hazards but can take steps to reduce their impacts. Alignment agreement: Testing a solution involves investigating how well it performs under a range of likely conditions.Alignment agreement: | Cause and effect relationships are routinely identified, tested, and used to explain change. Alignment agreement: Engineers improve existing technologies or develop new ones to increase their benefits, to decrease known risks, and to meet societal demands.Alignment agreement: |
International Technology and Engineering Educators Association - Technology
-
Students will develop abilities to assess the impact of products and systems.
(Grades
K -
12)
More Details
Do you agree with this alignment?
-
Students will develop an understanding of the role of society in the development and use of technology.
(Grades
K -
12)
More Details
Do you agree with this alignment?
State Standards
Colorado - Science
-
Earth's surface changes constantly through a variety of processes and forces
(Grade
5)
More Details
Do you agree with this alignment?
Materials List
Each student needs:
- Map of Unawaria
- Save Our City! Worksheet
- a set of six natural disaster prevention devices, as cut out of the attached Natural Disaster Prevention Devices Sheet (20 sets on one sheet)
- scissors
- white glue or a glue stick
- (optional) crayons
Worksheets and Attachments
Visit [www.teachengineering.org/activities/view/cub_natdis_lesson01_activity1] to print or download.Introduction/Motivation
A natural hazard is a natural event that has the possibility to cause damage. A natural disaster is a natural hazard that affects human populations. Who can tell us an example of a natural hazard? Let's make a list. (Possible answers: Volcano, earthquake, tsunami, flood, hurricane, tornado, avalanche, forest fire, thunderstorm and landslide.) Do you know of any ways that engineers keep natural hazards from becoming disasters for people, or minimize the effects of natural hazards? Engineers design many different devices. Today we are going to talk about avalanche mortars, tsunami buoys, seismometers, Doppler radar, volcano tiltmeters and water gauges. (Write these on the classroom board.)
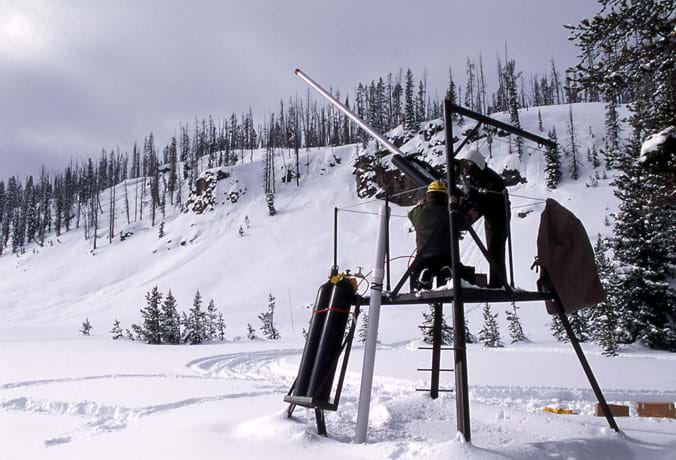
Avalanche mortars are designed by engineers to prevent natural disasters by triggering small avalanches before enough snow builds up to cause a catastrophic avalanche. An avalanche mortar is an explosive projectile that is launched at a slope where an avalanche is likely to occur. The explosion shakes the snow loose from the slope, causing a small avalanche. (Figure 1 shows an avalauncher, which is used to launch an avalanche mortar. The typical launch method is compressed nitrogen.) Explosives can also be dropped by skiers. The advantage of the avalanche mortar is that it can easily cover a large area and is safer for ski patrollers so they do not have to ski into dangerous avalanche zones to place explosives. The problem with avalanche mortars is that they are susceptible to wind and a dud mortar leaves a live explosive on the mountain. Without the avalanche mortar, snow levels could build to a point at which a huge avalanche could cause casualties and damage structures.
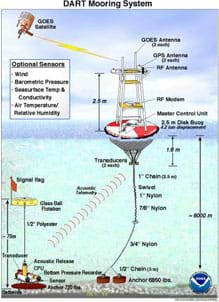
Because tsunamis often start far out in the ocean, it can take hours for the huge wave to reach land. Engineers design special buoys (floating devices) that can be left far out to sea to detect tsunami waves early, allowing time for coastal areas to be evacuated. As a tsunami moves across deep ocean water, its wave is usually only a few centimeters high. Sensors placed on the ocean bottom can detect even small tsunamis. The sensor information is sent to a buoy on the ocean surface and then relayed to tsunami centers via satellite. This system is known as DART (deep-ocean assessment and reporting of tsunamis; see Figure 2). Tsunami buoys are typically placed far away from the coast so that when they detect a tsunami the maximum amount of time is made available to warn coastal residents.
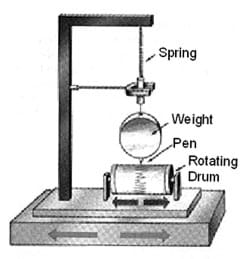
The most common way of detecting and measuring earthquakes is a seismometer (also known as a seismograph). A seismometer is any device used to detect vibration in the Earth's surface. A simple seismometer consists of a something suspended from springs that are allowed to swing as the Earth shakes. A pen attached the device records all vibrations (see Figure 3). Seismometers can be sensitive enough to detect earthquakes that people cannot even feel. Seismometers can detect a powerful earthquake anywhere in the world, but often seismometers are placed near fault lines to detect very small earthquakes. This information can help engineers predict when a large earthquake is due to occur. Faults are the boundaries between the tectonic plates that make up the surface of the Earth's crust. As the plates slide along each other, they slip and grind, causing earthquakes.
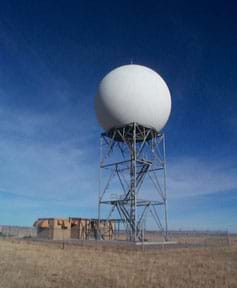
Thunderstorms can form quickly and are not always easy to predict. So this is why engineers create Doppler radar stations that are able to detect approaching thunderstorms. Doppler radar works by sending out pulses or radio waves, then measuring how long it takes the waves to bounce off objects and return. In the case of thunderstorms, the radio waves bounce off the rain or hail. Information from the radar station can determine the size of a storm, how fast it is moving, which direction it is moving, and whether or not there is danger of a tornado. Because tornadoes usually occur in flat areas, such as grasslands, radar stations are often placed in these areas (see Figure 4).
One indication that a volcano is about to erupt is that the mountain grows larger as magma moves up towards the surface. Unfortunately, the change is small and happens fairly slowly so that people rarely notice it. That is why engineers have developed devices called tiltmeters that can detect small changes in the shape of volcanoes. These devices are placed directly on the sides of volcanoes to help us predict any upcoming eruptions.
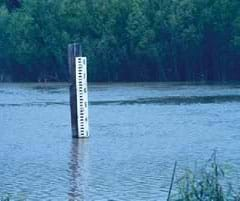
A basic way of monitoring floods is with a water gauge. A simple water gauge is just a vertical post marked with water depths and placed in rivers and streams that often flood (see Figure 5). If the water rises over a certain level, nearby communities are evacuated to prevent the loss of lives. Engineers have developed some fancier water gauges that automatically relay information to local data centers.
Procedure
Before the Activity
- Make two copies of the Natural Disaster Prevention Devices Sheet. Cut the sheets so that each student gets a strip with each of the six different devices; each sheet contains 20 sets.
- Make copies of the Map of Unawaria, one per student.
- Make copies of the Save Our City! Worksheet, one per student.
With the Students
- Tell the students a background story about Unawaria and natural disasters: "The prime minister of Unawaria has just called me and she is worried about natural disasters causing destruction in the city of Merryville and the small city of Bliss Town. She says she wants our engineers to place some disaster prevention devices around her country to minimize the impact of the many natural hazards in and around Unawaria. Unfortunately, we have only a small budget for this project, so we only can place six different devices around the country. It is up to us to decide where these devices go so they best protect populated areas."
- Briefly explain the six different disaster prevention devices (tsunami buoy, volcano monitor, Doppler radar, water gauge, seismometer, avalanche mortar) and where they are usually placed in order to help prevent natural disasters.
- Hand out a map to each student and lead a class discussion about the different natural disasters that could occur in this hypothetical country.
- Next, pass out the strips of the six different disaster prevention devices to students.
- Have students cut along the lines to separate them into six pieces.
- Working individually, have students decide where they think each device should be placed in order to best help prevent a natural disaster or predict a disaster so that lives can be saved. Have them glue their devices to their maps at those locations.
- Next, have students complete the worksheet. (Note: Make sure to hand out this worksheet only after the students have completed gluing their devices on their own maps.)
- (optional) While waiting for the rest of the class to finish, have students color their maps and devices.
- Review the map and worksheet with the class. There are no absolute right and wrong answers as long students are able to logically justify where they placed their devices. With everyone's ideas pooled together, can we agree on what are the best placements for each device?
- Conclude by conducting the post-activity assessment activities described in the Assessment section.
Vocabulary/Definitions
avalauncher: A device used to launch explosives (an avalanche mortar) onto avalanche-prone slopes in order to trigger small avalanches so that large avalanches do not form.
buoy: A floating device.
DART: DART = deep-ocean assessment and reporting of tsunamis system. A collection of sensors and buoys that detect potential tsunamis and warn people in coastal areas.
Doppler radar: A type of weather radar that is used to detect precipitation and track the speed and direction of a storm.
engineer: A person who applies her/his understanding of science and mathematics to creating things for the benefit of humanity and our planet.
seismometer: A device for detecting and measuring the intensity of an earthquake. Also known as a seismograph.
tiltmeter: A device placed on a volcano that can detect changes in the size of the volcano due to increased magma volume. Used to help predict impending eruptions.
Assessment
Pre-Activity Assessment
Discussion Questions: Solicit answers to the following questions and explain to students that these questions will be answered as we explore the activity.
- Is it necessary to monitor every natural hazard in order to prevent a natural disaster? (No, many natural hazards exist in remote areas and are no threat to humans.)
- Can anyone name any devices or methods we use to predict, eliminate or minimize the effects of natural disasters? (Example answers: Seismometers, avalanche mortars, water gauges, volcano tiltmeters, tsunami buoys, Doppler radar, sensors, communication and warning devices, weather satellites and forecasts, levees, structures, fire fighting equipment, etc.)
Activity Embedded Assessment
Activity Worksheet: Have students complete the Save Our City! Worksheet; review their answers to gauge their mastery of the subject. After students finish working individually on worksheets, have them compare answers with a peer, giving all students time to finish their worksheets.
Voting: Have students vote on the following true/false questions and then explain the answers.
- True or False: Avalanche mortars prevent avalanches from occurring. (Answer: False, avalanche mortars trigger small avalanches so that large avalanches are not likely to occur.)
- True or False: Tsunami buoys should be placed close to shore in order to better protect the coast. (Answer: False, tsunami buoys should be placed in the ocean, far from shore, so that residents have time to evacuate.)
- True or False: A seismometer can detect a strong earthquake anywhere in the world. (Answer: True)
- True or False: Tiltmeters measure the tilt on an avalanche slope. (Answer: False, tiltmeters measure the change in the shape of a volcano.)
- True or False: Tornadoes typically form over flat areas such as grasslands. (Answer: True)
Post-Activity Assessment
On the Map/Worksheet Discussion: Draw a rough version of the Map of Unawaria on the classroom board and have several students come up to show where they think the devices should go. Have students explain their reasoning for choosing their locations.
Worksheet: After students complete the Save Our City! Worksheet, explain that they work for an engineering firm and the interns made their best guesses as to where the devices should be located. Now, as expert engineers, the students can help the interns place the devices correctly. Review and discuss the worksheet with the entire class. Have the class generate a list of "mistakes" and have them describe "improvements," explaining why they would move the devices elsewhere.
Safety Issues
- Be sure students are careful with scissors, or do the cutting in advance.
Troubleshooting Tips
Remind students that there is no one right place to put each device, although some placements do not make sense (such as a tsunami buoy placed in the mountains). Their placement decisions may be correct as long as they can provide good reasoning for where they place their devices.
Activity Extensions
Have students identify other natural hazards on the map or add a natural hazard to the map. Then, have them use an existing device or design their own devices that would help keep the new natural hazard from becoming a disaster.
Activity Scaling
- For lower grades, discuss as a class where the devices would be best placed and go through the worksheet together. Make sure all the students are writing down the class decisions (that is, the mistakes on the map) throughout the discussions.
- For upper grades, tell the students how the natural disaster prevention devices work, but do not give them information on where they are usually placed. Challenge them to decide where to place the devices without this information.
Subscribe
Get the inside scoop on all things Teach Engineering such as new site features, curriculum updates, video releases, and more by signing up for our newsletter!More Curriculum Like This

Students are introduced to natural disasters and learn the difference between natural hazards and natural disasters.

Students learn about tsunamis, discovering what causes them and what makes them so dangerous. They learn that engineers design detection and warning equipment, as well as structures that that can survive the strong wave forces. In a hands-on activity, students use a table-top-sized tsunami generator...

Students consider how weather forecasting plays an important part in their daily lives. They learn about the history of weather forecasting — from old weather proverbs to modern forecasting equipment — and how improvements in weather technology have saved lives by providing advance warning of natura...

Students are introduced to our planet's structure and its dynamic system of natural forces through an examination of the natural hazards of earthquakes, volcanoes, landslides, tsunamis, floods and tornadoes, as well as avalanches, fires, hurricanes and thunderstorms. They see how these natural event...
References
About Earthquakes, Earthquake Hazards Program. Last modified November 13, 2006. U.S. Geological Survey, U.S. Department of the Interior. Accessed December 20, 2006. (Facts and terms, educational topics, resources) http://earthquake.usgs.gov/learning/
Avalanche Center (CSAC) – Snow and Avalanches. The Avalanche Center. Accessed December 20, 2006. http://www.avalanche-center.org/
Doppler radar. Last modified December 8, 2006. Wikipedia, the free online encyclopedia. Accessed December 20, 2006. http://en.wikipedia.org/wiki/Doppler_radar
National Data Buoy Center (NDBC) – Deep-ocean Assessment and Reporting of Tsunamis (DART). Last modified December 11, 2006. National Oceanic and Atmospheric Administration. Accessed December 20, 2006. http://www.ndbc.noaa.gov/dart/dart.shtml
Sawall, Hardy. Avalanche Defense Techniques. Michigan Technological University. Accessed December 20, 2006. http://www.mtu.edu/geo/
Watson, John and Kathie. Last updated October 23, 1997. Predicting Earthquakes – General Interest Publication. U.S. Geological Survey. Accessed December 20, 2006. http://pubs.usgs.gov/gip/earthq1/predict.html
Copyright
© 2006 by Regents of the University of Colorado.Contributors
Geoffrey Hill; Malinda Schaefer Zarske; Denise W. CarlsonSupporting Program
Integrated Teaching and Learning Program, College of Engineering, University of Colorado BoulderAcknowledgements
The contents of this digital library curriculum were developed under a grant from the Fund for the Improvement of Postsecondary Education (FIPSE), U.S. Department of Education, and National Science Foundation GK-12 grant no 0338326. However, these contents do not necessarily represent the policies of the Department of Education or National Science Foundation, and you should not assume endorsement by the federal government.
Last modified: September 27, 2021


User Comments & Tips