
Quick Look
Grade Level: 5 (4-5)
Time Required: 3 hours
(three 60-minute sessions)
Expendable Cost/Group: US $0.00
Group Size: 3
Activity Dependency: None
Subject Areas: Biology, Life Science, Measurement, Number and Operations, Problem Solving, Science and Technology
NGSS Performance Expectations:

| 3-5-ETS1-1 |
| 3-5-ETS1-2 |
| 5-PS1-4 |
Quick Look

- Grade Level:
- 5 (4 – 5)
- Time Required:
- 3 hours
(three 60-minute sessions)
- Group Size:
- 3
- Subject Areas:
-
Biology Life Science Measurement Number and Operations Problem Solving Science and Technology -
NGSS Performance Expectations:
3-5-ETS1-1 3-5-ETS1-2 5-PS1-4

Summary
Students use the engineering design process to build and refine a low-cost, light-based diagnostic prototype that simulates real-world biomedical tools. Students learn how light interacts with matter through spectrometry and explore how photonics technologies are used in point-of-care devices such as pulse oximeters to assess blood flow and cardiovascular health. Using everyday materials to model scattering “blood” samples, students test and compare how light transmission changes, analyzing brightness and clarity rather than precise absorbance.Engineering Connection
Biomedical engineers design low-cost, light-based diagnostic tools that use light transmission, reflection, and scattering to measure health indicators, such as pulse oximeters that shine red and infrared light through tissue to detect blood oxygen levels. Engineers also develop accessible, non-invasive biosensors that analyze how light behaves as it passes through blood to identify cardiovascular conditions. In this lesson, students apply these ideas by designing and testing a simplified, photonics-inspired device to explore how changes in blood thickness or clarity affect light transmission and how this information can be used to detect potential heart-related conditions.
Learning Objectives
After this activity, students should be able to:
- Describe how the mixing of two or more substances results in a new substance.
- Explore how blood clarity can inform us of the heart’s health.
- Solve a real-world problem involving light-based diagnostic tools.
- Describe spectrometry and how it is applied in point-of-care devices.
Educational Standards
Each Teach Engineering lesson or activity is correlated to one or more K-12 science,
technology, engineering or math (STEM) educational standards.
All 100,000+ K-12 STEM standards covered in Teach Engineering are collected, maintained and packaged by the Achievement Standards Network (ASN),
a project of D2L (www.achievementstandards.org).
In the ASN, standards are hierarchically structured: first by source; e.g., by state; within source by type; e.g., science or mathematics;
within type by subtype, then by grade, etc.
Each Teach Engineering lesson or activity is correlated to one or more K-12 science, technology, engineering or math (STEM) educational standards.
All 100,000+ K-12 STEM standards covered in Teach Engineering are collected, maintained and packaged by the Achievement Standards Network (ASN), a project of D2L (www.achievementstandards.org).
In the ASN, standards are hierarchically structured: first by source; e.g., by state; within source by type; e.g., science or mathematics; within type by subtype, then by grade, etc.
NGSS: Next Generation Science Standards - Science
| NGSS Performance Expectation | ||
|---|---|---|
|
3-5-ETS1-1. Define a simple design problem reflecting a need or a want that includes specified criteria for success and constraints on materials, time, or cost. (Grades 3 - 5) Do you agree with this alignment? |
||
| Click to view other curriculum aligned to this Performance Expectation | ||
| This activity focuses on the following Three Dimensional Learning aspects of NGSS: | ||
| Science & Engineering Practices | Disciplinary Core Ideas | Crosscutting Concepts |
| Define a simple design problem that can be solved through the development of an object, tool, process, or system and includes several criteria for success and constraints on materials, time, or cost. Alignment agreement: | Possible solutions to a problem are limited by available materials and resources (constraints). The success of a designed solution is determined by considering the desired features of a solution (criteria). Different proposals for solutions can be compared on the basis of how well each one meets the specified criteria for success or how well each takes the constraints into account. Alignment agreement: | People's needs and wants change over time, as do their demands for new and improved technologies. Alignment agreement: |
| NGSS Performance Expectation | ||
|---|---|---|
|
3-5-ETS1-2. Generate and compare multiple possible solutions to a problem based on how well each is likely to meet the criteria and constraints of the problem. (Grades 3 - 5) Do you agree with this alignment? |
||
| Click to view other curriculum aligned to this Performance Expectation | ||
| This activity focuses on the following Three Dimensional Learning aspects of NGSS: | ||
| Science & Engineering Practices | Disciplinary Core Ideas | Crosscutting Concepts |
| Generate and compare multiple solutions to a problem based on how well they meet the criteria and constraints of the design problem. Alignment agreement: | Research on a problem should be carried out before beginning to design a solution. Testing a solution involves investigating how well it performs under a range of likely conditions. Alignment agreement: At whatever stage, communicating with peers about proposed solutions is an important part of the design process, and shared ideas can lead to improved designs.Alignment agreement: | Engineers improve existing technologies or develop new ones to increase their benefits, to decrease known risks, and to meet societal demands. Alignment agreement: |
| NGSS Performance Expectation | ||
|---|---|---|
|
5-PS1-4. Conduct an investigation to determine whether the mixing of two or more substances results in new substances. (Grade 5) Do you agree with this alignment? |
||
| Click to view other curriculum aligned to this Performance Expectation | ||
| This activity focuses on the following Three Dimensional Learning aspects of NGSS: | ||
| Science & Engineering Practices | Disciplinary Core Ideas | Crosscutting Concepts |
| Conduct an investigation collaboratively to produce data to serve as the basis for evidence, using fair tests in which variables are controlled and the number of trials considered. Alignment agreement: | When two or more different substances are mixed, a new substance with different properties may be formed. Alignment agreement: | Cause and effect relationships are routinely identified, tested, and used to explain change. Alignment agreement: |
International Technology and Engineering Educators Association - Technology
-
Compare how things found in nature differ from things that are human-made, noting differences and similarities in how they are produced and used.
(Grades
3 -
5)
More Details
Do you agree with this alignment?
-
Apply the technology and engineering design process.
(Grades
3 -
5)
More Details
Do you agree with this alignment?
-
Evaluate designs based on criteria, constraints, and standards.
(Grades
3 -
5)
More Details
Do you agree with this alignment?
-
Create a new product that improves someone's life.
(Grades
3 -
5)
More Details
Do you agree with this alignment?
-
Describe the unique relationship between science and technology, and how the natural world can contribute to the human-made world to foster innovation.
(Grades
3 -
5)
More Details
Do you agree with this alignment?
State Standards
Florida - Science
-
Identify the organs in the human body and describe their functions, including the skin, brain, heart, lungs, stomach, liver, intestines, pancreas, muscles and skeleton, reproductive organs, kidneys, bladder, and sensory organs.
(Grade
5)
More Details
Do you agree with this alignment?
Materials List
Each group needs:
- 3–5 clear plastic cups or mini containers (240 mL each / 8 oz)
- 3-5 pieces of cardboard
- 3–5 wide-mouthed clear plastic straws
- 60 mL (¼ cup) of cornstarch
- 60 mL (¼ cup) of granulated sugar
- 2–3 drops of red food coloring
- 2–3 disposable 3 mL plastic droppers or disposable plastic pipettes
- 1 small sheet of aluminum foil (approx. 20 cm × 20 cm or 8 in × 8 in)
- 2 index cards or pieces of stiff white cardstock (approx. 7.6 cm × 12.7 cm or 3 in × 5 in)
- 50 cm (20 in) of tape (masking or clear)
- 1 small flashlight
- Imagine: Brainstorm Solutions Worksheet (1 per student)
- Plan: Develop a Prototype Worksheet (1 per group)
- Test and Improve Worksheet (1 per student)
- Post Activity Reflection Worksheet (1 per student)
- (optional) Vocabulary List (1 per group or student)
For the entire class to share:
- 5-10 pulse oximeters
- black construction paper or fabric scraps (at least 2 sheets)
- rulers, scissors, glue sticks
- 1 large mixing bowl and spoon (for teacher prep and/or student setup station)
- sticky notes (3-4 per student)
- writing utensils (one per student)
- 3-4 solutions of varying opacity for testing (this is the teacher’s discretion)
For the teacher:
- (optional) access to NearPod (https://nearpod.com)
- 1 laptop or computer with internet access and a projector (to show YouTube videos and display the Exploring Light & Health Presentation
- 1 small flashlight
- 1 clear plastic cup with colored water (create a colored water mixture through which light can pass)
- 1 clear plastic cup with a mixture of cornstarch, sugar, and water (create a mixture cloudy enough that less or no light can pass)
YouTube Links and Run Times:
- “How Your Heart Works” (https://www.youtube.com/watch?v=tg_ObDJEaGo, 4:03 minutes)
- “What is a Heart?” (https://www.youtube.com/watch?v=pIPV1n2A9LI, 2:49 minutes)
- “What is Bioengineering?” (https://www.youtube.com/watch?v=LtUefo9Taus, 2:36 minutes)
- “How pulse oximeters work, and why they sometimes do not” (https://www.youtube.com/watch?v=r0RISnX-cnc, 2:14 minutes)
Worksheets and Attachments
Visit [www.teachengineering.org/activities/view/fiu-3023-light-based-diagnostic-device-activity] to print or download.Pre-Req Knowledge
Students should be familiar with the engineering design process.
Introduction/Motivation
(Have ready a small flashlight and a clear plastic cup with colored water and another with cornstarch/sugar mixture.)
Hello, engineers! I want you to imagine something for a moment. What if someone in your family wasn't feeling well, maybe dizzy, tired, or had chest pain, and you didn't have access to a nearby clinic, hospital, or even a school nurse? What would you do? (Pause for responses. Encourage brief student ideas. Don't dismiss ideas; use this as a way to bring in varied experiences. Possible answers: "Call 911," "Look it up," "Try to rest," "Go to urgent care.”)
That's a good list. But here's the truth: in many parts of the world and even in some neighborhoods right here in the United States, people don't always have access to medical help when they need it. That's where engineers come in.
Engineers, especially biomedical engineers, design point-of-care tools that help people check their health without needing a hospital or expensive machines. Some of these tools use light to figure out what's happening inside your body. Can anyone think of a health tool you've seen that uses light? (Call on a few students. If needed, prompt: "Have you ever had your finger clipped to a little device at the doctor's office?" Possible answers: pulse oximeter, thermometer, heart monitor, scan machines.)
That's right! A pulse oximeter shines red light through your finger to check how much oxygen is in your blood. Why light? Because light behaves differently depending on what it passes through, and scientists and biomedical engineers use that to detect things like blood clots, thickness, or poor blood flow.
(Shine the flashlight through a cup of water, then one with cornstarch/sugar mixture to show cloudiness or reduced light.)
Think of it like this: When you're driving through fog, your headlights don't work as well, right? That's because light gets blocked or scattered. The same thing happens when blood is too thick or cloudy.
In this activity, we will be learning about our hearts, how to monitor our hearts, and point-of-care technologies, and we will work on a challenge: You're going to work in a team to design and build a light-based test device that can "diagnose" a liquid sample. You'll create different mixtures that simulate healthy or unhealthy blood, shine light through them, and build a prototype that helps people test for blood problems, using light as the tool.
Just like real biomedical engineers, you'll ask questions, test materials, and make changes based on what works. You're solving a real-world problem, which is how to help someone understand their health when there's no hospital nearby.
Procedure
Background
This activity introduces students to light-based sensing and spectrometry, which are core concepts in photonics and biomedical engineering and are widely used in modern medical devices to assess properties of the human body without invasive procedures.
Light-based sensing works by shining light onto or through an object and analyzing how the light changes (e.g., how much is absorbed, reflected, scattered, or transmitted) after interacting with the material. Because light can travel quickly and safely through many materials, this approach allows engineers and doctors to gather information without breaking the skin or directly contacting internal tissues. In biomedical applications, light-based sensing is used to measure heart rate, blood flow, oxygen levels, and other physiological indicators by examining how light behaves as it passes through or reflects off the body.
Spectrometry is the study of how light interacts with matter, specifically how light is transmitted, absorbed, reflected, or scattered by substances. Biomedical engineers use principles of spectrometry to design low-cost diagnostic tools that analyze fluids (such as blood) using visible or infrared light to detect signs of disease or poor circulation.
A real-world example of this is the pulse oximeter, which is a device that shines red and infrared light through a patient's fingertip to measure blood oxygen levels. These tools rely on how light intensity changes after passing through blood of varying composition. The pulse oximeter provides a fast, non-invasive way to monitor a patient’s oxygen levels, which is critical for detecting respiratory or cardiovascular issues and guiding medical decisions.
In this activity, students take on the role of biomedical engineers by designing and testing a simplified diagnostic device that models how spectrometers work. By shining light through simulated “blood” mixtures made from water, sugar, and cornstarch, students explore how changes in viscosity (thickness) and opacity (cloudiness) affect light transmission, helping them connect fundamental light–matter interactions to real-world biomedical technologies.
Before the Activity
- Familiarize yourself with the Exploring Light & Health Presentation.
- Print or prepare digital copies of student worksheets:
- Imagine: Brainstorm Solutions Worksheet (1 per student)
- Plan: Develop a Prototype Worksheet (1 per group)
- Test and Improve Worksheet (1 per student)
- Post Activity Reflection Worksheet (1 per student)
- Optional: Familiarize yourself with the Nearpod Presentation, interactive slides, and embedded videos.
- Gather materials and prepare two cups for class demonstration on Day 1:
- 1 clear plastic cup with colored water (create a colored water mixture through which light can pass)
- 1 clear plastic cup with a mixture of cornstarch, sugar, and water (create a mixture cloudy enough that less or no light can pass)
- Optional but recommended: Set up or check access to pulse oximeters for Day 2.
- Gather and prepare “blood simulation” materials for Day 3.
- Gather prototyping materials for student teams for Day 3.
- Set up team spaces for building and testing that allows for safe use of light and liquids.
- Review the engineering design process and print copies of the EDP Handout for student reference.
- Consider grouping students in advance for team collaboration (2–4 per group recommended).
- Review safety expectations with students before beginning the design challenge.
During the Activity
Day 1 (60 minutes)
Ask (15 minutes)
- Begin with the Introduction/Motivation section.
- Present the following questions for the students to think about:
- How would you describe the function of the heart?
- What does our blood tell us about our heart health?
- How can we monitor our heart?
- Display the Exploring Light & Health Presentation.
- Give each student a sticky note.
- Display Slide 3 and ask students to answer the question on their sticky note.
- Conduct a class discussion about students’ background knowledge on the heart and its functions. This will help you assess their pre-activity knowledge.
Research (45 minutes)
The Heart and Its Functions (10 minutes)
- Click on Slide 4 and play the video, “How Your Heart Works” (https://youtu.be/tg_ObDJEaGo, 4:04 minutes), asking the following questions throughout the video to check for understanding:
- At the 1:30 mark, pause the video and ask the following questions and let students offer answers:
- What is the primary function of the heart?
- In your own words, how would you describe what the heart does in the body?
- Expected student responses / key ideas:
- The heart pumps blood around the body.
- It circulates oxygenated blood to organs and tissues, and deoxygenated blood back to the lungs.
- It acts like a pump or a strong muscle.
- Without the heart pumping, the body’s cells wouldn’t get oxygen or nutrients.
- After hearing students’ answers, summarize and make sure students understand the following:
- “The heart is the central pump of the circulatory system, moving blood so that oxygen and nutrients get to all parts of our body and so that waste (like carbon dioxide) can be removed.”
- Resume the video.
- Pause the video at the 2:45 mark and ask the following questions:
- When blood leaves the heart, where is it going, and why?
- What happens to blood after it leaves the heart?
- Expected student responses / key ideas:
- Blood leaves the heart and goes to the lungs (to pick up oxygen) and/or body tissues.
- Oxygenated blood goes out via arteries, delivers oxygen/nutrients, and then returns via veins.
- The heart sends blood out via the aorta and other major arteries.
- Deoxygenated blood returns to the heart and then to the lungs to get oxygen.
- After hearing students’ answers, summarize and make sure students understand the following:
- “Blood is part of a loop. The heart sends it out and it travels, delivers what’s needed, and returns. This continuous circulation is what keeps our body functioning.”
- Resume video and play to end.
Biomedical Engineers and Point-of-Care Devices (10 minutes)
- Show Slide 5 and review how we monitor our hearts.
- Jot and Post:
- Display Slide 6.
- Hand each student a sticky note.
- Give students 5 minutes to answer the question on Slide 6 on their sticky note.
- After everyone writes down their thoughts, post their sticky notes on a wall or whiteboard or chart paper.
- Optional: Go around the class and have each student share one of their answers.
- Show Slide 7 and transition students to learning about biomedical engineering: “We will now explore how biomedical engineers help keep people healthy by developing point-of-care devices.”
- Display Slide 8 and show the video: “What is Biomedical Engineering?” (https://youtu.be/LtUefo9Taus, 2:36 minutes), which discusses what a biomedical engineer is and what they do.
- Summarize what biomedical engineers do based on the video and then link to point-of-care devices: “Now that we’ve seen what biomedical engineers do, let’s focus on one of the ways they help people stay healthy by designing point-of-care devices.
- Click to Slide 9 and read: “A point-of-care device is a medical tool that allows people to get important health information right where they are, instead of needing to go to a hospital or lab. These devices give fast results, often at home, in a clinic, or even out in the field.”
- Ask the class: “Can anyone think of a device you or someone in your family might have used to check health at home?” (Potential answers: thermometer, blood glucose meter, pregnancy test.)
Pulse Oximeters and Hands-On Experimentation (15 minutes)
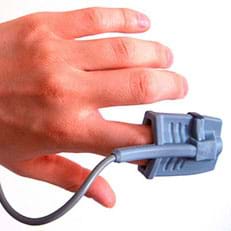
- Introduce pulse oximeters with the following script: “One of the most common point-of-care devices is the pulse oximeter, a small tool that clips onto your finger and uses light to measure how much oxygen is in your blood.”
- Display Slide 10 and show the video: “How pulse oximeters work, and why they sometimes do not” (https://www.youtube.com/watch?v=r0RISnX-cnc, 2:14 minutes.) This video discusses how light is used in the pulse oximeter and how sometimes the pulse oximeter can provide inaccurate readings.
- Let’s Try It:
- Display Slide 11.
- Hand out pulse oximeter(s) and provide time for students to use the pulse oximeter and measure how much oxygen is in their blood. Inform students that they are looking for a 95-100% range.
- After testing the pulse oximeter(s), ask students the following questions:
- Why do you think engineers decided to use light instead of something more invasive? (Possible student response: Because light doesn’t hurt and you don’t need to stick a needle in someone.) Teacher Note: Highlight the value of non-invasive tech for comfort and safety.
- How might this be useful during an emergency, or in a place without a hospital? (Possible student response: You can tell if someone needs oxygen or help right away, even if there’s no doctor.)
Light and Sensors (10 minutes)
- Display Slide 12 and transition light and sensors: Now that we understand what point-of-care devices do and how engineers design tools like the pulse oximeter, we’re going to dig deeper.
- Read through Slides 13-15, explaining how light and sensors work together to measure what's happening in our bodies.
- Wrap up the session by summarizing what they now know about the heart and its functions, what biomedical engineers do, and why point-of-care devices are important.
Day 2 (60 minutes)
Review previous day’s research (10 minutes)
- Display the Exploring Light & Health Presentation.
- Display Slide 17 and prompt students to watch a new video, “What is a Heart?” (https://youtu.be/pIPV1n2A9LI, 2:49 minutes), reviewing what they know about the heart. Briefly remind students what point-of-care devices are.
- Briefly review how a pulse oximeter works.
Present the Design Challenge and Details (15 minutes)
- Display Slide 18 of the Exploring Light & Health Presentation.
- Present the design challenge using the following script:
All right engineers, today’s the day! You have learned how the heart and circulatory system work, how we can monitor heart health, and how engineers use light and sensors in point-of-care devices like pulse oximeters.
Now, you’re going to put that learning into action by becoming biomedical engineers yourselves. Your challenge is to design and build a prototype of a light-based diagnostic device that can help identify differences between simulated ‘blood’ samples, just like a real medical device would.
Your task is to design a light-based diagnostic tool that can distinguish between at least two different mixtures that simulate blood. These mixtures will vary in color or opacity to represent different oxygen levels; for example, bright red could mean oxygen-rich blood, and dark red or purple could mean oxygen-poor blood.
You’ll use materials such as flashlights, clear containers, colored liquids, and paper or cardboard to build a system that shines light through the sample and detects how much light gets through.
You’ll work in teams and follow the engineering design process to plan, build, test, and improve your device.
- Optional: Show Slide 19 and review the engineering design process.
- Display Slide 20 and present the challenge parameters and constraints:
- Use a light source (flashlight).
- Your device must allow light to pass through the sample container.
- Include a detection method (e.g., a sensor area, a marked screen, or even your own eyes) to observe differences in light intensity.
- You must test at least two “blood” samples and record your results.
- Your design must be safe, non-invasive, and reusable for multiple tests.
- Optional: Introduce the class to the materials available for their devices
- Optional: Display the “blood samples” students will test their devices with.
- Display Slide 21 and review the success criteria for the challenge:
- Effectiveness: It can clearly show a difference between at least two sample types based on how light passes through.
- Accuracy: The way you measure or observe the light must be consistent and repeatable.
- Creativity & Design: Your system is thoughtfully constructed, easy to use, and safely handles the samples.
Step 3: Imagine (15 minutes)
- Display Slide 22.
- Hand out one Imagine: Brainstorm Solutions Worksheet to each student.
- Give students 10-15 minutes to imagine and brainstorm solutions on their worksheet.
Plan (15 minutes)
- Display Slide 23.
- Put students into groups.
- Give each group a Plan: Develop a Prototype Worksheet.
- Give students 15 minutes to sketch their group design and create a plan.
- Optional: Have each group get your approval of their design plan before moving to the next step.
Day 3 (60 minutes)
Create (15 minutes)
- Display Slide 24.
- Give students time to build their devices according to their plan.
Test and Improve (30-40 minutes)
- Display Slide 25.
- Give each group time to test their device.
- Optional: Have students record their observations and any data they collect from their tests.
- Give each student a Test and Improve Worksheet.
- Have students answer the Test questions.
- Give each group time to brainstorm how they would improve their device.
- Have students answer the Improve question.
- Give each group time to improve their device and retest.
Reflection (5-10 minutes)
- Give each student a Post Activity Reflection Worksheet.
- Give students time to answer the worksheet and reflect on the activity.


Vocabulary/Definitions
artery: A blood vessel that carries oxygen-rich blood away from the heart.
circulatory system: The body system made up of the heart, blood, and blood vessels that moves oxygen and nutrients around.
heart: A muscular organ that pumps blood through the body.
light transmission: How much light passes through a material.
point-of-care device: A medical tool that gives fast results outside of a hospital, such as at home or in a clinic.
pulse: A rhythmical throbbing of the arteries as blood is propelled through them.
pulse oximeter: A small device that uses light to measure how much oxygen is in the blood.
sensor: A tool or part of a machine that detects changes and collects information.
vein: A blood vessel that carries blood back to the heart.
Assessment
Pre-Activity Assessment
Opening question: Students write down what they know about the heart and its functions on sticky notes before the activity begins. The teacher leads a group discussion about the students’ background knowledge on the heart and its functions.
Jot and Post: Students write down how they think heart health can be monitored at home. The teacher leads a group discussion about the students’ background knowledge of point-of-care devices they are familiar with.
Activity Embedded (Formative) Assessment
Imagine/Brainstorm: Students complete the Imagine: Brainstorm Solutions Worksheet as they individually brainstorm possible designs to create a device that uses light to detect heartbeats.
Imagine/Brainstorm: Each group completes a Plan: Develop a Prototype Worksheet, which identifies what materials are needed; how everything will be kept safe and secure; what roles each team member will take on; and how they will know if their design works.
Test/Improve: Students complete the Test and Improve Worksheet, identifying what worked and what didn’t work. They then brainstorm what they would improve and why.
Post-Activity (Summative) Assessment
Reflection questions: Students answer the questions in the Post Activity Reflection Worksheet and reflect on the activity.
Subscribe
Get the inside scoop on all things Teach Engineering such as new site features, curriculum updates, video releases, and more by signing up for our newsletter!More Curriculum Like This

Students learn that trigonometric functions can model how their hearts work and can provide important information about their cardiovascular condition. Students analyze their own photoplethysmogram (PPG) obtained from a fingertip pulse oximeter.
Copyright
© 2026 by Regents of the University of Colorado; original © 2025 Florida International UniversityContributors
Kaitlin Cunningham, Dr. Jessica Romella-RomanSupporting Program
PATHS-UP Research Experience for Teachers, Florida International UniversityAcknowledgements
This activity was developed as part of the Research Experience for Teachers through the Florida International University Department of Mechanical and Materials Engineering—PATHS-UP under grant number IIS 1730574. Any opinions, findings and conclusions or recommendations expressed in this material are those of the authors and do not necessarily reflect the views of the National Science Foundation or Florida International University.
Thank you to the NSF PATHS-UP center for providing the RET opportunity.
Last modified: February 3, 2026
User Comments & Tips