Quick Look
Grade Level: 7 (6-8)
Time Required: 6 hours 45 minutes
(Multiple 45-minute sessions (8-10 days))
Expendable Cost/Group: US $0.00
Group Size: 3
Activity Dependency: None
Subject Areas: Physical Science, Problem Solving, Reasoning and Proof, Science and Technology
NGSS Performance Expectations:

| MS-ETS1-1 |
| MS-ETS1-2 |
| MS-ETS1-3 |
| MS-ETS1-4 |
Summary
Students engineer surfaces to control and modify friction and grip as they design and build a tabletop game that uses sliding friction as the main component of its mechanics. Students first observe surface roughness on a variety of surface materials using a digital microscope and explore how engineers use surface modifications to manage friction. They then investigate and compare the friction and grip on multiple surface materials using an inclined plane. Applying the concepts of surface roughness and surface modification, students work as engineering teams to create a tabletop game that uses sliding friction as a main game mechanic. Students go through the steps of the engineering design process, from ideation to prototype development. Students test their own games to balance relevant parameters (surface roughness, speed, board design, game rules, etc.) to improve their prototypes. Students review the prototypes of their peers and offer feedback for further improvements.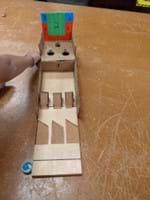
Engineering Connection
Learning about surfaces to control and modify friction and grip is integral to engineering as it enables engineers to optimize performance, enhance durability, ensure safety, and innovate across a wide range of applications and industries. Mechanical engineers frequently encounter challenges related to friction and grip in the design of machines, mechanisms, and moving parts. Understanding how surface properties influence friction allows mechanical engineers to optimize the performance and efficiency of mechanical systems. For example, in automotive engineering, engineers may modify tire tread patterns to enhance grip on different road surfaces, improving vehicle stability and safety.
Learning Objectives
After this activity, students should be able to:
- Describe the qualitative effects of surface roughness on friction, grip, and motion.
- Explain ways that surfaces can be modified to control friction, grip, and motion, and qualitatively predict the results of such modifications.
- Explain the role of engineers in managing friction.
Educational Standards
Each Teach Engineering lesson or activity is correlated to one or more K-12 science,
technology, engineering or math (STEM) educational standards.
All 100,000+ K-12 STEM standards covered in Teach Engineering are collected, maintained and packaged by the Achievement Standards Network (ASN),
a project of D2L (www.achievementstandards.org).
In the ASN, standards are hierarchically structured: first by source; e.g., by state; within source by type; e.g., science or mathematics;
within type by subtype, then by grade, etc.
Each Teach Engineering lesson or activity is correlated to one or more K-12 science, technology, engineering or math (STEM) educational standards.
All 100,000+ K-12 STEM standards covered in Teach Engineering are collected, maintained and packaged by the Achievement Standards Network (ASN), a project of D2L (www.achievementstandards.org).
In the ASN, standards are hierarchically structured: first by source; e.g., by state; within source by type; e.g., science or mathematics; within type by subtype, then by grade, etc.
NGSS: Next Generation Science Standards - Science
| NGSS Performance Expectation | ||
|---|---|---|
|
MS-ETS1-1. Define the criteria and constraints of a design problem with sufficient precision to ensure a successful solution, taking into account relevant scientific principles and potential impacts on people and the natural environment that may limit possible solutions. (Grades 6 - 8) Do you agree with this alignment? |
||
| Click to view other curriculum aligned to this Performance Expectation | ||
| This activity focuses on the following Three Dimensional Learning aspects of NGSS: | ||
| Science & Engineering Practices | Disciplinary Core Ideas | Crosscutting Concepts |
| Define a design problem that can be solved through the development of an object, tool, process or system and includes multiple criteria and constraints, including scientific knowledge that may limit possible solutions. Alignment agreement: | The more precisely a design task's criteria and constraints can be defined, the more likely it is that the designed solution will be successful. Specification of constraints includes consideration of scientific principles and other relevant knowledge that is likely to limit possible solutions. Alignment agreement: | All human activity draws on natural resources and has both short and long-term consequences, positive as well as negative, for the health of people and the natural environment. Alignment agreement: The uses of technologies and any limitations on their use are driven by individual or societal needs, desires, and values; by the findings of scientific research; and by differences in such factors as climate, natural resources, and economic conditions.Alignment agreement: |
| NGSS Performance Expectation | ||
|---|---|---|
|
MS-ETS1-2. Evaluate competing design solutions using a systematic process to determine how well they meet the criteria and constraints of the problem. (Grades 6 - 8) Do you agree with this alignment? |
||
| Click to view other curriculum aligned to this Performance Expectation | ||
| This activity focuses on the following Three Dimensional Learning aspects of NGSS: | ||
| Science & Engineering Practices | Disciplinary Core Ideas | Crosscutting Concepts |
| Evaluate competing design solutions based on jointly developed and agreed-upon design criteria. Alignment agreement: | There are systematic processes for evaluating solutions with respect to how well they meet the criteria and constraints of a problem. Alignment agreement: | |
| NGSS Performance Expectation | ||
|---|---|---|
|
MS-ETS1-3. Analyze data from tests to determine similarities and differences among several design solutions to identify the best characteristics of each that can be combined into a new solution to better meet the criteria for success. (Grades 6 - 8) Do you agree with this alignment? |
||
| Click to view other curriculum aligned to this Performance Expectation | ||
| This activity focuses on the following Three Dimensional Learning aspects of NGSS: | ||
| Science & Engineering Practices | Disciplinary Core Ideas | Crosscutting Concepts |
| Analyze and interpret data to determine similarities and differences in findings. Alignment agreement: | There are systematic processes for evaluating solutions with respect to how well they meet the criteria and constraints of a problem. Alignment agreement: Sometimes parts of different solutions can be combined to create a solution that is better than any of its predecessors.Alignment agreement: Although one design may not perform the best across all tests, identifying the characteristics of the design that performed the best in each test can provide useful information for the redesign process—that is, some of the characteristics may be incorporated into the new design.Alignment agreement: | |
| NGSS Performance Expectation | ||
|---|---|---|
|
MS-ETS1-4. Develop a model to generate data for iterative testing and modification of a proposed object, tool, or process such that an optimal design can be achieved. (Grades 6 - 8) Do you agree with this alignment? |
||
| Click to view other curriculum aligned to this Performance Expectation | ||
| This activity focuses on the following Three Dimensional Learning aspects of NGSS: | ||
| Science & Engineering Practices | Disciplinary Core Ideas | Crosscutting Concepts |
| Develop a model to generate data to test ideas about designed systems, including those representing inputs and outputs. Alignment agreement: | Models of all kinds are important for testing solutions. Alignment agreement: The iterative process of testing the most promising solutions and modifying what is proposed on the basis of the test results leads to greater refinement and ultimately to an optimal solution.Alignment agreement: | |
State Standards
Texas - Science
-
identify and explain how forces act on objects, including gravity, friction, magnetism, applied forces, and normal forces, using real-world applications;
(Grade
6)
More Details
Do you agree with this alignment?
-
use mathematical calculations to assess quantitative relationships in data; and
(Grade
6)
More Details
Do you agree with this alignment?
Materials List
For the entire class to share:
- laptop computer/Chromebook (one per group would be ideal, but a shared one would be sufficient.)
- handheld digital microscope (available here). Teachers could alternatively use other types of microscopes. (One per group would be ideal, but a shared one would be sufficient.)
- various materials for surfaces (cardboard, textile, foam, wood, packaging material, etc.) and sliding pucks (plastic bottle caps)
- various grit sandpaper (available here)
- different particulate solids such as sand, corn starch, breadcrumbs, different types of flour, etc.
- rubber bands
- ruler or measuring tape
- markers
- scissors and/or cardboard cutters
- glue gun and glue sticks
- other adhesives such as white glue, clear tape, and/or masking tape
Worksheets and Attachments
Visit [www.teachengineering.org/activities/view/uot-2840-engineering-friction-grip-activity] to print or download.Introduction/Motivation
What do you know about friction? (Let students offer answers.) Friction is defined as the force resisting the relative motion of solid surfaces. When you look closely at a surface using a microscope, you can see that even the smoothest surfaces contain a measurable degree of roughness. When you look at a “smooth” surface under large magnification, you can see a rich structure covering the surface: bumps, grooves, and scratches. At the microscopic level, when you move two surfaces across each other, these bumps and grooves get stuck inside each other, making it difficult for the motion to continue.
Although we tend to think of friction as the undesirable force that slows everything down, creates heat or wear, or damages moving parts, there are many ways in which we take advantage of friction. Engineers use a combination of surface modifications, lubricants, and solid additives to manage and control friction. You might remember learning about how rubbing two sticks together can help you build a fire. You might be one of those people with cold hands who rub their fingers together to keep them warm. Looking around us, we can find many examples of engineered surfaces that improve traction. Vehicle tires and their treads take advantage of friction to help control the motion when speeding up, slowing down, or changing direction.
Did you know you wouldn’t be able to walk without friction? Or that no object would be able to roll on a surface if there were no friction? The patterns on the bottoms of our shoes have been engineered to give us a balanced combination of traction and comfort. Using a variety of surface patterns and materials, engineers have created products that prevent us from slipping, such as anti-slip stair treads, non-slip shower mats, non-slip pedal covers, etc.
Today you are going to investigate surface roughness and its connection to friction and grip to understand how friction can be engineered to meet our needs. You then will become engineers and create a tabletop game in which two objects (surfaces) slide against each other. You will work through the iterative phases of the engineering design process (ask, research, imagine, plan, create, test, and improve).
Procedure
Background
Friction is defined as the force resisting the relative motion of solid surfaces, but what is the source of friction between surfaces? Looking closely at a surface using a microscope brings some answers to light. Even the smoothest surfaces you can imagine contain a measurable degree of roughness. When you look at a “smooth” surface under large magnification, you can see a rich structure covering the surface: bumps, grooves, and scratches. At the microscopic level, when you move two surfaces across each other, these bumps and grooves get stuck inside each other, making it difficult for the motion to continue.
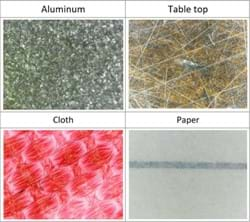
Although we tend to think of friction as the undesirable force that slows everything down, creates heat or wear, or damages moving parts, there are many ways in which we take advantage of friction. Engineers use a combination of surface modifications, lubricants, and solid additives to manage and control friction. You might remember learning about how rubbing two sticks together can help you build a fire. You might be one of those people with cold hands who rub their fingers together to keep them warm. Looking around us, we can find many examples of engineered surfaces that improve traction. Vehicle tires and their treads take advantage of friction to help control the motion when speeding up, slowing down, or changing direction. Did you know you wouldn’t be able to walk without friction? Or that no object would be able to roll on a surface if there were no friction? The patterns on the bottom of our shoes have been engineered to give us a balanced combination of traction and comfort. Using a variety of surface patterns and materials engineers have created products that prevent us from slipping, such as anti-slip stair treads, non-slip shower mats, non-slip pedal covers, etc.


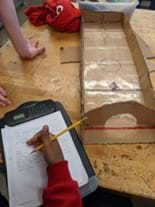
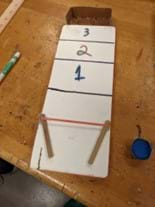
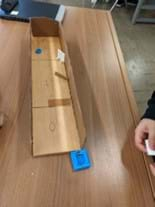
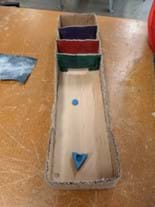
In this engineering design process activity, students are going to first investigate surface roughness and its connection to friction and grip to build an intuitive understanding about how friction can be engineered to meet our needs. Students will then apply their learning to design and create a tabletop game in which two objects (surfaces) slide against each other. Students will go through the iterative phases of the engineering design process (ask, research, imagine, plan, create, test, and improve). For more detailed information, see the Engineering Design Process here. After every group’s prototype is ready, students will test each other’s prototypes and complete a feedback form to offer constructive solutions for improvements.
Before the Activity
- A few weeks before the activity, provide students with a list of recycling materials to bring to the classroom (cardboard, fabric, packaging material, bottle caps, etc.). Collect and sort these materials for the activity. Designate bins for materials that are listed with prices in the materials list, and separate those from materials that students can use for free.
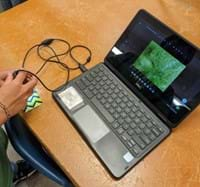
- Ensure that you are comfortable working with the handheld digital microscope on your device and student devices. On many devices, including Chromebooks, the microscope works as an additional camera and can be readily accessed through the Camera App toggle button.
- Make copies of worksheets, or make them available to your students through your LMS.
- Familiarize yourself with trypophobia, the aversion to the sight of irregular patterns or clusters of small holes or bumps.
- Modify the design brief to meet the specific needs of your classroom. You may alter the requirements on the dimensions based on your storage space, and the materials list based on availability. You may change prices to help regulate the use of certain rare items in your classroom. Decide whether you will allow students to barter.
- Designate an area in your classroom as the digital microscope station, where students have access to the digital microscope, a laptop/Chromebook, and a variety of surfaces.
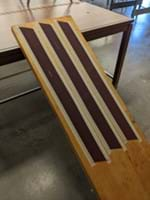
- Designate an area in your classroom where an inclined plane can be set up to compare friction between multiple surfaces. This can be as simple as a long piece of cardboard secured next to a desk at an angle. Students may tape different surfaces and observe how an object sliding down due to gravity is slowed down at different rates based on the surface on which it’s traveling. Decide whether you want to use the structured activity Investigating Friction for these investigations, or allow students to design their own experiments.
With the Students
Introduction / Motivation
- Read the Introduction / Motivation section.
- Show students the slides with Examples of Engineered Surfaces.
- Divide students into groups of three or four.
- Have students brainstorm in their groups to come up with examples of other engineered surfaces we use every day. Encourage them to look at the diversity of patterns on the soles of their shoes, or on tire treads, non-slip shower mats, and anti-slip stair treads.
- Ask each group to make a gallery of engineered surface examples using image searches.
- Ask each group to choose one example and explain to the class how they think the structure of the surface pattern relates to its function.
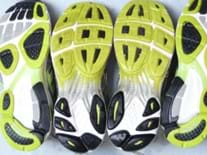
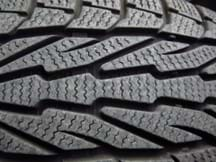
- Ask students to read the text in the Introduction to Friction Worksheet. (You may make the text available to students through a LMS or with hard copies. Make one copy of the text for each student, and one copy of the rest of the worksheet for each group.)
- Have students discuss in their groups and summarize their prior knowledge about friction that did not appear in the text.
- Ask students to organize their thoughts, questions, and epiphanies on friction in the table.
- Designate an area in the classroom as the epiphanies board for students to collect their aha moments. Students may use this area to self-monitor their learning progress.
- Ask students to brainstorm and list everyday situations where friction is beneficial to us, and situations where friction is undesirable. Remind students that many games, sports, and activities use friction to create interesting game mechanics. Students will summarize their answers in the worksheet table.
- Give students time to look around the room and list common types of surfaces they encounter daily, and ask them to order the surfaces by smoothness. For their predictions, encourage students to engage in argument based on prior knowledge and experience. Students will record their group answers on the worksheet.
- Show students the image of sandpaper under the microscope in the Roughness Observation Presentation and ask them to guess what they are looking at, and what they notice and wonder. Familiarize yourself with trypophobia, the aversion to the sight of irregular patterns or clusters of small holes or bumps. Be prepared for some students to feel disgusted when seeing trypophobic imagery.
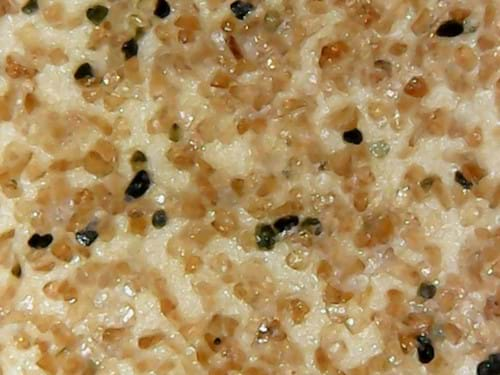
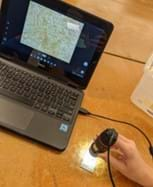
- Model the use of the handheld digital microscope for students. Explain how to focus using the wheel, adjust the light, and take pictures. Ask students to bring surfaces they want to investigate the next day.
Part 1
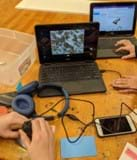
- Provide students with a variety of surface options (such as wood, plastic, fabric, sandpaper, metal, skin, etc.) at the digital microscope station. To save time and to emphasize collaboration, you may choose to give different student groups different surfaces to investigate. Ask students to take pictures of these surfaces.
- Ask groups to upload their pictures to the Roughness Observation slides or submit their pictures to a collaborative platform such as Google Slides.
- Once all groups have made their submissions, ask students to categorize these surfaces based on structure, texture, roughness, geometry, etc.
- Have the groups justify their classifications and share their justifications with the entire class.
- Ask students to reflect on the task in the Introduction to Friction sheet and discuss whether their observation has changed how they want to reorder surfaces by smoothness.
Part 2
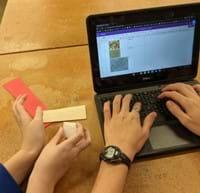
- Brief students on the design challenge of creating a tabletop game using the design brief scenario in the Design Brief.
- Ask students to identify and list the criteria and constraints outlined in the Design Brief.
- Quiz students about the criteria and constraints to guarantee that they fully understand the expectations. Use examples of designs that do not meet the criteria. Emphasize that their time is their biggest constraint.
- Ask each student to come up with ideas individually. Ask each student to list their ideas. Give students time to draw labeled sketches to help them communicate their ideas.
- Within their groups, ask students to discuss their ideas and brainstorm to combine their ideas and create preliminary sketches of their first designs.
Part 3
- Ask students to use their preliminary sketches to prepare a budget using the materials list provided in the Design Brief.
- Give students adequate time each day to design, build, and test in their groups. Monitor student progress and give daily feedback to each group.
- At the end of each day, ask students to complete the Daily Reflection Form (what worked, what didn’t work) and make a to-do list for the following day (what needs to get done).
- Encourage students to engage in opposition research. If you find a student or a student group not progressing, you may ask them to shadow other groups for a few minutes to gather inspiration.
- Throughout the design process, encourage students to write their epiphanies on sticky notes and add them to the epiphanies board.
- Rotate students through the structured activity Investigating Friction or, alternatively, have students sign up for time slots to access the station to perform their own experiments.
Part 4
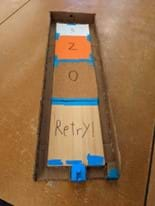
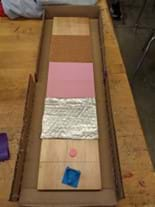
- Ask groups to test each other’s prototypes.
- Guide each student to use the Peer-Review Form to offer constructive feedback.
- Collect all completed Peer-Review Forms, return them to their corresponding groups, and give students an opportunity to reflect and list future revisions.
- Give students time to improve their prototypes.

Part 5
- Ask students to complete the Summative Reflection as a summative assessment.
- Optional: Give students additional time to improve their designs.
Vocabulary/Definitions
force: A pull or a push; any interaction that when unopposed will change the motion of an object.
friction: The resistance that one surface or object encounters when moving over another.
grip, traction, adhesive friction: The friction between a body and the surface on which it moves.
lubrication: The action of applying a substance such as oil or grease to an engine or component to minimize friction and allow smooth movement.
solid additives: Solid particles used to modify the properties of a material or a surface.
surface roughness: A measure of surface texture; when a surface has higher bumps and deeper grooves, it is rougher.
tribology: The science and technology of interacting surfaces in relative motion, which includes the study of friction, wear, and lubrication.
trypophobia: An aversion or repulsion to objects such as honeycombs and sponges that have repetitive patterns or clusters of small holes.
Assessment
Pre-Activity Assessment
Discussion: Students discuss and give examples of when the presence of friction is beneficial to us and when it proves disadvantageous.
Activity Embedded (Formative) Assessment
As students are working through the activity, ask them questions and help them justify and explain the decisions they make throughout the design process:
Choose a surface they are using in their project:
Why did you choose this surface material?
How can you increase friction on this surface?
How can you decrease friction on this surface?
Choose two surfaces they are using in their project:
Which surface is rougher? Why?
In case the motion is too fast or too slow:
What can you do to slow down, or speed up the motion?
How do you need to change friction to slow down or speed up the motion?
How can you modify the surface to get the desired effect?
Before students test their prototype:
Can you predict the outcome of this test?
Post-Activity (Summative) Assessment
Reflection: Students will complete the Summative Reflection after producing their prototypes.
Making Sense Assessment: The making sense assessment is done throughout the activity using the thoughts, questions, epiphanies technique (TQE).
Students will reflect daily on the science concepts they explored, the science and engineering skills they used, and their progress through the engineering design process, by completing the Daily Reflection Form.
Safety Issues
Continuously remind students to use caution when items are moving across surfaces and when handling rubber bands. Advise students not to use excessive forces or speeds.
Activity Scaling
For more advanced students, ask them to independently initiate the experimental design and give student groups the freedom to take different approaches to ranking friction on different types of surfaces. Ask students to use a decision matrix to decide which of their ideas to choose for prototyping. Include Newton’s laws of motion in discussions.
For older students, for example in a physics course, ask them to measure the static and kinetic coefficients of friction, and/or create a friction curve for different surfaces and explain why maximum static friction tends to be larger than the force of friction. Students may be asked to draw force diagrams and use force meters and kinematic equations to describe a sliding motion on a straight surface or down a slope.
Subscribe
Get the inside scoop on all things Teach Engineering such as new site features, curriculum updates, video releases, and more by signing up for our newsletter!More Curriculum Like This

With a simple demonstration activity, students are introduced to the concept of friction as a force that impedes motion when two surfaces are in contact. Then, in the associated activity, Sliding and Stuttering, they work in teams to use a spring scale to drag an object such as a ceramic coffee cup ...

Based on what students have already learned about friction, they formulate hypotheses concerning the effects of weight and contact area on the amount of friction between two surfaces.

Building upon their understanding of forces and Newton's laws of motion, students learn about the force of friction, specifically with respect to cars. They explore the friction between tires and the road to learn how it affects the movement of cars while driving.
Copyright
© 2024 by Regents of the University of Colorado; original © 2022 University of Texas at AustinContributors
Mariam Nouri, Jieming Yan, Filippo MangoliniSupporting Program
Research Experience for Teachers (RET), University of Texas at AustinAcknowledgements
This curriculum was developed under National Science Foundation RET grant number EEC-1160494 and EEC-1855314. Any opinion, findings, and conclusions or recommendations expressed in this material are those of the authors and do not necessarily reflect the views of the National Science Foundation.
Last modified: September 17, 2025


User Comments & Tips